If you’re a fan of Capture One, the industry-standard raw editor, then this post is for you!
In this post, I will share with you some insider hacks specifically tailored to editing Capture One color.
Check out the video to watch me outline them directly in Capture One.
These tricks might be new to you, but they are absolute game-changers when it comes to crafting stunning photos.
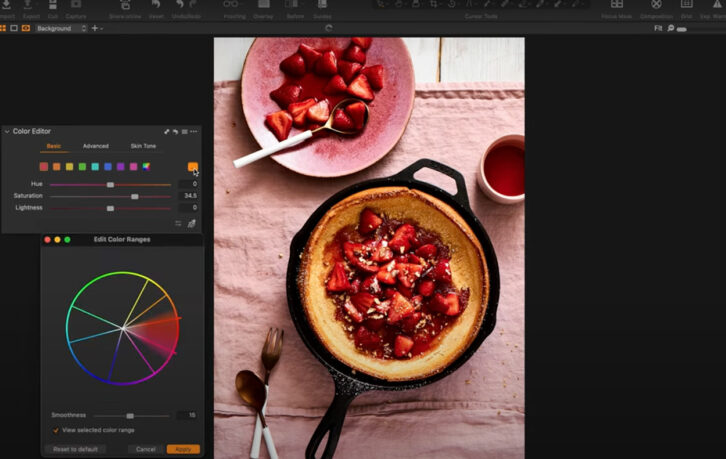
Color Range Tool: Customising Your Adjustments
While editing your photography you want to be able to fine-tune the colours in your image to be perfect for your project. What you need is the Color Range tool. This is one of my top go-to tools in the basic Color Editor of Capture One. With just a few clicks, you can expand predefined colour ranges and tailor your adjustments with laser-like precision.
For example, I might want a little bit less pink and a little bit more red when I edit my reds. In my yellows, as well, I might want a little bit more green or less green in that range, and then you simply hit apply.
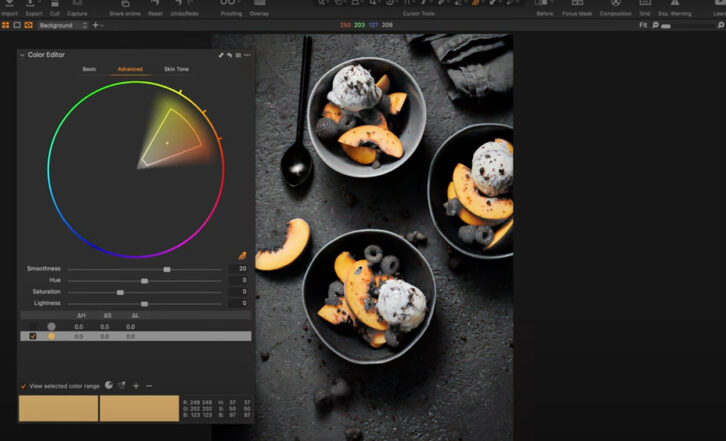
Easily Create Color Masks in One Click
Now, we’re going to get a bit more specific. You can head into the Advanced Color Tool and select any colour range you want and easily turn it into a mask. By putting that colour onto a specific layer, you can have amazing control over what you want to do with your edits to that specific colour.
So in the Color Editor if you jump into the Advanced tab, select a colour, and then once you have that particular colour range on, you simply have to tap “more options” here and you have a mask layer selection. Then you can make hue adjustments and more.
RELATED POST: Advanced Color Theory
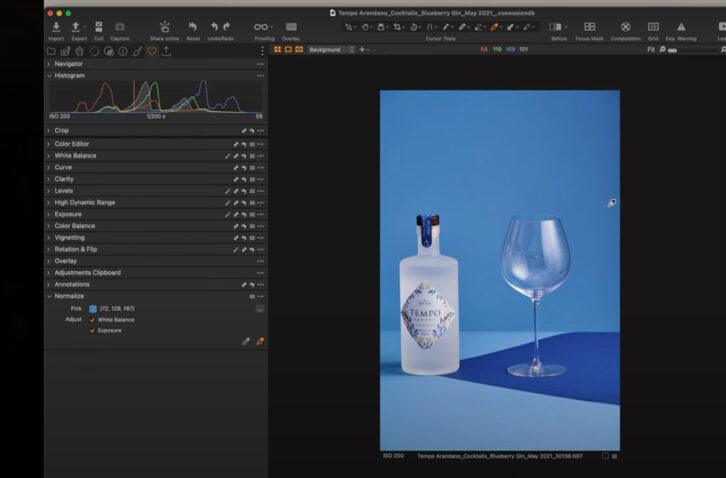
A Hidden Gem: Mastering the Normalize Tool
The Normalize tool is a hidden gem in Capture One that deserves more love and use. Do you struggle to achieve consistent white balance and exposure across multiple images or sessions? The Normalize tool will help you effortlessly balance colour by helping us create a base between images and sessions for white balance and exposure of a specific colour range that we’re selecting. Creating consistent images across a shoot.
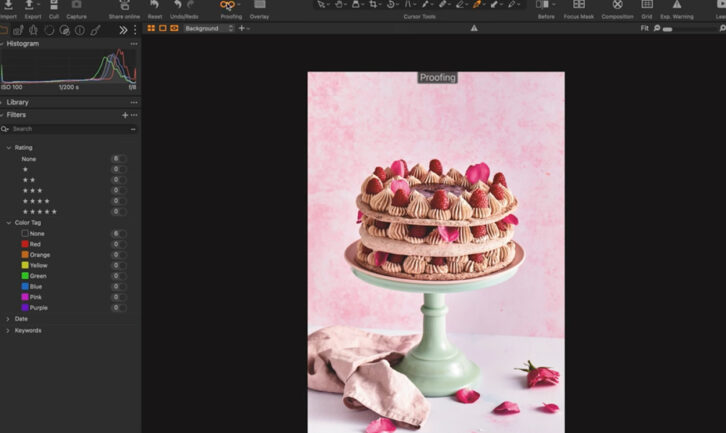
Capture One Color Editing: Previewing Color Profiles
If you’re a professional photographer you probably work in different colour profiles and different colour spaces depending on the client and the output of the file.
In Capture One it is really handy to be able to Preview Color Profiles and proof any colour profiles before you send them off to clients.
It’s really easy to go ahead and proof a Color Profile now when I’m shooting for books and there’s a very specific colour profile that the publisher needs I go ahead and upload that colour profile to Capture One. Then I can go ahead and proof that colour profile to make sure it looks really good before I send it to the client.
If you don’t have the “Proofing shortcut” you can simply head to View > Proof Profile and you can go ahead and look at the different profiles that Capture One has and any that you’ve specifically uploaded so that you can make any final adjustments before sending it off to the client. It’s like having a virtual test run for your colours!
The Power of Styles
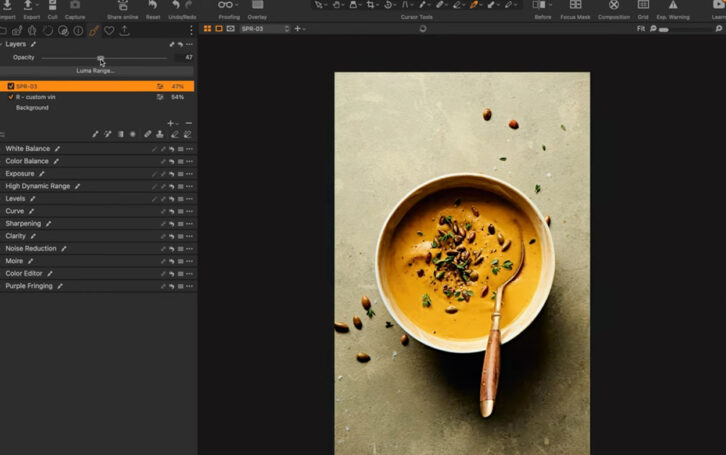
Last but certainly not least, let’s talk about Styles. Styles are Capture One’s style presets. They are a great way to add a feeling via colour through your image in Capture One. You can use styles a layer to have further control over how that style looks on your image.
Head to the style tab, if you have your own custom Styles or if you want to use the ones that are built into Capture One, you can go ahead and have a look and see how these affect your images from a colour standpoint.
Now the beautiful thing is that we can change the opacity of the layer and even double up on layers, so you can really control how this Style is going to affect the colour and the look in your image.
A cool way that we can use Styles in layers is that you can add as many styles as you want. So, you might find something else that you like and want to layer upon and keep adding and changing their opacity to get a super customisable look.
Ready to Become an Expert on Capture One Color Editing?
These tools give endless possibilities for creating jaw-dropping visuals that stand out from the crowd. So, if you’re looking to unlock the full potential of Capture One and elevate your editing skills to new heights, then I’ve got just the thing for you!
Check out my online masterclass at captureonemagic.com and embark on a journey to become an expert at Capture One. Trust me, your photos will thank you!
Whether you’re a seasoned pro or just starting out, these tips are sure to take your editing game to the next level. Happy editing! ?✨
Want to watch all of these steps in real time with me? Check out my video on YouTube: 5 Capture One Workflow Hacks to Perfect Your Photo Editing.
FAQs
Four tools you can use to edit quickly and with best results are:
1. The Eye-dropper Tool to quickly select the best White Balance
2. A Tone Curve preset for medium contrast
3. Vibrance Slider to pump up your colors
4. Clarity to add punch to your image
Food photography celebrates a diverse range of colors, so it is important to edit all colors to make them ‘POP’. Ensure your reds, blues and greens are rich and saturated.
Brown food has many colors, including reds, oranges, yellows and sometimes greens. Using your color tools, like the Basic Color Editor in Capture One will allow you to tweak each of these shades for the perfect brown. Learn more here: https://youtu.be/Cc2eIYFBXF8?si=zBzad1z94c_SXlfb


shibani Mishra
Love your contents Rachel.. Your capture one course is just amazing .. Loved the in depth tutorials..