If you edit tons of photos like I do, you want to make sure you have an efficient workflow! In this blog, I’ll discuss various Capture One workflow hacks.
I’m going to share my top five Capture One workflow hacks. Watch this video to see each of them in action.
Capture One Workflow Hacks You Need!
Capture One is the professional industry standard when it comes to photo editing. And the reason I love to use it over Lightroom is there is so much ability to customize the program to make your workflow unique.
The tools we are going to cover:
- Creating floating tools
- How to reorder variants
- How to use the Set Compare tool
- The slideshow function
- Syncing masks
Let’s dive in!
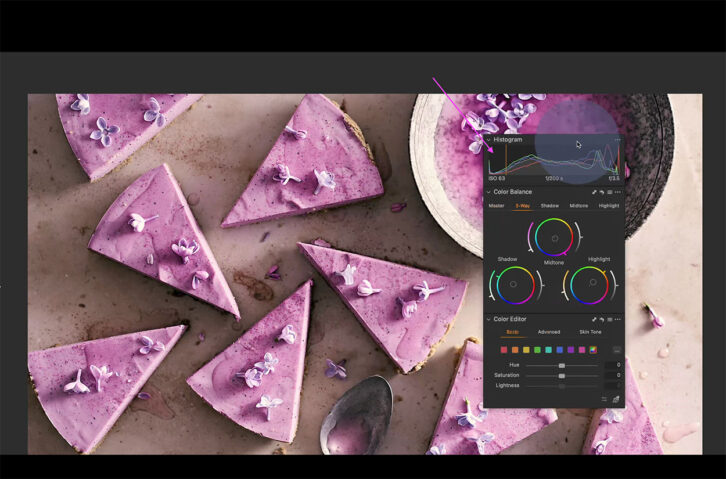
Creating Floating Tools in Capture One
The first tip is to create a floating tool. I use this for a couple of different reasons.
One of the ways that I love to use floating tools is to add a histogram to the browser. Then no matter what tool tab I’m in, the histogram will always stay there.
The other way I love to use this tool is to jump into fullscreen. To create this, you want to head up to Window, select, Create Floating Tool, and you can create a floating tool with basically any tool in Capture One. Usually, I like to add color adjustment tools as well as the histogram. That’s one of my favorite Capture One workflow hacks.
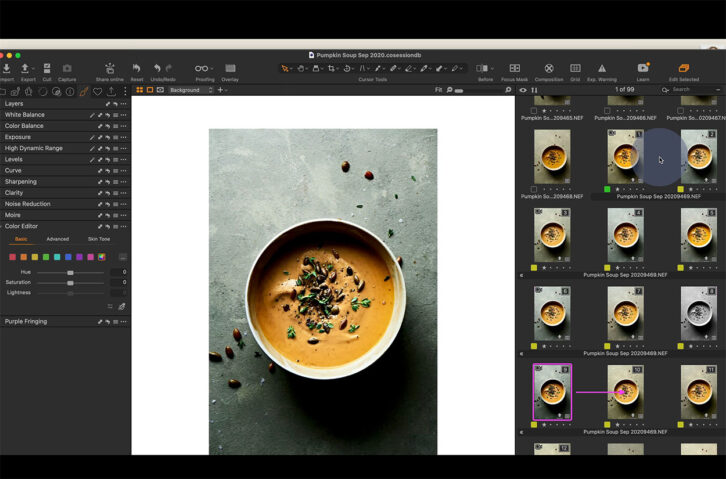
Reorder Variants by Dragging and Dropping
The next workflow hack is to reorder any variants. So you might create variants in your workflow to test different color grades and to test different editing.
If you take a look at this pumpkin soup shot above, you can see that I have 12 variants that I was playing with for different looks, color grades, and toning So if there’s one that I like, I can go ahead and go up to ‘Image’ on the menu bar and I can ‘Promote Variant’ or ‘Demote Variant’. You can also drag and drop a Variant into the place you want.
I find this works well if you have clients or art directors on set, you can go through different edits with them and place the variants in a different order of preference due to that client’s needs.
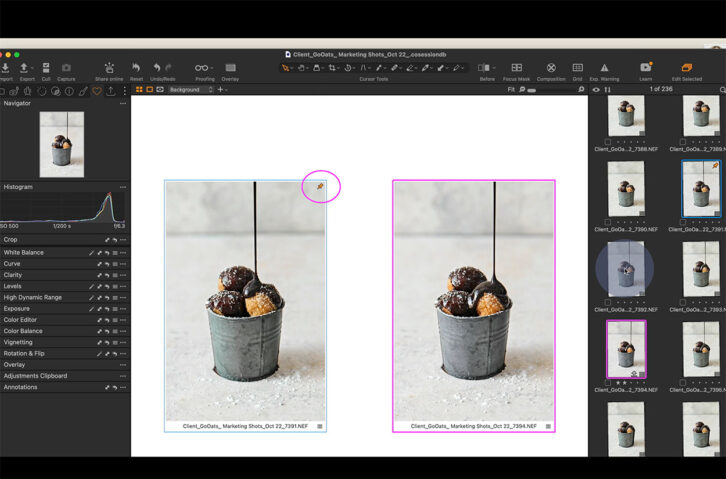
Set Compare Tool to Easily Compare Images
Comparing images is a staple for any workflow. Whether you’re working with a team or by yourself, there are so many different ways to use the Compare Tool.
You can compare within the platform which is the best photo to give the client. When you have a group of photos you want to choose from, you can simply right-click the image and set it as Compare.
Then you can scroll through the following images to see which ones are the best. It’s also a great tool if you’re working with a client shooting the same product or the same recipe, but you need a variety of images. Using the Set Compare tool is an essential Capture One workflow hacks.
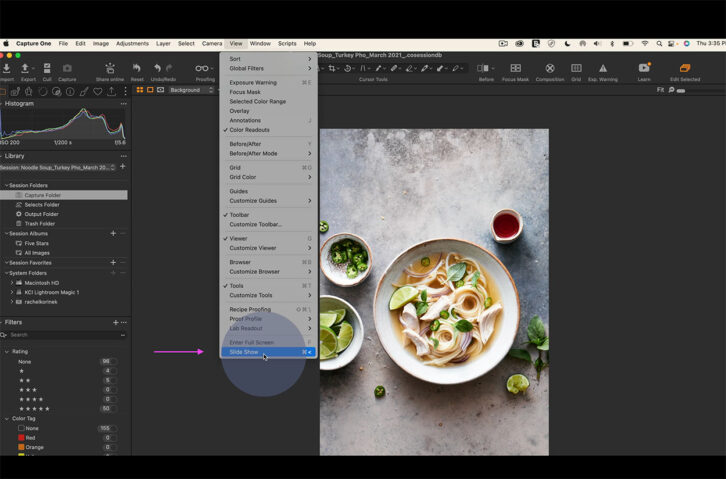
Slideshow Function Hack for GIFs
Our fourth tool is a little hack on how I use the Slideshow Function when I’m creating GIFs or stop-motion for clients.
Let’s say that I am shooting by myself and I want to just preview a little bit of the GIF before I go ahead and pack up the shoot to make sure I’ve got the right images.
I will use the slideshow function when I’m tethering during a shoot and head into Capture One, go to View and select Slideshow. Then you can preview using the arrow keys. It’s one of the best Capture One workflow hacks for previewing GIFs.
Syncing Masks Between Images in One Click
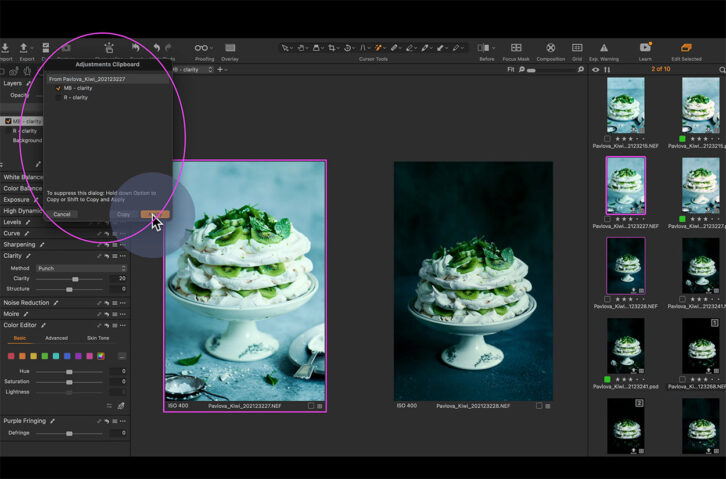
The last workflow hack is how I can sync masks between images. This is something that I would be lost without and use all the time. So let’s look at the settings of masks to make sure that we’re syncing masks correctly between images.
Let’s look at this Pavlova above and see this mask that I’ve put on to target the clarity and contrast of the beautiful green ingredients.
I want to be able to translate that masking and edits to another photo, but if you just select another image and sync that particular layer over you will find that the mask is not showing up in the right spot.
So the way we fix that is to right-click and clear the mask, but we’re keeping the settings.
Then you can use something like the Magic Brush to select the rest of the greens in this image. And now you can apply the same settings from the first mask simply and quickly.
Capture One Magic
If you’re interested in taking your photos to the next level and ready to unlock the secrets to the industry’s most powerful editing tool, then make sure you check out my masterclass, Capture One Magic. Learn more Capture One workflow hacks by joining the course.
FAQs
The masking tool allows us to create different types of masks which are known as local adjustments. They allow us to make edits to a small section of an image without touching the other parts of a photo. Masks can be gradients, linear or radial, or irregular masks like a brush.
A histogram is a graph of tones from blacks to shadows, through to midtones, highlights and whites. It’s a visual representation of where the tones sit from a corresponding photo. It tells the photographer if their image is well exposure, bright or moody. We use this to help us change settings when shooting in manual mode and to edit our images.





Mark Schoenfelt
What is the overall reaction of Capture One from people that are coming from the world of Lightroom and Photoshop? It took me forever to learn them so I can’t imagine taking the time to move to another platform unless it’s a complete game-changer. http://www.markschoenfelt.com