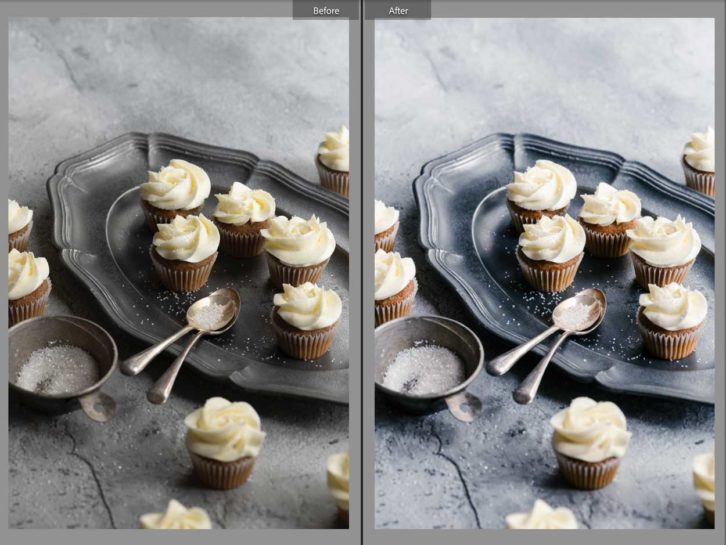
The Lightroom Before And After comparison tool is one of the most important photo editing tools you should learn how to use. It will instantly show you how much your original image has changed after you’ve made edits in Lightroom.
This will help you determine what else has to be edited in your shot to make it a masterpiece.

Why Should You Make Use of This Feature?
Comparing your original and edited photos is a wonderful technique to ensure that you don’t lose any important aspects of the image during the editing process. You may discover that you’ve desaturated a colour you meant to maintain. Or that you’ve darkened a section of the image and lost the definition of a texture you wanted to emphasize.
Taking a step back to compare your edits to the original image is a good approach to make sure you’re getting the exact look you want.
Method 1: Quick Toggle Switching
The backslash key [ \ ] is the quickest way to see Before and After in Lightroom. With this approach, you can use a keyboard shortcut to switch between the original and edited photo.

On most keyboards, the Backslash key [ \ ] is normally located above the Return or Enter key. Once you press the button, you’ll view the original image without any edits. If you tap it again, the image will restore to its previous state. This is available in both Lightroom Classic and Lightroom CC.
Method 2: Side-by-Side Comparison Button
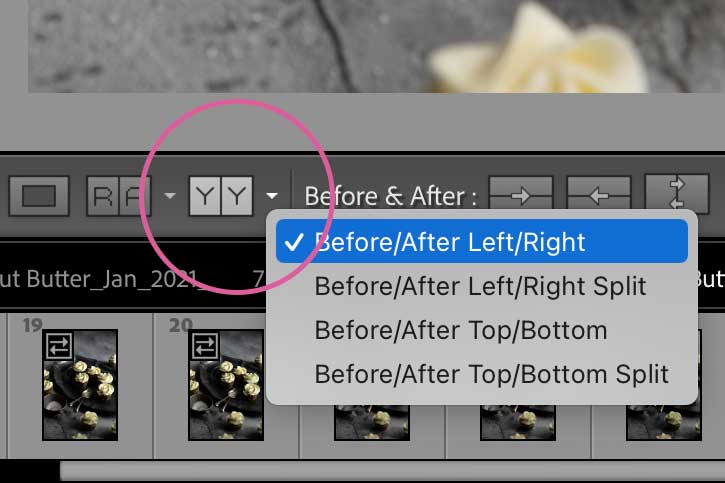
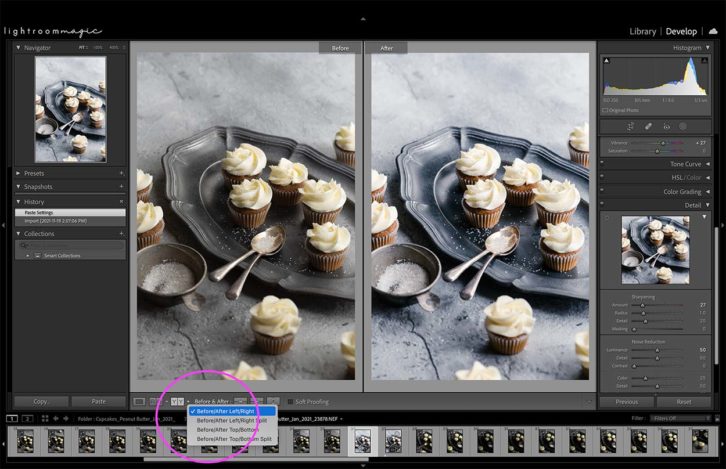
Go to the Develop tab in Lightroom Classic to begin tweaking your shot. After you’ve finished editing, click the YY button beneath the photo to activate the comparison tool.

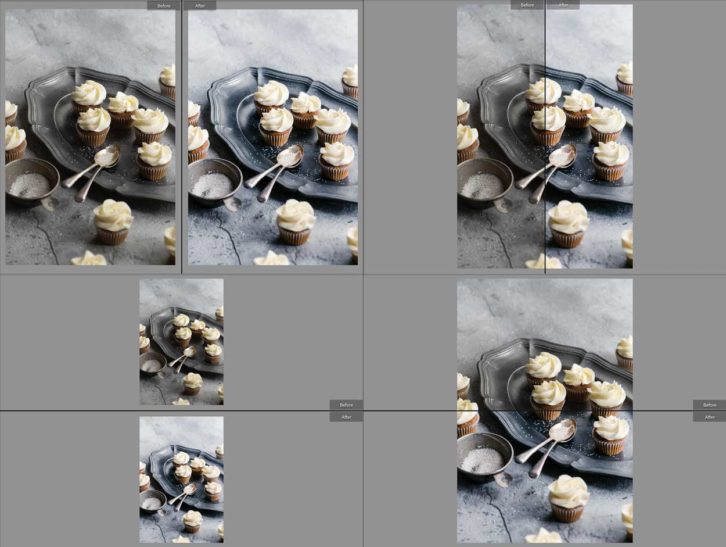
You’ll see two photographs side by side the first time you click it: your original photo on the left and the altered version on the right.
Click it again, and you’ll see part of the photo with the edits on the right and the other part with the original image on the right. When you click it again, the original image will appear on top, with the altered image beneath it. A final click will show the top half of the image as the original and the bottom as your edited version.

To disable the comparison tool, click on Loupe View (the square button beneath your photo, or keyboard shortcut [ D ].
Method 3: Using Keyboard Shortcuts in Lightroom Classic
Use the following keyboard shortcuts to toggle Before and After views on and off in Lightroom Classic (currently not available in Lightroom CC):
Turning Comparison Modes On/Off:
[ Y ] = Left/Right Comparisons [ Alt + Y ] Windows / [ Option + Y ] Mac = Top/Bottom ComparisonsOnce you’ve chosen a Left/Right or Top/Bottom Comparison, you can toggle between comparing full images to a split-screen comparison using [ Shift + Y ].
Wrapping up the Before and After Tools
The Before And After comparison tool in Lightroom is the easiest way to check how much your original image has changed since your first edit. The [ \ ] key is the quickest and most convenient way to compare your original image to your edited image.
Otherwise, simply follow the steps explained above to compare side-by-side or see a split-screen comparison.

For more information, visit https://twolovesstudio.com/
If you want to learn about all the magic Lightroom has to offer, check out our comprehensive Lightroom Masterclass.


Bozena
I love this tool. I found your blog when I was googling lightroom shortcuts. I love your website and content.
Mitja
Hi!
all clear, but how do you even get to the “backslash” key on Macs? Keyboard doesn’t have “backslash” key…
Rachel Korinek
Hey Mitja, my mac has a backslash key! I use a MacBook Pro and it’s located on the right hand side under the ‘delete’ button.
JD Vekich
Nice Presentation. Julieanne Kost look out! You have serious competition.
Block Blast
It’s still works in 2024. Just hit a key on my keyboard and saw it was the before edit. I am enlightened. Thanks so much.
age of war
You tell it like it is, which I find honest and interesting. My blog taught me a lot about
block blast online
Love this post on Lightroom’s Before & After! It’s a game-changer for seeing my edits. Speaking of changes, I need a quick break from all this – maybe a round of block blast online to sharpen my reflexes before I get back to editing!