The latest edition of Lightroom is here and it’s had a major overhaul.
There’s now a ‘Lightroom Family’, made up of the all new Lightroom CC and Lightroom Classic. What’s new, what’s changed and how will this affect your food photography editing?
Well, let’s take a look.
Like any product, there will be continued development and changes to provide better offerings and serve the market better. So Adobe products and contents will always be changing, but what won’t change is the core editing theory, ideals for powerful food photography editing.
The New Lightroom CC v The New Lightroom Classic
In this post, I will be going through the changes that you need to know for the editing process with your food photography.
In a nutshell, we now have two Lightroom apps, the first called Lightroom CC.
It’s a completely new offering that targets cloud-centric workflow and mobile device editing. The second is a rebranded app called Lightroom Classic, which is formerly what we knew as Lightroom.
Lightroom Classic is a desktop-centric program designed for editing on your desktop computers – just like we have been doing for many, many years.
Let’s take a look at some of the key features between both when it comes to editing food photography.
Lightroom CC 2017 – For Mobile Photographers
Lightroom CC is an entirely new version of Lightroom that is focused on cloud-centric workflows and for photographers who want to :
Access Image Across Devices
Access their full resolution images across all of their devices, which is great for preparing and sharing on social for those who maybe aren’t photographers but have a social presence where images are needed, i.e Instagram
Primarily Shoot With Smartphones
Take photos with their smartphones or tablets. So potentially people who require images as part of their brand story, but aren’t photographers looking to get paid to take photos.
Mobile Editing
Those who want to be able to edit with Lightroom from their devices wherever they are and have the ability to share easily from those devices onto to a range of platforms.
I have to say this appeals to me when I am travelling and want to share ‘happy snaps’ via social media. I didn’t take my computer to New Zealand one trip and my hands were tied in terms of processing raw files. Never again.
I now have a 13” travel-friendly MacBook pro!
Cloud-based Backup
Those who want access to files anywhere via the cloud without the need for local storage.
This means that you don’t need to lug hard drives around with you, or need to know anything about Lightroom Classic’s (or previous versions of Lightroom) file/folder based cataloguing system.
Lightroom Classic 2017 – For Desktop Photographers
Adobe knows that they have a large bank of professional photographers, including food photographers who use Lightroom and are completely happy and content with the way the program currently functions.
So they’ve rebranded what we formerly knew as Lightroom into the new Lightroom Classic.
Lightroom Classic is differentiated from Lightroom CC for photographers who want:
Local Storage Options
Local based file storage, for example, external hard drives and are happy to use a file/folder based workflow. Currently at launch, Oct 2017, Lightroom CC came with 1TB of cloud storage.
While this might sound like a lot, there will be a lot of professionals who will go through 5x this amount of storage per year. Food photographers may not go through this much storage each year, but busy wedding photographers, for example, can surely get close.
So for now, they might be tied to a local storage system.
Desktop Editing
Photographers who love their desktop editing and workflow. There are many of us who couldn’t imagine doing the bulk or detail of editing on a mobile device or tablet.
Adobe isn’t forcing us all too prematurely ditch the monitor and edit on our tablets, they understand that desktop-based Lightroom editing is super important and preferred by a lot of users.
So they’ve rebranded to Lightroom Classic for these user’s preferences.
High Volume Editing
And those who have high volumes of work to edit. For example, at this point in time, a wedding photographer isn’t going to be processing 1000 images per wedding on a smartphone.
So there is still a real need for desktop editing.
Both Lightroom Classic and Lightroom CC have a whole range of new features in terms of cataloguing, file storage and organisation, even artificial intelligence in their Adobe Sensi in Lightroom CC, but I am only going to cover the changes you need to know for your food photography editing workflow.
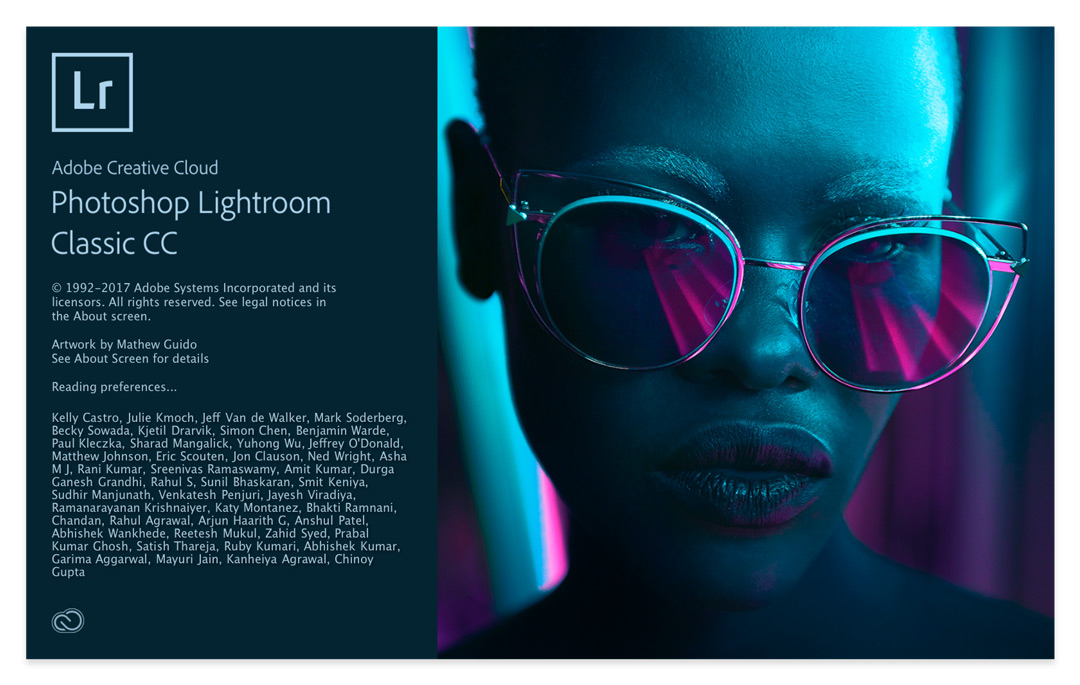
The Biggest Differentiator Between Lightroom CC and Lightroom Classic
The two biggest differentiators or deciding factors between the two are:
Where your files are located, so if you want to store your files locally or through cloud-based storage AND your preferred workflow, which is mobile v desktop.
As this is a new release and the first version of Lightroom CC in the new form, there is a third differentiator between the two and that is
The depth of editing tools is more comprehensive in Lightroom Classic.
Lightroom CC Doesn’t Have All The Editing Tools
When Lightroom came out over 10 years ago, the first version didn’t even have the cropping tool! Fun fact, I know.
So anytime they release the first version of something it will be missing features.
Lightroom CC doesn’t have all of the editing tools that Lightroom Classic does. Lightroom Classic will be a more comprehensive tool with a range of more editing and adjustments at your disposal.
Currently, for this first version of Lightroom CC, where the app is focused on mobile workflow and cloud-based editing, it does NOT include these tools and panels that the app formerly known as ‘Lightroom’ did and that the new Lightroom Classic does.

The differences are that the new Lightroom CC is intuitive and streamlined, whereas the new Lightroom Classic is more comprehensive and what we are used to.
Let’s look at the difference in editing tools between the two versions of Lightroom.
No Tone Curve
Lightroom CC currently doesn’t have the tone curve. Essentially one of the most powerful tools in editing and that is essential to my workflow and one of the core aspects of editing food, which is controlling and manipulating tonal range and contrast.
To be able to use this tool, you’ll need to be editing in Lightroom Classic.
No Split Toning
Lightroom CC doesn’t have Split toning either, a tool that is aimed more towards a stylistic look, creating your own style and differentiating your work.
A tool that is used in a lot of stylised presets, you’ll once again need to edit in Lightroom Classic to get access to this tool.
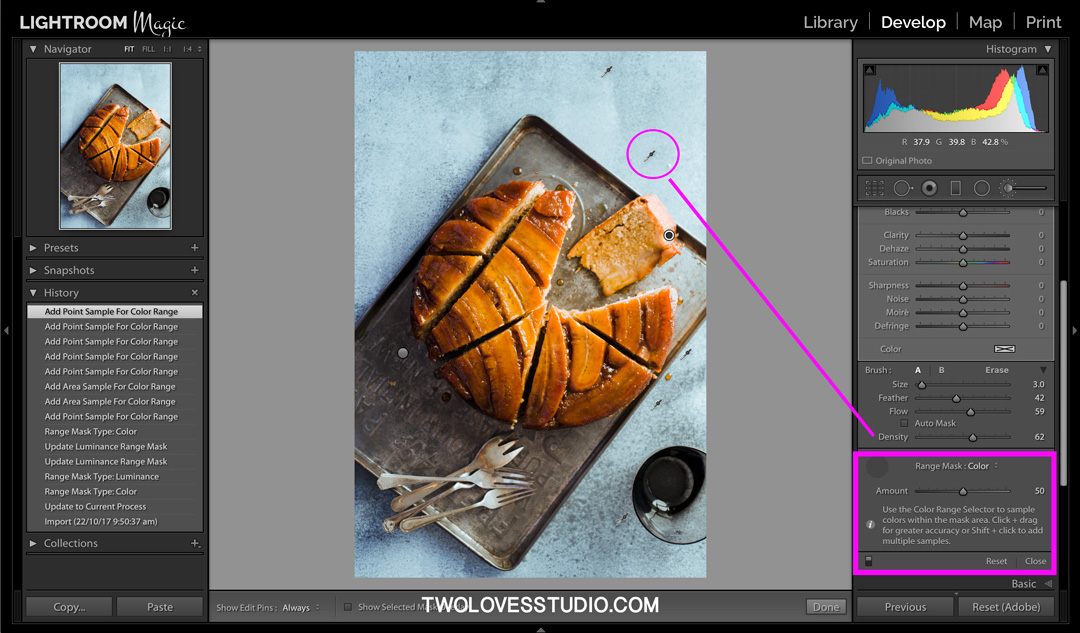
New Lightroom Classic Tool – Color + Luminance Range Masking
With any new Adobe Lightroom update, there is always a buzz about the new tools.
This new release of Lightroom Classic, there has been a much anticipated new tool added: The Color and Luminance Range Masking Tool.
This tools can now be found in Lightroom Classic under any of your local adjustments. It’s been updated for more powerful masking when it comes to colour and luminance.
Local adjustments are our fine tuning on an image, and colour editing is a core aspect of editing food.
This tool there combines two very powerful processes and adjustments for food editing which is a really exciting win.
It works by targeting any adjustments you want to make for either colour or luminance in your selected mask.
For food photography, this will be really important in targeting specific coloured areas without compromising the colour in your focal subject or recipe dish.
Why The Change From Lightroom to Lightroom Classic and Lightroom CC?
Why have they not included these tools/features into Lightroom CC? Well, the first version of anything is always a stepping stone and doesn’t include everything.
Adobe has also said that one of their differentiators with their Lightroom products, in the beginning, was that it was an intuitive editing system.
Over the years since it was first launched it has become a powerful editing tool and has progressed to slowly be a more complex system.
For those of us who have been using it for years, we’ve also grown with their changes.
They acknowledge that for new users, amateurs (meaning those who do photography for the love of it) and those who just want to shoot with their smartphones and share on social the program is overly complex for some users needs.
Therefore Lightroom CC is targeting a new market and once again filling that gap.
Which System Will I Use: Lightroom Classic or Lightroom CC?
So which version will I be using, Lightroom Classic or Lightroom CC?
As of the time of writing, October 2017, I will be sticking with Lightroom Classic. Not because I am opposed to change, but because Lightroom Classic is tailored to photographers like me.
Currently, I go through more than 1TB of images per year, and the current cloud plan as of the time of launch is 1TB.
Plus Australia is not known for having the best internet speeds in the world and it takes considerably longer to upload/download large files as opposed to say Canada when I have found it’s a significant fraction of the time.
I am not sure if this will affect my workflow as I won’t be trying it at this point. But it is a consideration for some of us.
I need a desktop to process.
For the sheer volume of images I process, I prefer to have a large editing monitor to look over and editing my images. I do wear glasses when I edit due to astigmatisms and I find it harder on smaller devices to edit. I also currently at the time of this recording still have an iPhone 5!
I want joy from my editing, not frustration.
Another big reason is that I wouldn’t be able to get my signature look or my style without accessibility to tone cures. The most important tool in editing. Plus I am excited for the new colour and luminance masking.
Lightroom Classic or Lightroom CC? What Do I Recommend For You?
If you want to truly understand all the powerful adjustment tools that Lightroom has to offer, to really process your images to a high level with a range of tools at your disposal to choose from, then I recommend that you at least have accessibility to Lightroom Classic for those who have CC plans.
If you want to use both, by all means.
Just ensure that you are continuing to see the difference the tone curve can make to your work.
There are a lot of brilliant new features of Lightroom CC, however, the Tone Curve is just such an important tool in editing for really making beautiful images, that I’d hate for you not to be able to edit to your full potential as this tool is missing in Lightroom CC.
No More Stand-Alone Versions of Lightroom
Adobe also announced that it will no longer be updating or moving forward with stand-alone versions of Lightroom, like Lightroom 5 and Lightroom 6.
Whilst both of these versions will still work, they won’t be updated when new cameras and lens are created by all the major brands.
This means at some point in the near future, a lot of stand-alone users will be forced to move to the subscription model. This could even be fast-tracked if you update your camera or lens.


Idunn Sofie
Great post!! Thanks a lot, very useful. I think I’ll be going for Lightroom CC, having access to all my files across all devices would be heaven for me, and I’m not advanced enough in my editing that I would miss the extra features very much. The only thing is that I saw in another review that you can’t use presets in Lightroom CC, but I haven’t seen this backed up elsewhere? Do you know? Thanks again!
Rachel
So glad to hear that Idunn! It will be nice to have the files across all devices for sure. You definitely can use presets in Lightroom CC. When you start to edit an image there is a clickable ‘presets’ option at the bottom of the screen which will then open up your presets. Take a peek and let me know if you can’t find it.
Becky
I’ll be sticking with classic although I don’t like the subscription!
Rachel
Good to know Becky! I can see why people don’t like subscription models. I guess the bonus is that it’s always updated with the latest changes and camera features.
Amber Gaines
Hey Rachel
Wondering if you have a monitor you recommend for photo editing on your desktop. I am looking to upgrade to a better computer monitor strictly for photo editing for truer color, brightness etc. Any recommendations?
Rachel
Hey Amber! I have either used my MacBook Pro with Retina Screen or a BenQ editing monitor. This is what I had before I moved from Australia to Canada and I did like it (except the way it rendered orange I didn’t love so much). I have to get something better now I have settled in Vancouver life! Sorry I can’t be more help.
Amber
Thanks for responding. I guess I am on the right track as I have been debating between a new IMac to replace my MacBookPro or adding a BenQ editing monitor as a second screen to my MacBook. This is perfect. Thanks!!
Rachel
Awesome! Let me know what you think of it!