Food photography for me started out as just a hobby. I just wanted to be creative for the sake of creating.
But as we all know, we get to a point where it becomes much more and we are hungry to keep learning.
In the past, I had a tendency to shy away from things when they go hard. I didn’t like not being good at something, and I certainly didn’t like being told what to do.
So when super technical photographers would tell me that I needed to know about histograms and tonal values, I’d brush off their advice. Chalking it up to the fact that I’m the ‘creative type’ and that was so much better than the ‘technical photographer’.
Pffft! Was I wrong! Oh, so wrong.
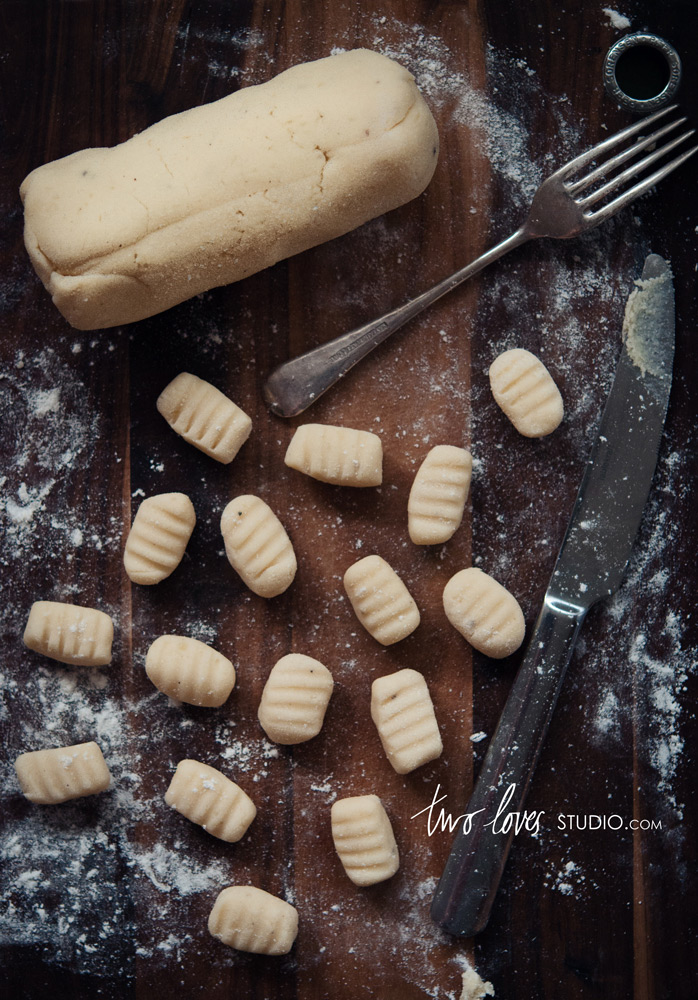
See photography is about capturing light, and light creates tones.
Without light, we couldn’t see different colours, hues, saturation or their luminance. Without light and contrast, we wouldn’t have an image, we’d just have a big ol’ blog of black.
So if these concepts are so important, why it is hard to get decent information on them?
With photography definitions out there like this:
A Histogram is a bar graph of a frequency distribution in which the widths of the bars are proportional to the classes into which the variable has been divided and the heights of the bars are proportional to the class frequencies.
It’s no wonder I was throwing in the towel before I even got started. (Did anyone else’s eye just roll out of their head when they read that? Thought so, I’m there with ya!)
Two Crucial Food Photography Lightroom Editing Concepts I Was Ignoring.
Self-diagnosed ‘the creative type’, I couldn’t have given two hoots about the ideas of a Histogram or Tonal Values. Yet, they are so CRUCIAL to creating truly noteworthy imagery.
Once I understood what they were and how to think about them, address them in my work – I saw a massive shift.
Understanding Your Histogram in Food Photography.
Now forget that (gosh-awful) definition that I mentioned earlier. What you really need to know is:
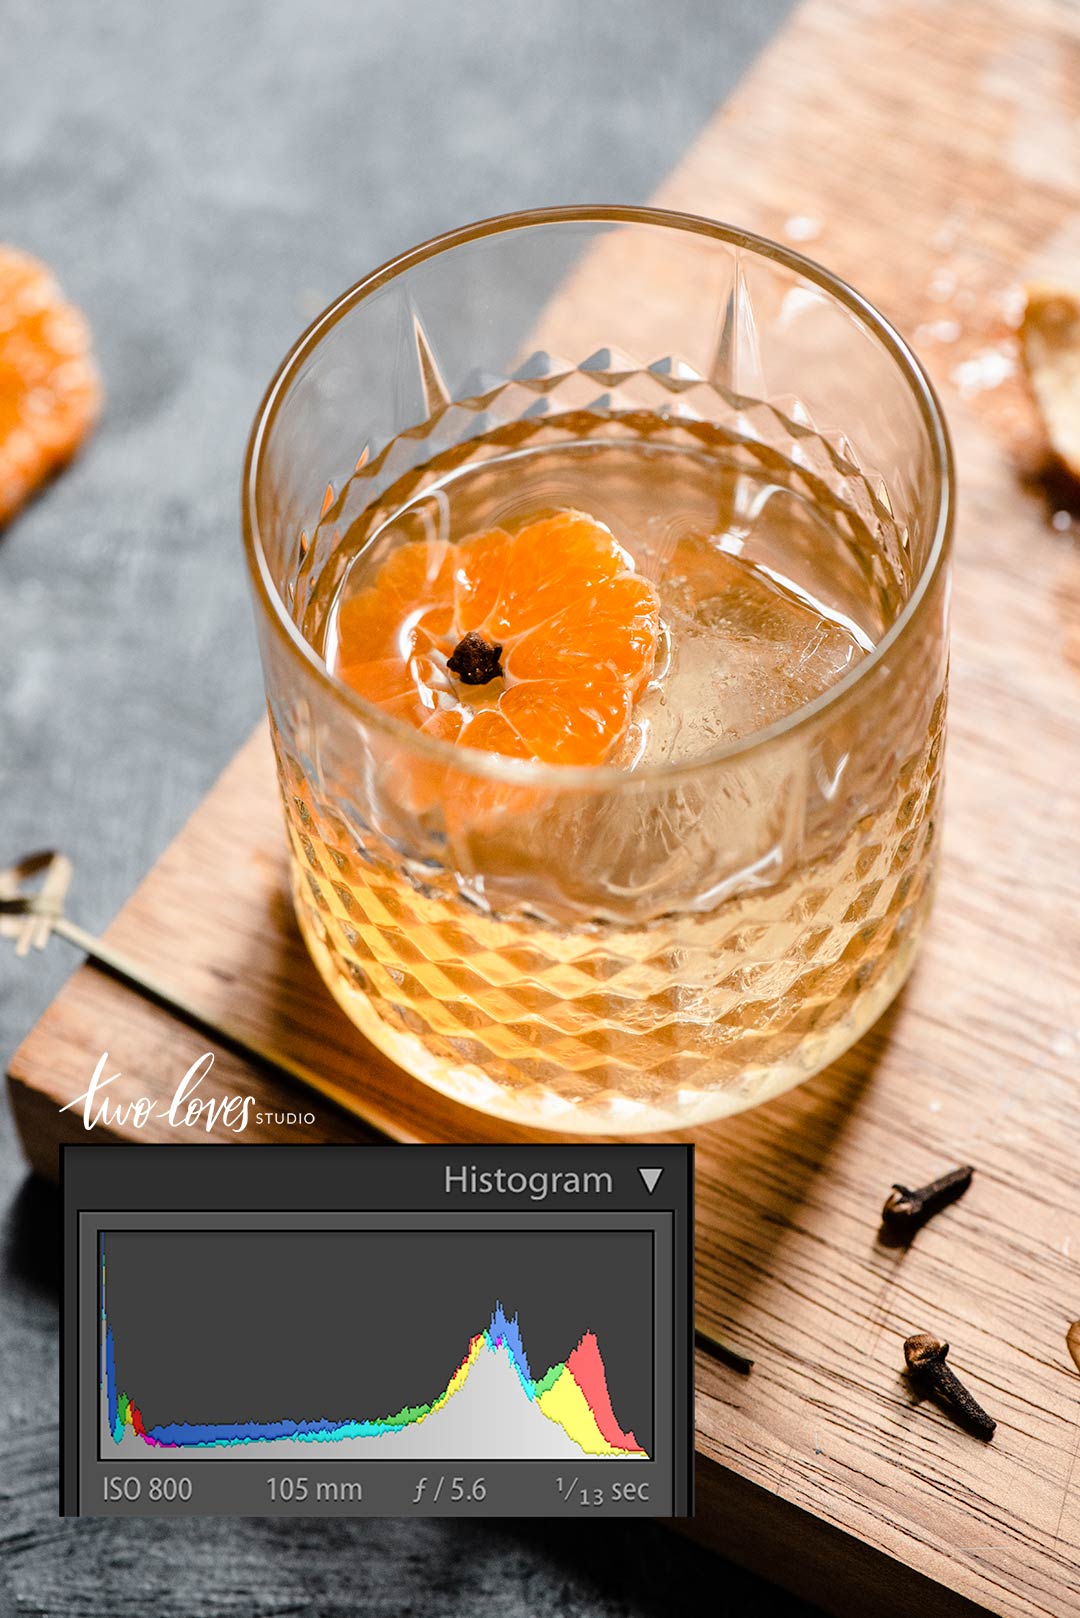
A histogram is a graphical representation of where the pixels in your image sit with respect to exposure.
Or put another way, your histogram is a graph of all the different tones in your image that are of a particular brightness.
From left to right, the tonal representation is: BLACKS >> SHADOWS >> MIDTONES >> HIGHLIGHTS >> WHITES.
Your histogram will tell you what type of image you’ve shot in terms of the tonal values.
So a histogram to the right will mean you have a bright/airy image (with the majority of tones in your image being of midtones – highlights – whites).
A histogram to the left will mean you have a dark/moody image (with the majority of tones in your image being of blacks – shadows – midtones).
Why are Histograms Important in Food Photography?
There are a number of reasons why histograms are important, and we don’t need to get super technical to understand that the fundamental reason you’d want to be able to read your histogram is to:
Be able to identify where your tonal values sit and if you have enough dynamic range to make a GREAT image.
When you understand where your tonal values sit in relation to the vision and story you are trying to create, you can truly make capture choices that will enhance your editing process:
You can stop clipping your black and whites
Understand how to set the brightest point in your image (and your darkest point for that matter)
Get away from shooting a ‘technically (boring) perfect’ histogram at the detriment of creative output.
You can make capture and editing choices without fear.
Understanding Tonal Values in Food Photography.
This is actually a super simple concept, but first, let’s get savvy on what a Tone actually is:
A tone is any pure colour mixed with a greyscale colour. All colours, hues, tints and shades.
So when we talk about tonal values we are simply assessing our image for what types of tones do we have in our image and in what quantity.
Are there more bright tones than dark? Do we have any tonal values that are shadows?
What about highlights?
Then our tonal range refers to the difference between lights/darks or whites/blacks in an image.
Tones (again) are: BLACKS >> SHADOWS >> MIDTONES >> HIGHLIGHTS >> WHITES
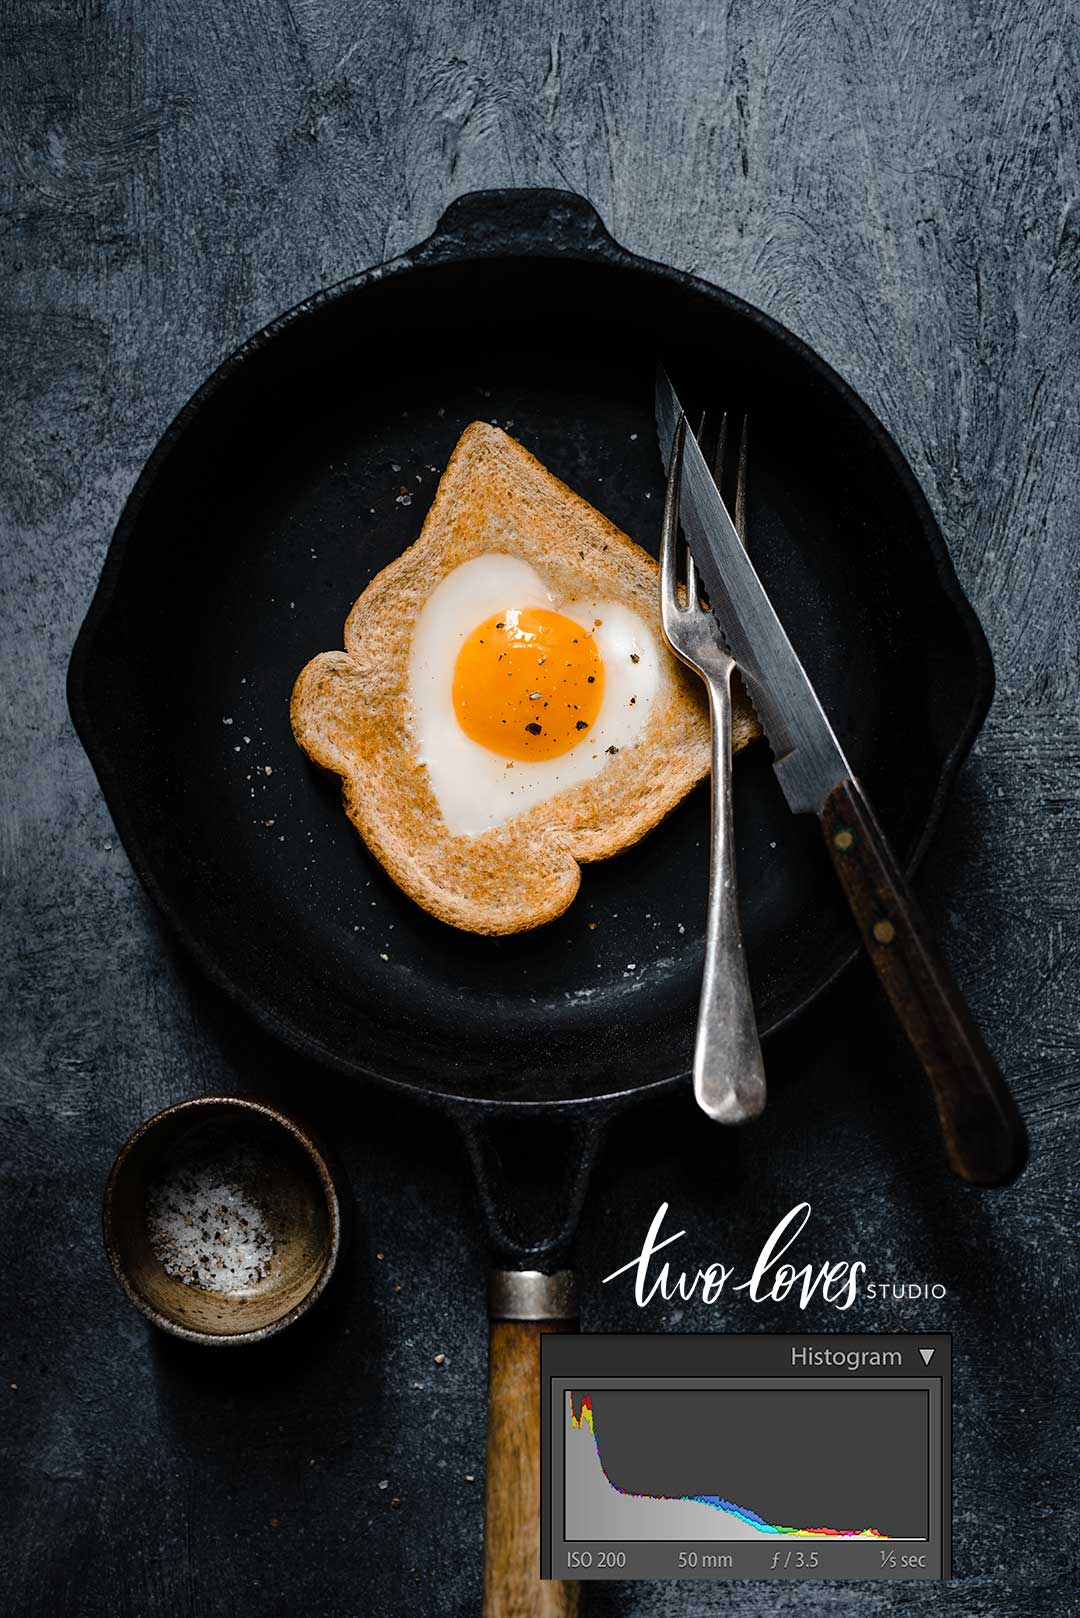
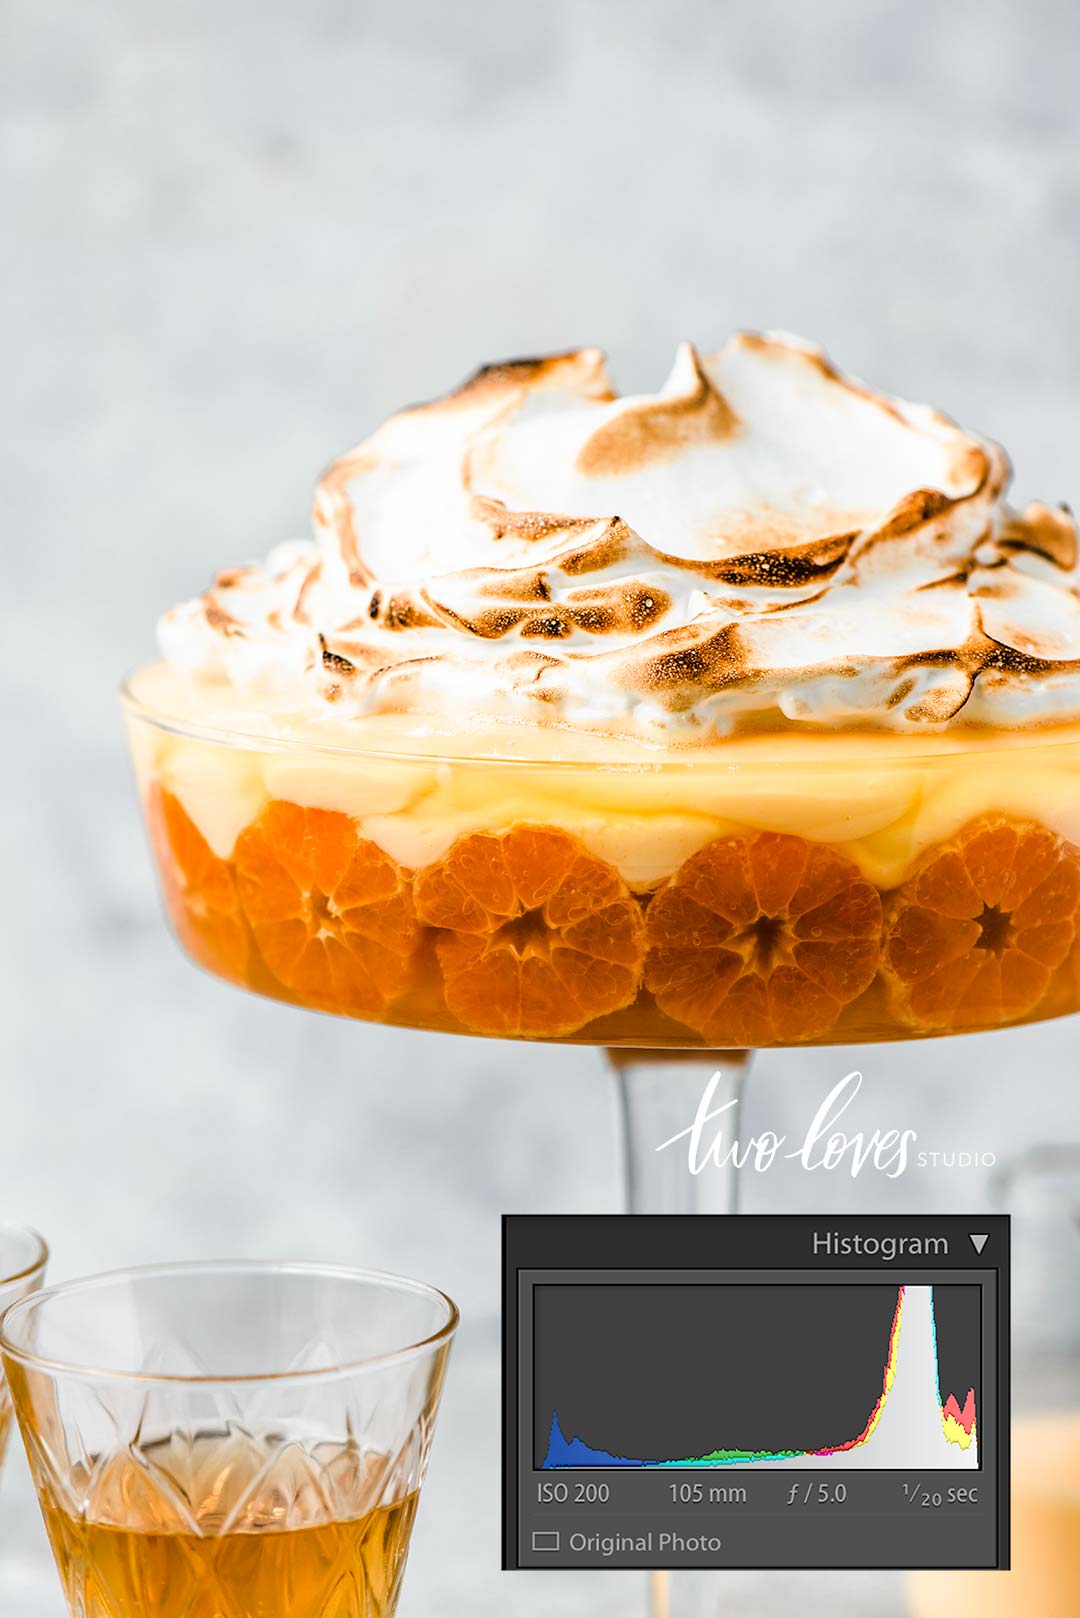
Now that you all caught up on what a tone is and that they sit in our histogram to tell us who showed up to class today and how many, we know what we are dealing with in our image.
Why are Tonal Values Important in Food Photography?
Tones are going to be your new bbf, so take a moment to say hi! (howdy).
Food photography is always done in colour. Unfortunately, the old black and white look just doesn’t cut the mustard in creating a strong connection with viewers.
So when we are shooting and editing food photography, we are copping an eye full of colour. A nose full of mouthwatering smells, hustling to manipulate the light before our hero ingredient goes limp.
An ear full of grumbling tummy noises – and oh, there is that small detail of a head full of connections to capture the entire scene.
It’s no wonder the poor tones in our image are left to the wayside.
But let me ask you this? What if you were shooting Black and White?
You’d be left capturing texture and emotion. You know that without colour, you need to really focus on the TONES in your image.
We need to get a full tonal range in order to have an image that is powerful.
Food photography (and colour photography) is no different.
Having tones that are shadows are super important. Having tones that are highlights are super important.
Not relying on cramp your images with midtones is important.
So ask yourself, when was the last time you thought about tonal values when shooting or editing?
How My Work Shifted When I Understood The Importance of Histograms and Tonal Values in Food Photography.
Have you ever had the feeling ‘why can’t I be consistent with my work’? I have.
That’s because I was missing these two CRUCIAL food photography lightroom concepts.
I couldn’t work out why sometimes I would create work that I loved (in terms of the overall brightness and feeling of an image), and other times it would tank – even though the lighting was the same.
But all this changed when I started to fill my knowledge belt with the concepts of histograms and tonal range.
I was now able to:
Analyse (not a sexy creative word but gives sexy results!) my histograms from the work that I loved and apply this when shooting.
Ensure I had a full tonal range in my work.
Manipulate my black and white point to set the overall brightness and darkness of an image when post-processing.
Create consistent work by having signature histograms that spoke to my style.
Understand how to target tones for truly memorable and powerful images.
When you understand the tones in your image and how they turn images into stunning noteworthy stories, you’ve got nothing to fear.
You’ll be able to adjust how you are shooting in real time to capture images that seriously make people stop mid-scroll on Instagram.
Throughout LIGHTROOM MAGIC, the EDITING SECRETS to create food photography you’re proud of.
I will be harnessing these two crucial concepts through the course so you can really become the creative rockstar, empowered with the knowledge and real-life skills so you can start taking those amazing photos you’ve been dreaming of right now.



Kiki
Hi Rachel, just watched this second video today, and it’s absolutely amazing what you can do in Lightroom. If you know what you’re doing… I have to admit that in awe as I was of how you did everything, even stopping the video to try to apply what you do to my own pics, basically switching back and forth between your videos and Lightroom, it was more fun watching you do it than doing it myself. The reason for that is, I think, that you have to be really familiar with LR to know what you’re doing.
While I’ve been using lightroom for over 2 years now, I’ve only been doing basic editing. Watching you manipulate the tone curve to me requires the knowledge of what every bit of movement does. The same goes for the radial filter – I think I’d have to watch a lot more LR tutorials to be able to copy your “moves” in LR.
Looking forward to the rest of the videos!
Rachel
Hi Kiki! Thanks for watching – glad you got something out of it. Very true, the more you learn and understand the more you are able to do (and do it quickly, with intent). For sure, that’s why in Lightroom Magic we cover all the tools in detail, how you can use them in food photography then splice it all together with watching my edits from start to finish. I know it is fun watching others edit, but the goal of Lightroom Magic is to empower you with knowledge so you can make your own editing choices. We’ll go from ‘copying’ to creating – that’s where the real fun lies.
Denise Browning
Hi, Rachel! I would love to take a lightroom e-course. But my food photography is dark, different from yours. Would I learn enough to edit my photos well on lightroom? Thank you!
Rachel
Absolutely! I teach how to edit for bright and airy, as well as dark and moody. I share the adjustments you need to think about with each kind of imagery, and you get to watch my editing process for both.
Images from my darker side you can see here:
https://www.instagram.com/p/BTYvbUDAZAM/?taken-by=twolovesstudio
https://www.instagram.com/p/BbusolkA7QC/?taken-by=twolovesstudio
And here are some from students who are taking Lightroom Magic and LOVE moody shots!
https://www.instagram.com/p/BZ01Z37A3RS/?taken-by=twolovesstudio
https://www.instagram.com/p/BZ6K_nLAV7R/?taken-by=twolovesstudio
https://www.instagram.com/p/BfGrn8qBx-E/?taken-by=mycommontable
https://www.instagram.com/p/BfLhCuTno_v/?taken-by=figsandpigsinsta
If you have an Instagram and want me to see if this course would benefit you, just email me at [email protected]