Color in food photography is everything! And really if you think about it, color in food is everything. What would you do if you saw a brown strawberry? So it would make sense that editing color in lightroom is an important skill.
Would you want to eat it? Most likely not. But a luscious, juicy, plump red – now you’re talking.
Getting the colors right in your food photography editing is one of the key elements in connecting with your viewer. Editing color in Lightroom is therefore very important.
Tools to Edit Color in Lightroom Correctly For Food Photography
Did you know that there are over 8 ways you can adjust, enhance and edit color in Lightroom? Exciting right?
If you’ve ever said to yourself: “I can’t get clear colors, my pictures seem to be boring and dull” – then listen up!
I’ve got some tips for you to think about. In this post we’ll cover:
- The Hue Adjustment Tool
- The Color Grading Panel
- Luminance Tools
Let’s dive in!

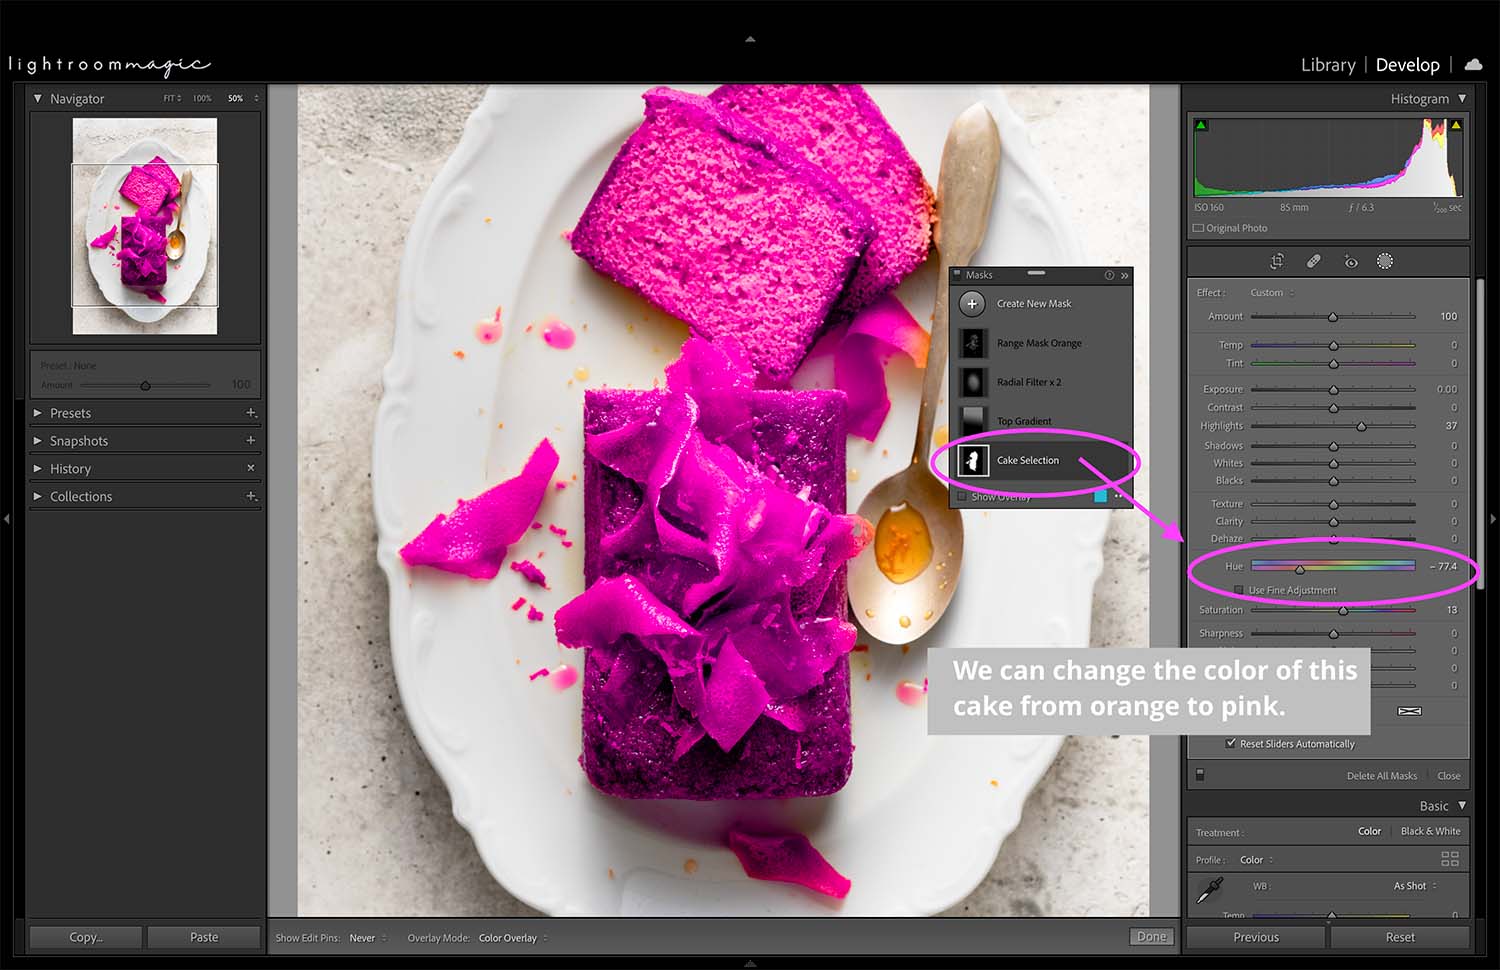
Use the Hue Adjustment Tool in Masks to Fine Tune Color
In any of your Masks, you can use the Hue Adjustment tool to change the color of your masked subject.
Hue refers to the type of color. Green, yellow and orange are all different hues. If you have a food subject that feels greener than you want, you can use this slider to push those hues into yellows.
To assist with a precise edit, you can tick the ‘Use Fine Adjustment’ box to limit how far you can push this edit.
If you’re looking to drastically change a color, you can do that too!
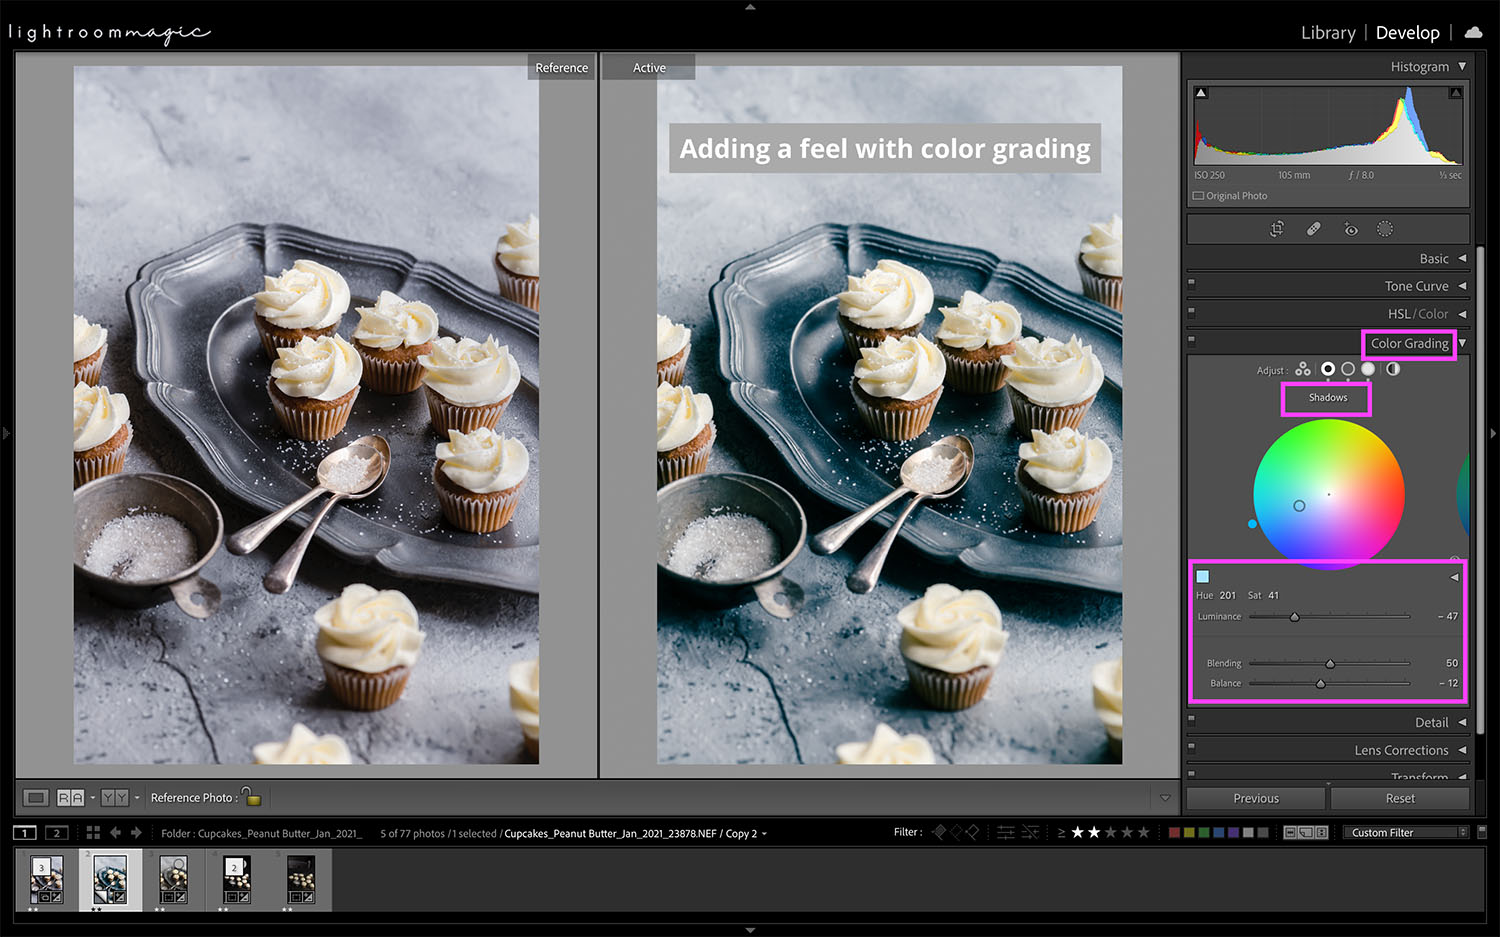
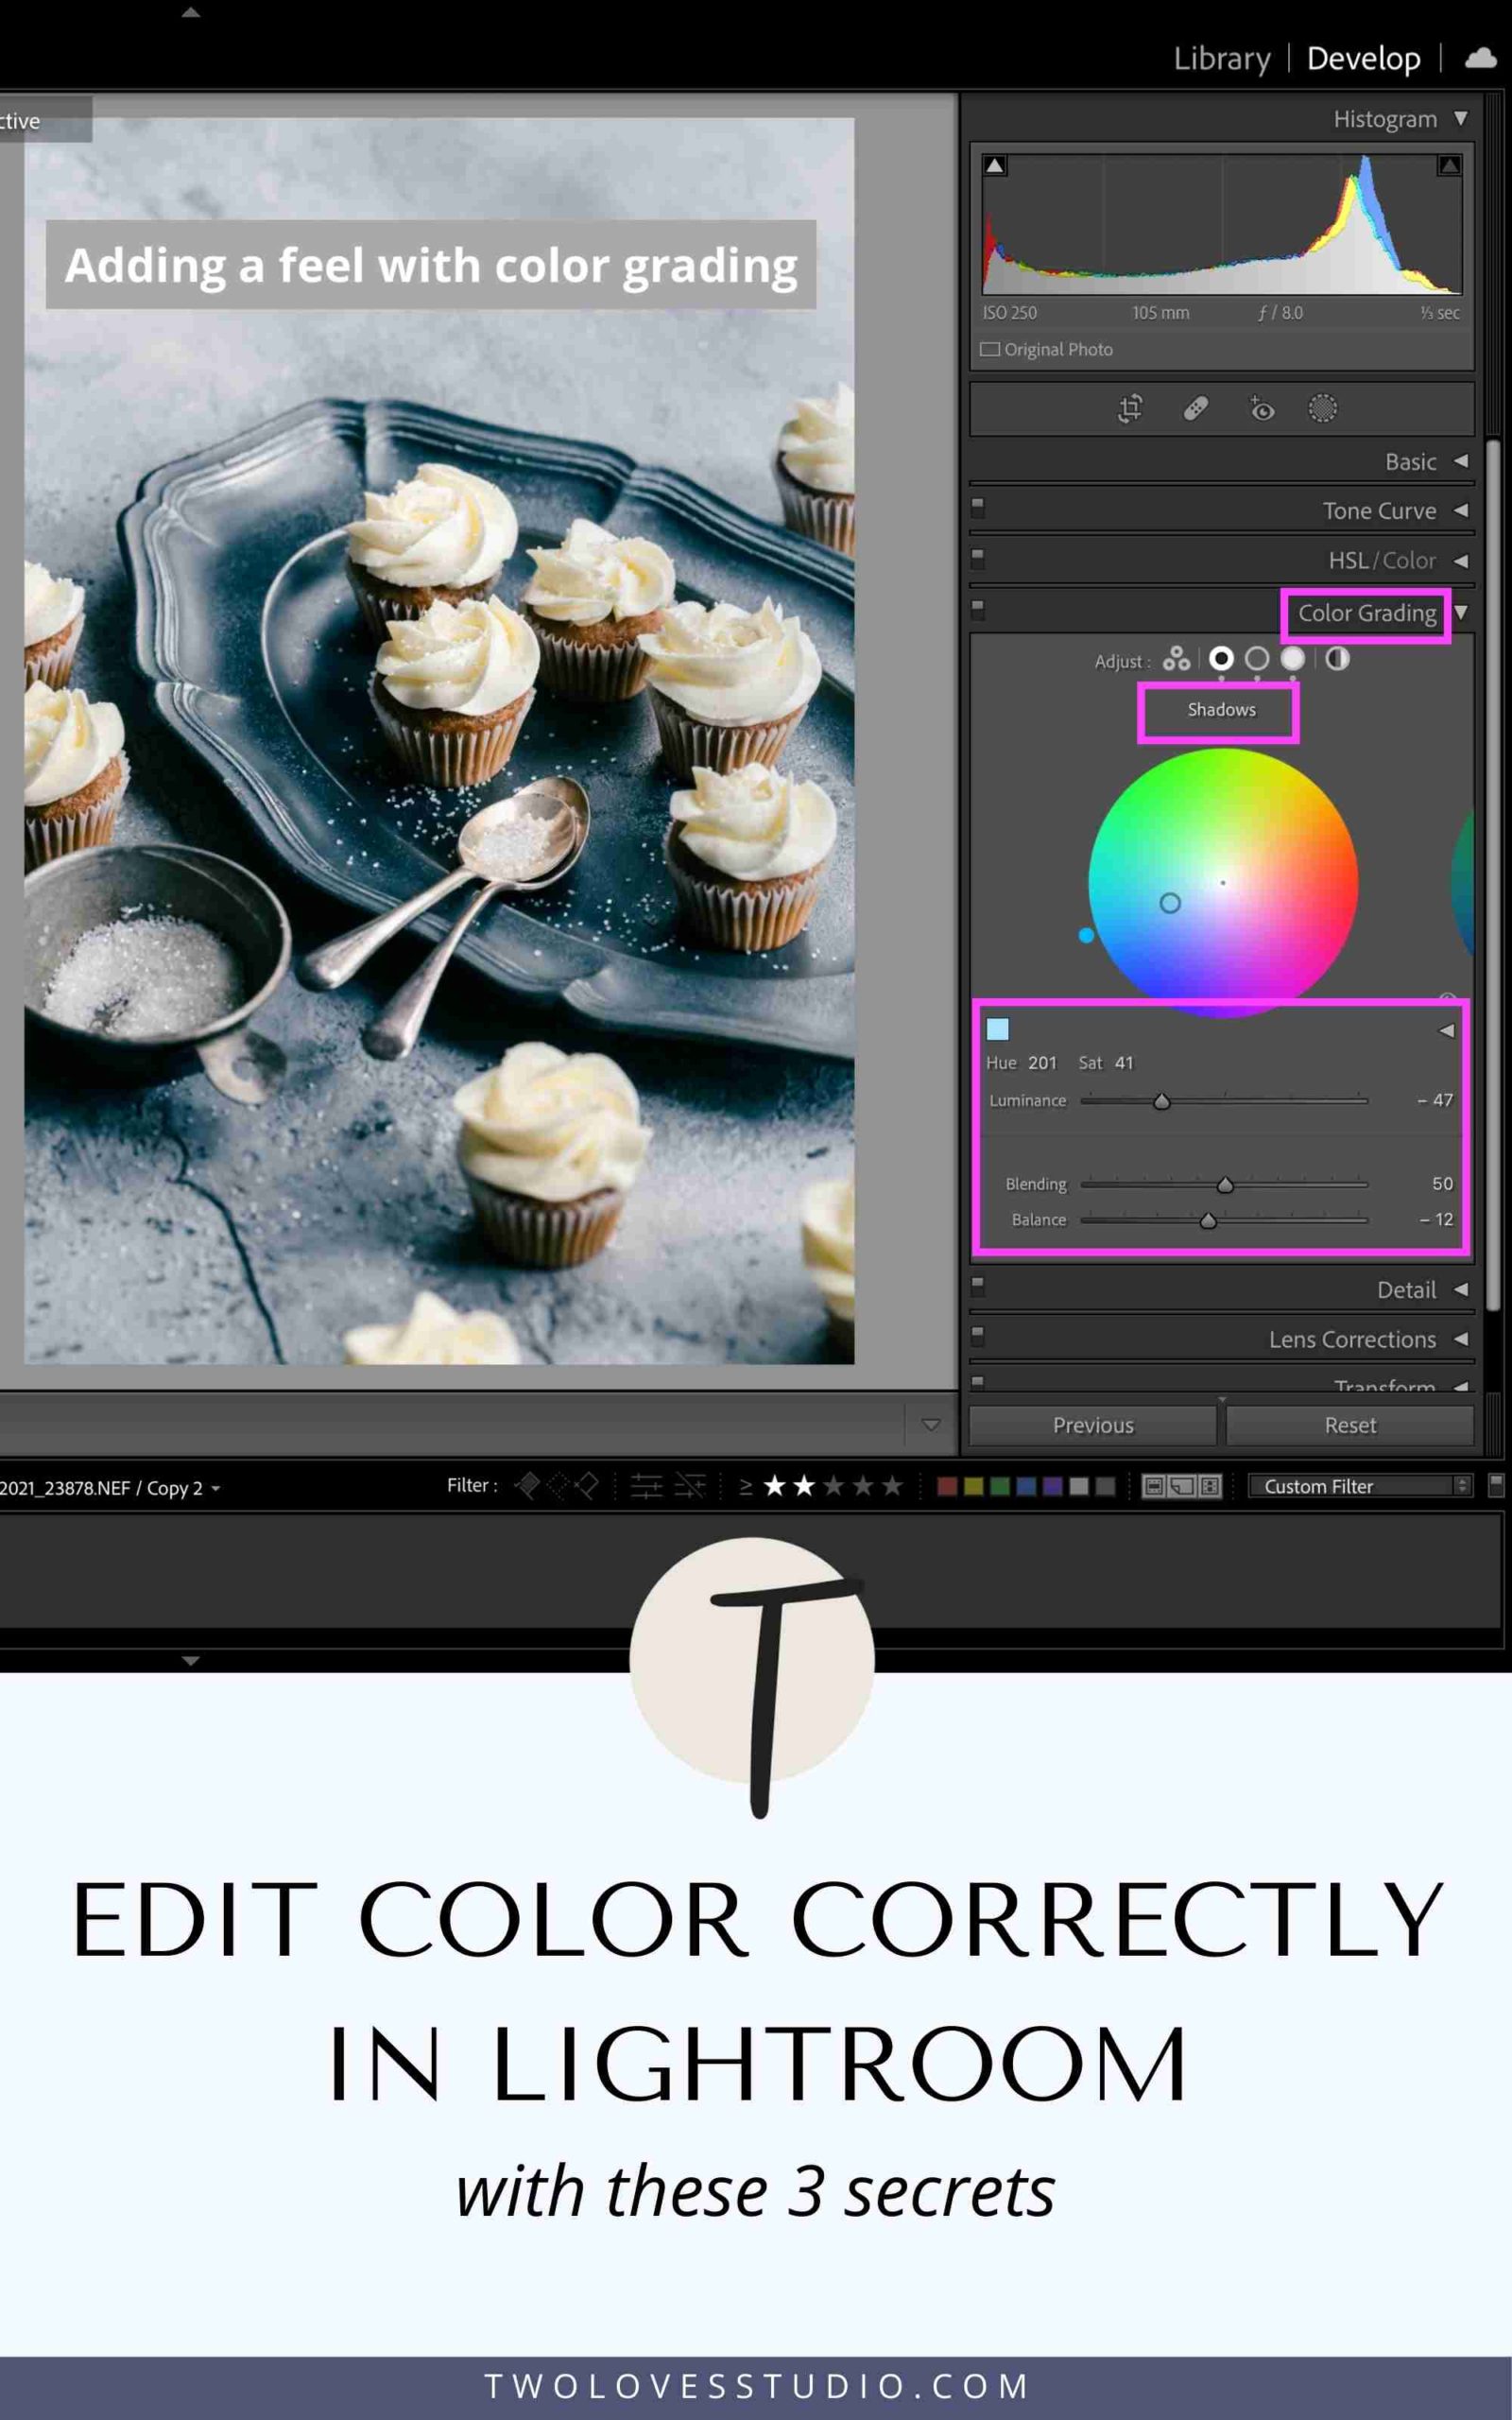
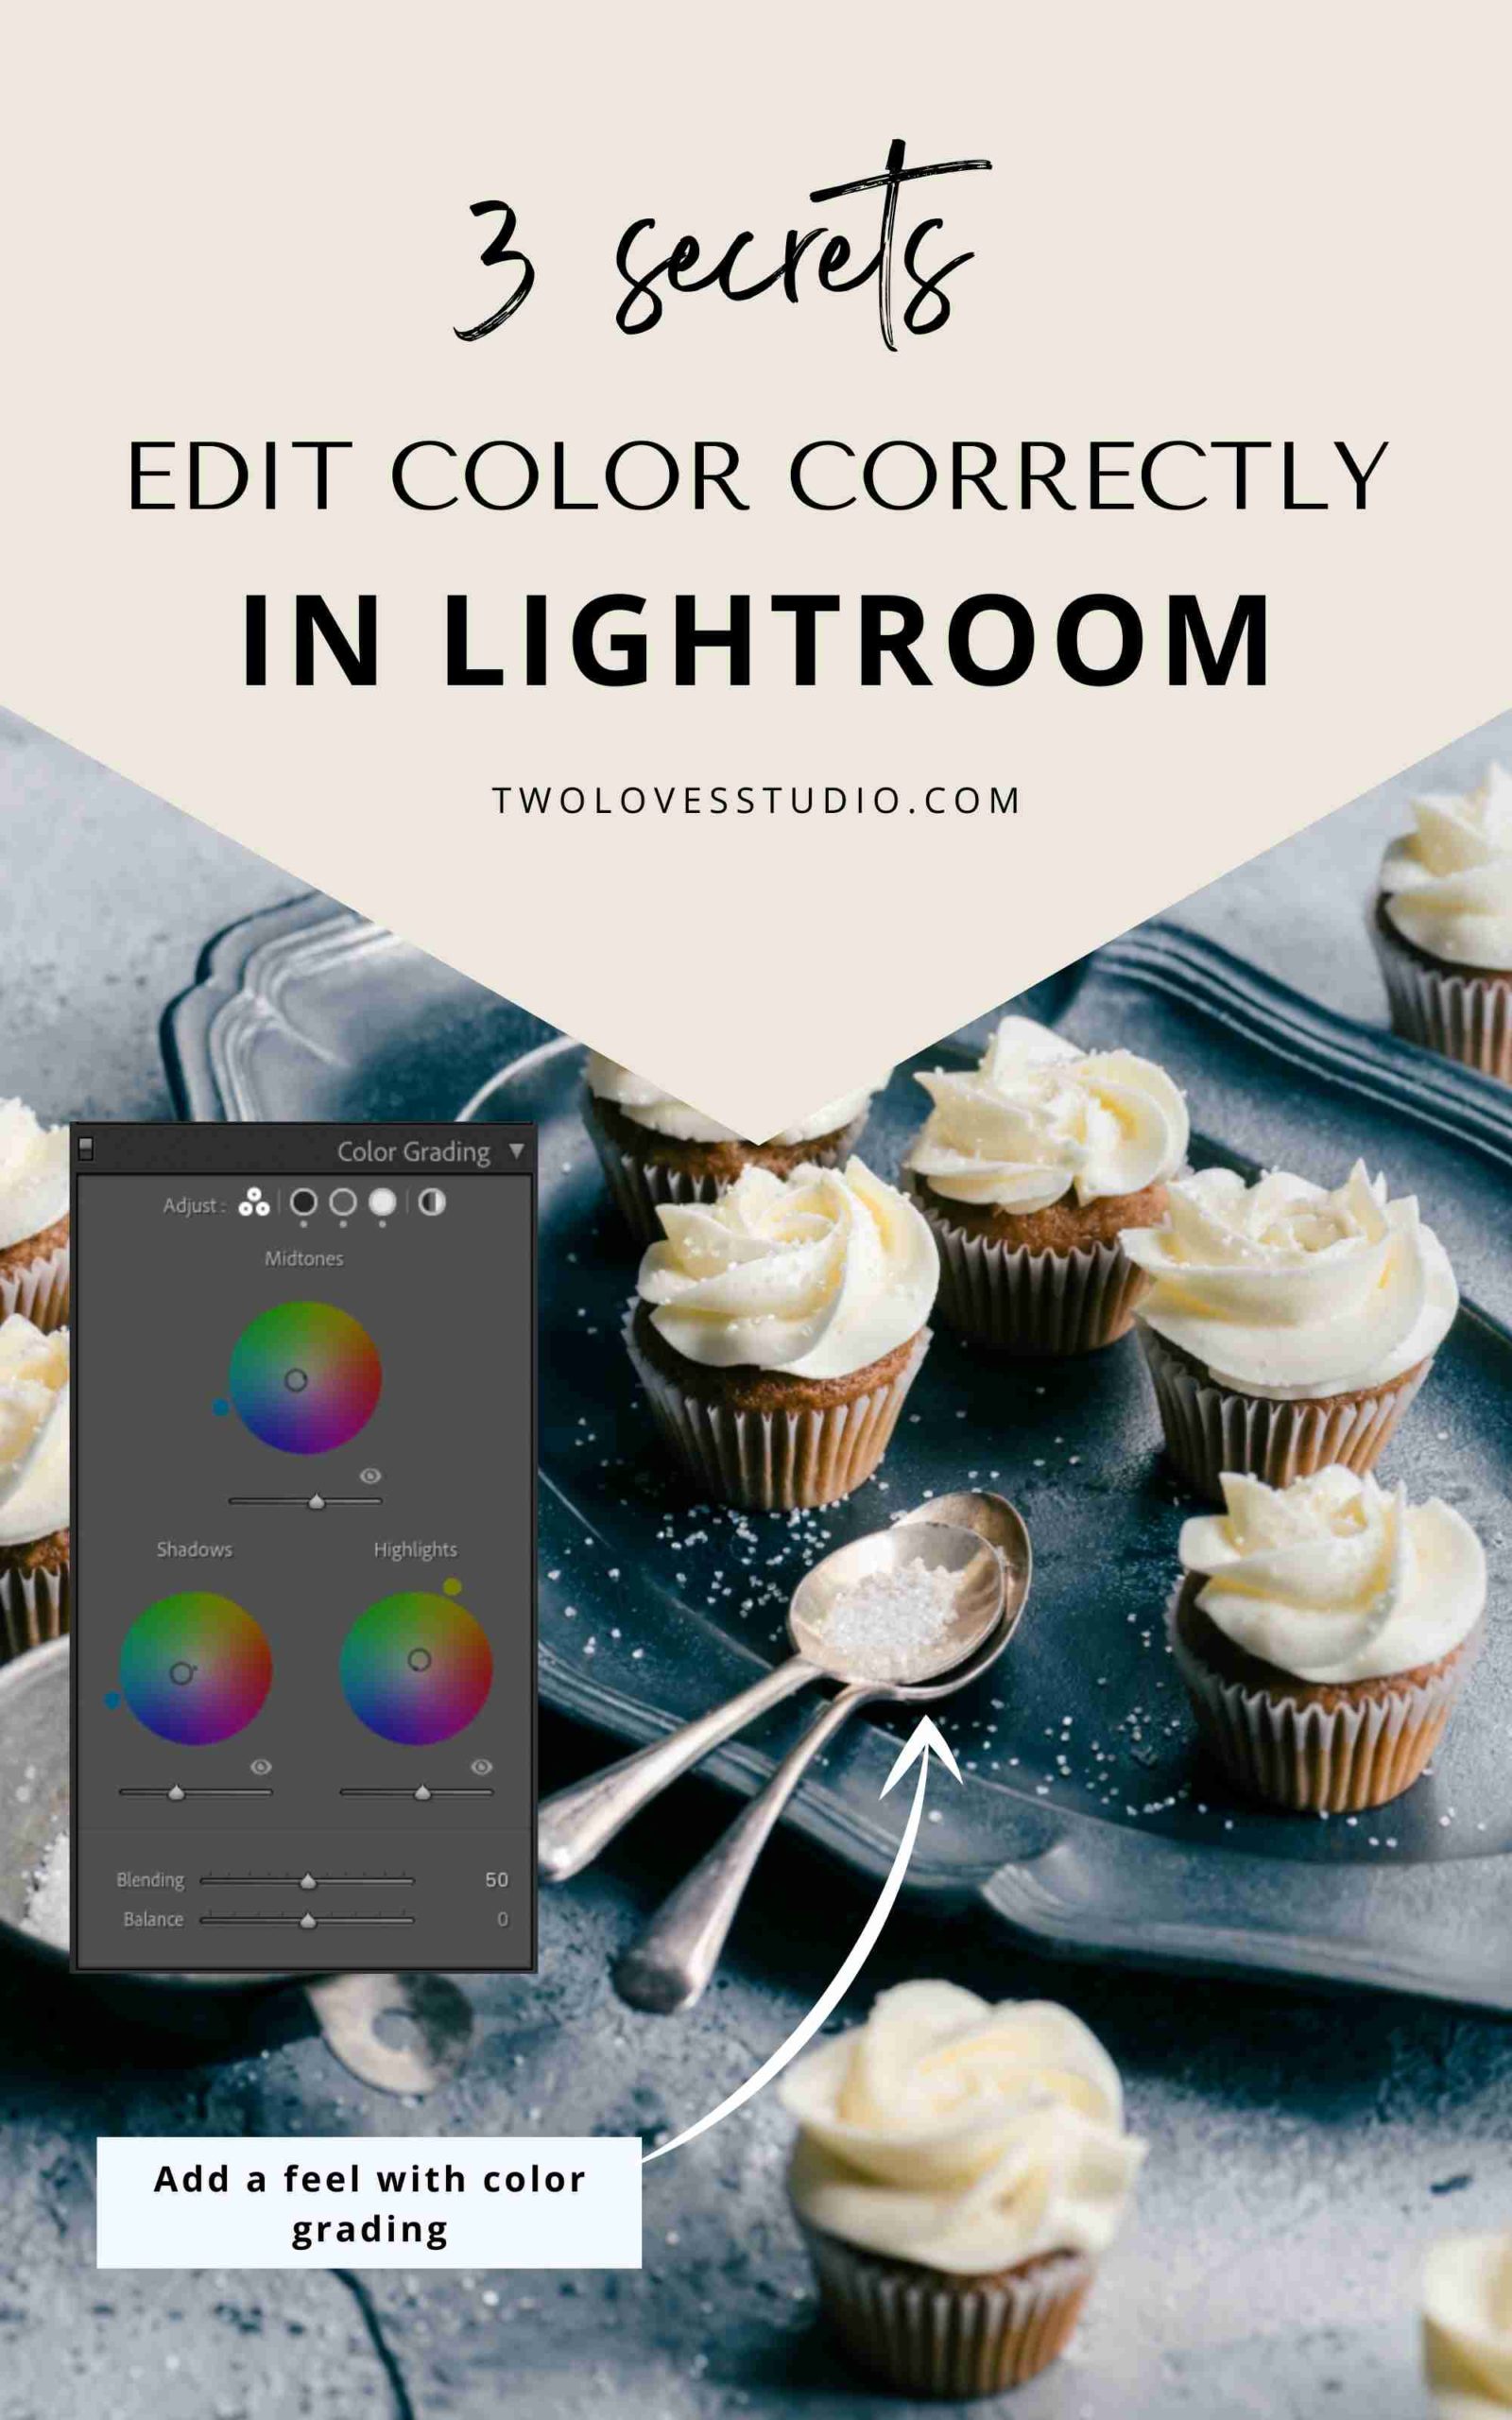
Add a Feeling Using Color in the Color Grading Panel
Color grading is a powerful way to add not only color to our images, but to evoke a mood or story.
If you’re unfamiliar with what color grading is, it’s the ability to:
- Add color to the shadows, mid-tones, and highlights independently. Or adding a color globally.
- Focusing on adding colors to shadows, mid-tones, and highlights to create an atmosphere, you can control the depth of saturation of colors as well as their luminance.
- When it comes to color grading food photography, less is usually more. We rely on colors to look realistic.
Color grading is often a tool that people feel intimidated by. But it’s actually quite easy once you get the hang of it.

To get you started with Color Grading, try out my special edition 10 Color Grading Adjustment Presets for Lightroom.
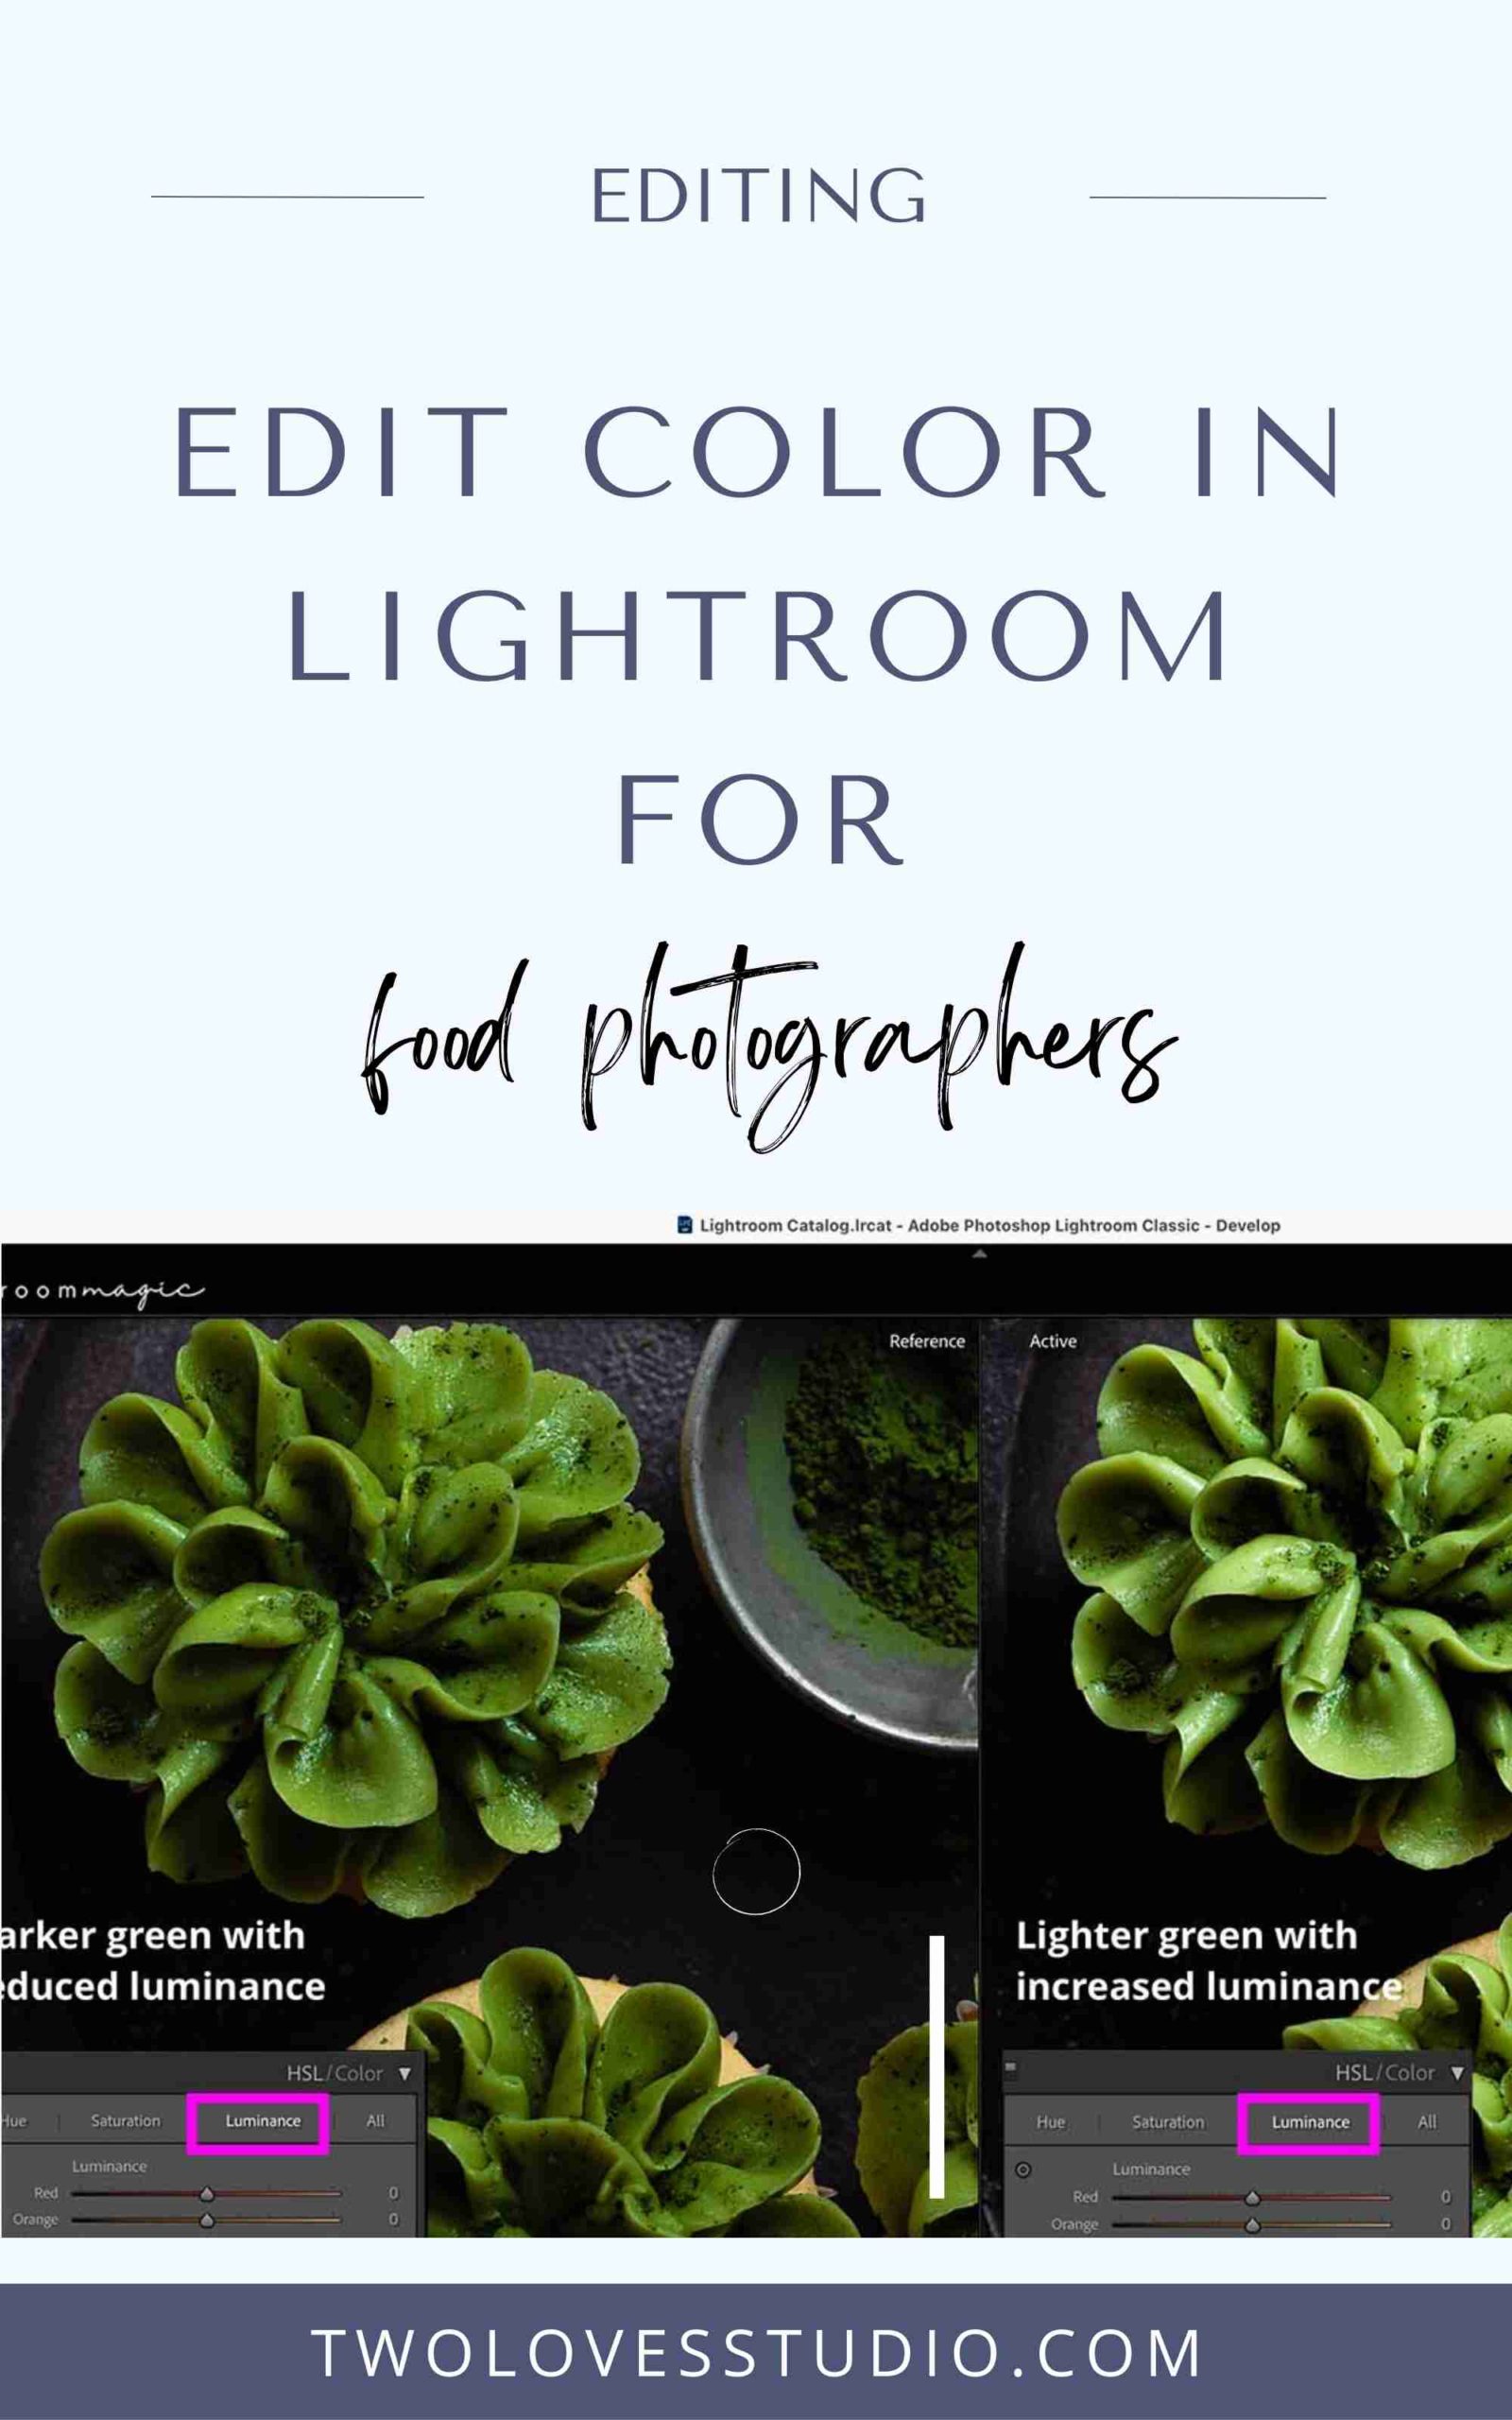
The Luminance of Color Changes: How Bright a Color Appears
When it comes to color, there is more to editing than just the type of color, like pinks or reds.
A color can be saturated or desaturated, dark or bright. We are influenced by how bright or dark a color is. This is where luminance comes in.
Luminance refers to the brightness of a color.
There are about 4 or 5 ways you can target luminance adjustments in Lightroom for your food photography editing.
The most common way to change the luminance of a color is by using the HSL/Color Panel. Here, you can change the appearance of a color’s brightness just by using the sliders.
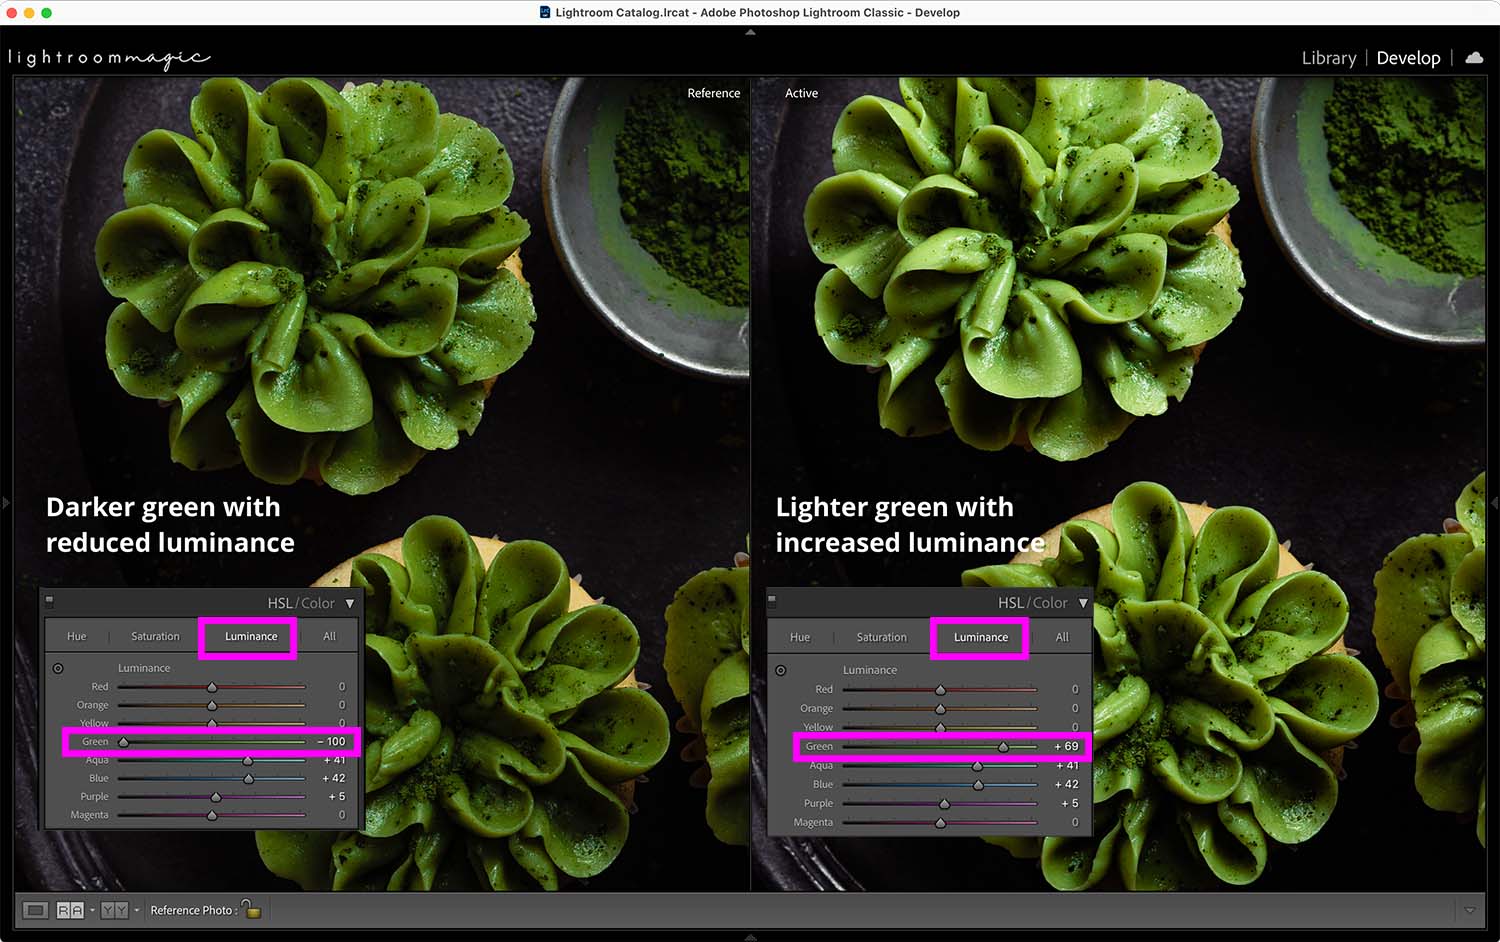
Play around with different luminance feels of different colors.
For more tips and tricks on how to edit in Lightroom, make sure to check out my Lightroom Magic class: The editing secrets for turning your food photos from RAW to WOW!
I’ll show you not only how to edit, but how to identify what your images need. Each time you approach editing, you’ll know exactly what tool to use and when.


Vectorization service
The secrets she describes in this blog are awesome. I liked it.
Rachel Korinek
So glad you liked the tips!
Vincent
Great article, Rachel.
I generally work with a balance of natural light and flash. I get my colors balanced in Lightroom and do basic color-work there before moving to Photoshop to dodge-burn and level.
After reading this, I think there are certain images where I’ve been too conservative with hue adjustments in color grading. After making just a few more definitive choices after reading this, I’ve found that my taps in Ps become even more minimal.
Thanks!
Vincent
Rachel Korinek
Thanks for sharing Vincent! Glad you got something out of it. I do think that it’s better to be conservative with colour edits for editorial food photography, however, I like to do Virtual copies and play around to see what works. Can’t wait to see what this opens up for you.
Shannon Jones
Thanks for the info on color grading. I have always felt super intimidated by it but after seeing what you did with your image, I really want to try it!
Rachel Korinek
I am glad to hear it Shannon! I love colour grading. It can really bring out emotion in our photos. Please let me know how you go when you get to play around with this feature.
Rod Arroyo
I am a headshot photographer in Detroit / Grosse Pointe and I haven’t done that much food photography. Your blog is full of helpful information. Thanks.
Rachel Korinek
Hey Rod – so glad you’ve got some valuable tips here! Food photography is a tough niche.