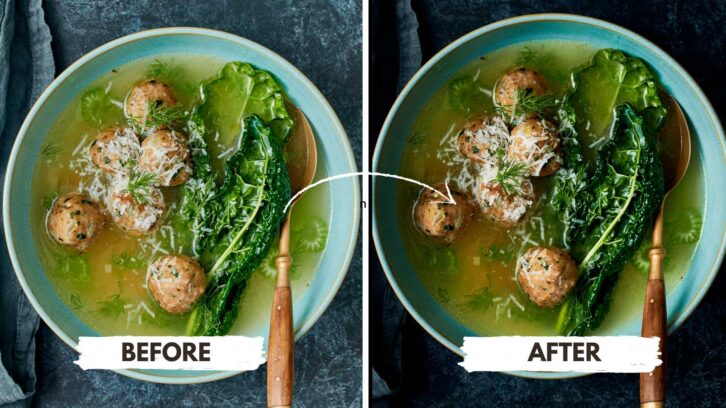
Part of creating beautiful dark food photography comes down to how you light and edit your photos. Here are some dark photo editing tips for achieving a dramatic look.
In this video, watch my top 4 tips to edit an image with a dark and moody feel, including my essential tips for editing dark photos.
When it comes to editing a dark photo, we want to make sure that we’re doing edits to draw the eye. These tips for editing dark photos can help you achieve the perfect look.
This is where the idea of the area of greatest contrast comes into play. We want to make sure even though our photo is dark that the hero food really stands out and draws the eyes of the viewer.
That’s what dark editing should focus on, and what we will look at in this tutorial on some crucial tips for editing dark photos.
4 Must-Have Dark Photo Editing Tips
To draw the viewer’s eye, when it comes to editing, we’ll be looking at using the following edits and tools. Here are some dark photo editing tips to guide you:
- Contrast adjustments via the Curve Tool
- Exposure adjustments with the Shadow Slider
- Vignettes
- Enhancing details with Masks
Contrast Adjustments Draw the Eye
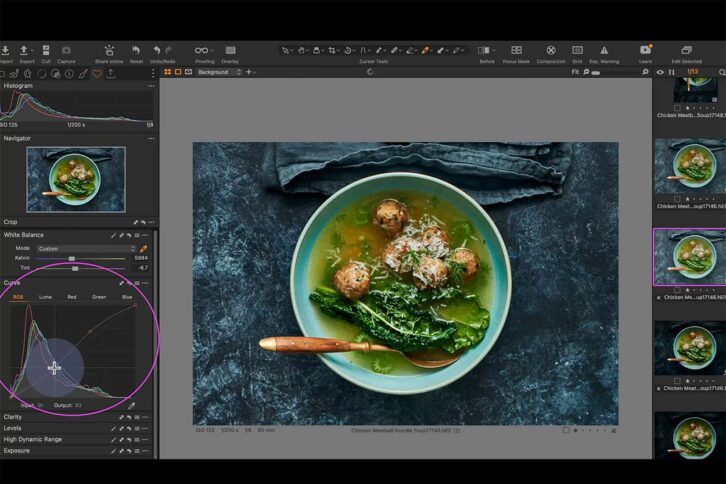
The first adjustment that we’re going to look at is a contrast adjustment. This is going to help us with the idea of the area of greatest contrast and help us push the viewer into the most important details, the hero food. With a contrast adjustment, you can use the contrast slider or a curve tool. Here, understanding dark photo editing techniques is crucial.
I love to use the curve tool. I like to use a curve tool when I’m adding contrast and I start with a basic S curve. This is where we’re lightening our light tones and darkening our dark tones. You can see the difference by just adding a little contrast.
Prefer to watch this tutorial? Check it out on YouTube here.
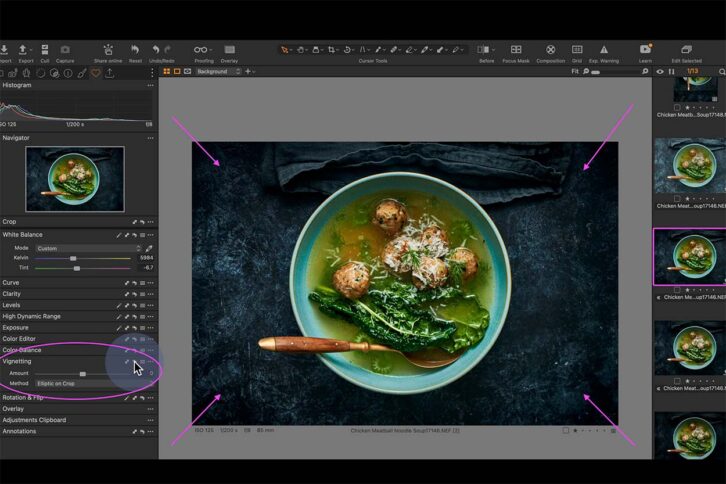
Adding a Vignette to Add Mood
As editing is all about using a layered approach to getting the look you’re after, we want to continue to make edits that draw the eye to our hero food. Adding a vignette will help us bring mood to the image. This falls under valuable tips for editing dark photos.
This is going to darken the corners and the edges of our frame to really push the viewer’s eyesight to the hero dish. You’ll see that this really simple adjustment has taken this image from maybe a little bit more mid-tone heavy to pushing us into the shadows and creating something that’s a little bit more moody.
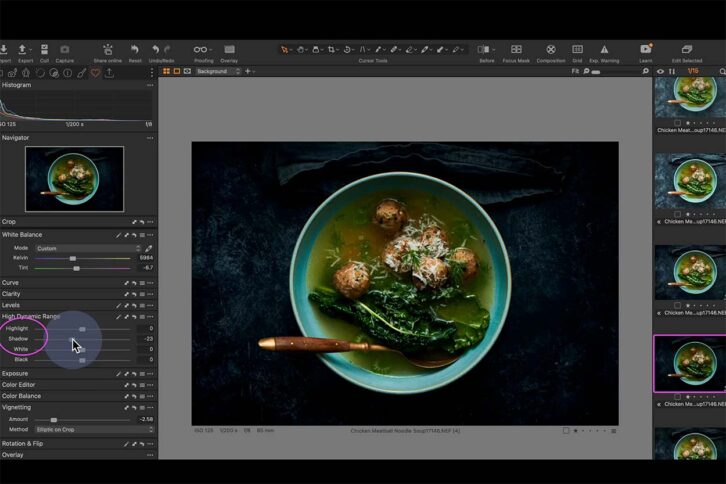
Adjust Shadows to Reveal Important Details
When it comes to editing dark photos, we usually have a lot of beautiful shadows to play with. I always recommend looking at your shadows, do they need to be enhanced? Do we need to deepen the shadows, or do we need to lighten them a little to reveal important details? Tools like the Shadow Slider are essential for dark photo editing tips.
You might play around with the shadows, darkening them slightly, then realise you may even want to readjust the other edits slightly, like the vignette or contrast to soften those areas.
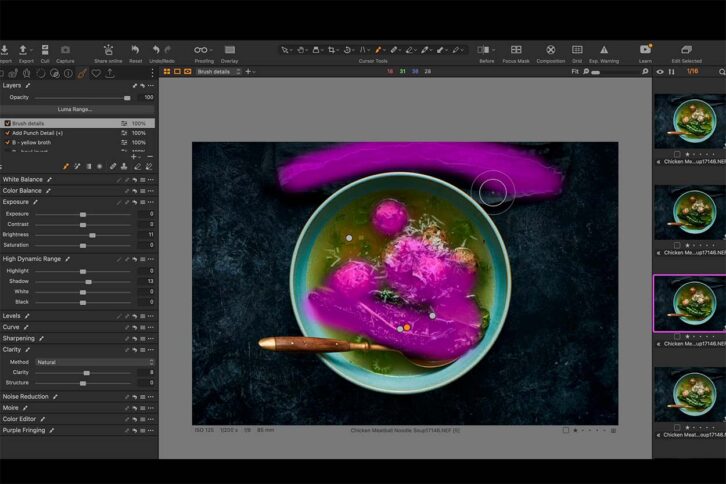
Lighten Food Details with Brush Mask
If you’re thinking at this point that the image is too dark, this is where our last adjustment comes into play.
I usually go with the adjustment brush last to bring back and reveal any of those important textures, elements, ingredients, details, or anything that we need to make this image jump out on the page. We want to make sure that we are highlighting all of those beautiful details. This technique is one of my go-to dark photo editing tips.
Simply, add a brush mask, then use your brush to mask over the area you want to edit. You can then adjust and edit to bring out some of the shadows, add a little bit of brightness, and potentially even a little bit of clarity. Play around with the layers until you reach something you like.
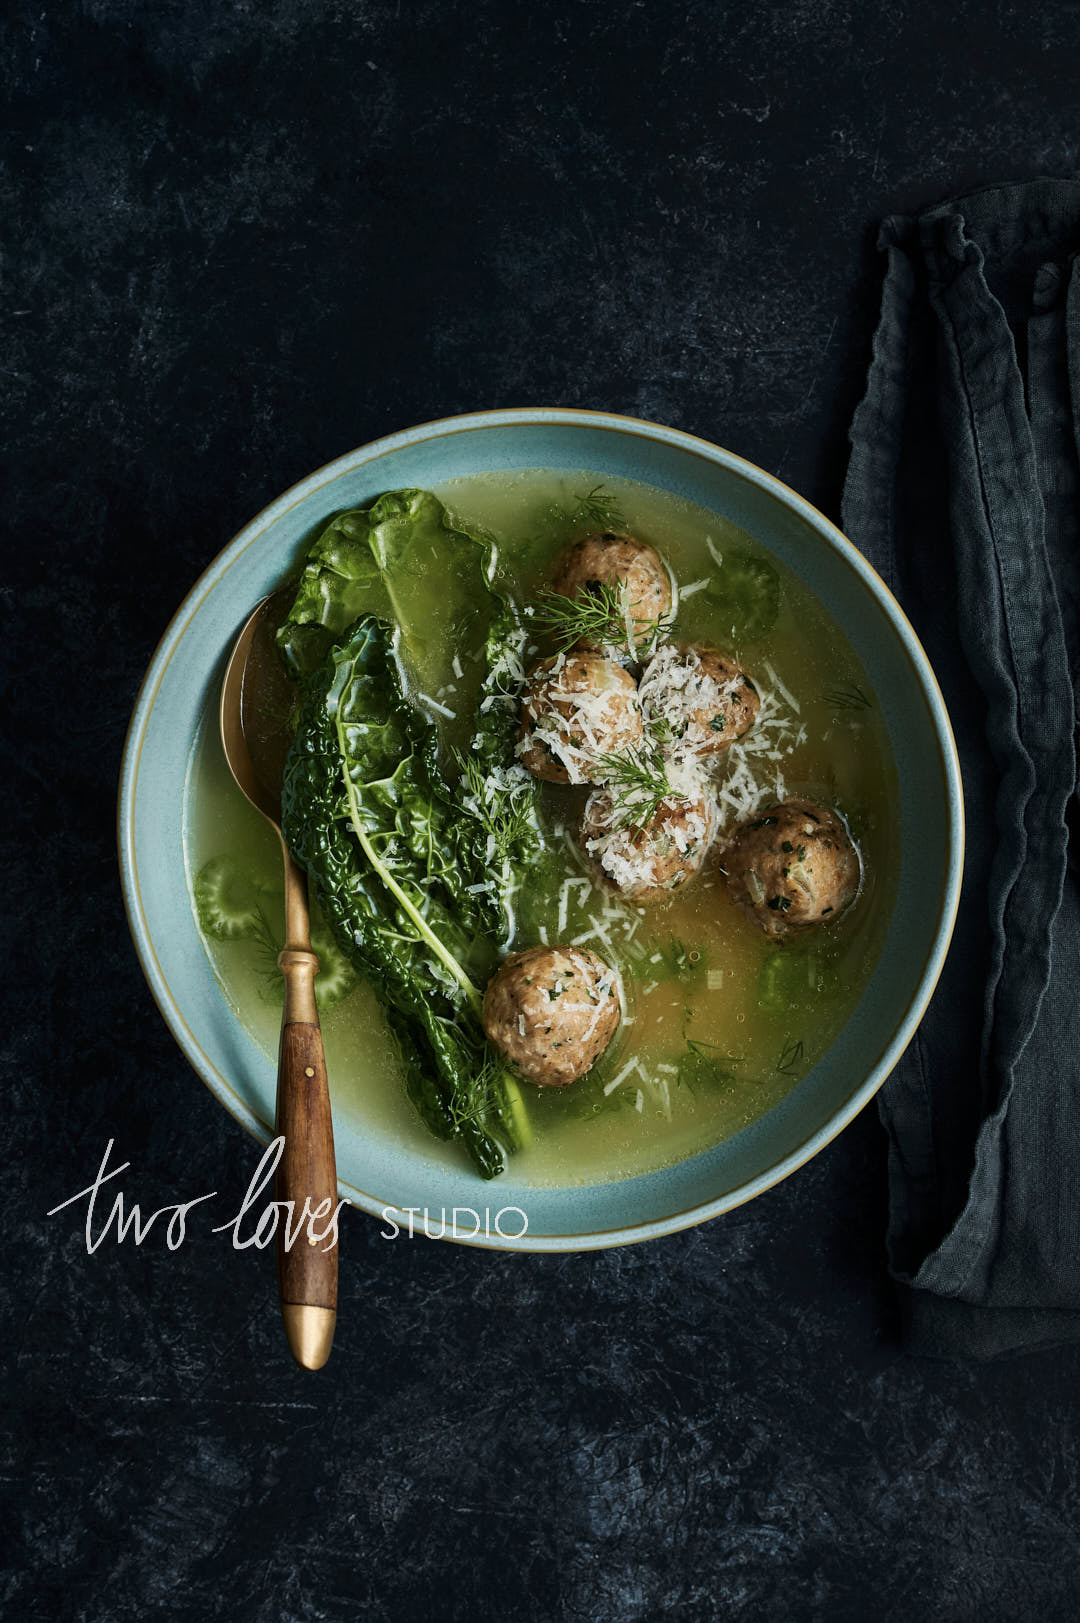
Capture One Masterclass
Now, if you’re ready to take your photos to the next level in Capture One and unlock the secret to the industry’s most powerful editing tool, then make sure to check out my masterclass, Capture One Magic. You will learn even more dark photo editing tips.
FAQs
Contrast should be the adjustment you make after correcting White Balance and Exposure. Use tools like the Contrast Slider or Curve Tool to add contrast to an image.
The Vingette Tool adds vingetting to a photo which darkens the corners and edges of the image to a circular shape defined by you. It’s an edit that is done to draw the eye of the viewer into the middle of the image and to the most important subject.
Dark and moody photos are a combination of moody light with contrast between highlights and shadows. After you’ve captured the image, making edits in your RAW editor to enhance contrast and mood will strengthen a dark photo.


