Looking to capture some beautiful dark food photography? Of course, you are. It’s an insanely beautiful style to add to your portfolio or on Instagram.
It’s funny that I’ve heard many creatives feel like they are either one way or the other.
Those who love to capture bright and airy images are afraid of tackling dark food photography, and those who are good at dark food photography feel like they struggle with light and bright.
Being able to capture each can certainly come in handy, and add to your skill level when you need to shoot different concepts.
It’s also an asset to your skill set if you can shoot both as you will really need to understand lighting, the dynamics of lighting and how natural light behaves.
The Most Important Tips for Dark Food Photography
Capturing dark images is similar to capturing bright images, but there are a few things that you will want to focus on in order to create stunning dark food photography images.
Shooting dark image isn’t about having less light either.
For sure there may be times when you have less light, and you’ll adjust your settings in order to capture a sharp, in-focus image.
There are a few other factors that you will want to consider when shooting dark food photography so that you are shooting the most powerful image possible. Let’s take a look at some of those tips, so you can create magic!
TIP #1 Play With Distance From Your Light Source
When it comes to the power of available light, the Inverse Square Law tells us that moving away from our light source will give us a reduced power of available light.
So therefore in order to capture dark food photography, you don’t have to find the smallest possible window to shoot with, you can just move further away from the light source.
Learn about the dynamics of natural light and how to apply the Inverse Square Law with my Behind The Scenes Natural Light Case Study Book.
TIP #2 Brightest Area In The Frame
A composition technique that should be thought about in dark food photography in order to make the image appealing to your viewer is having a bright area in your frame.
This will draw in the viewer’s attention in a technique that is called the area of greatest contrast.
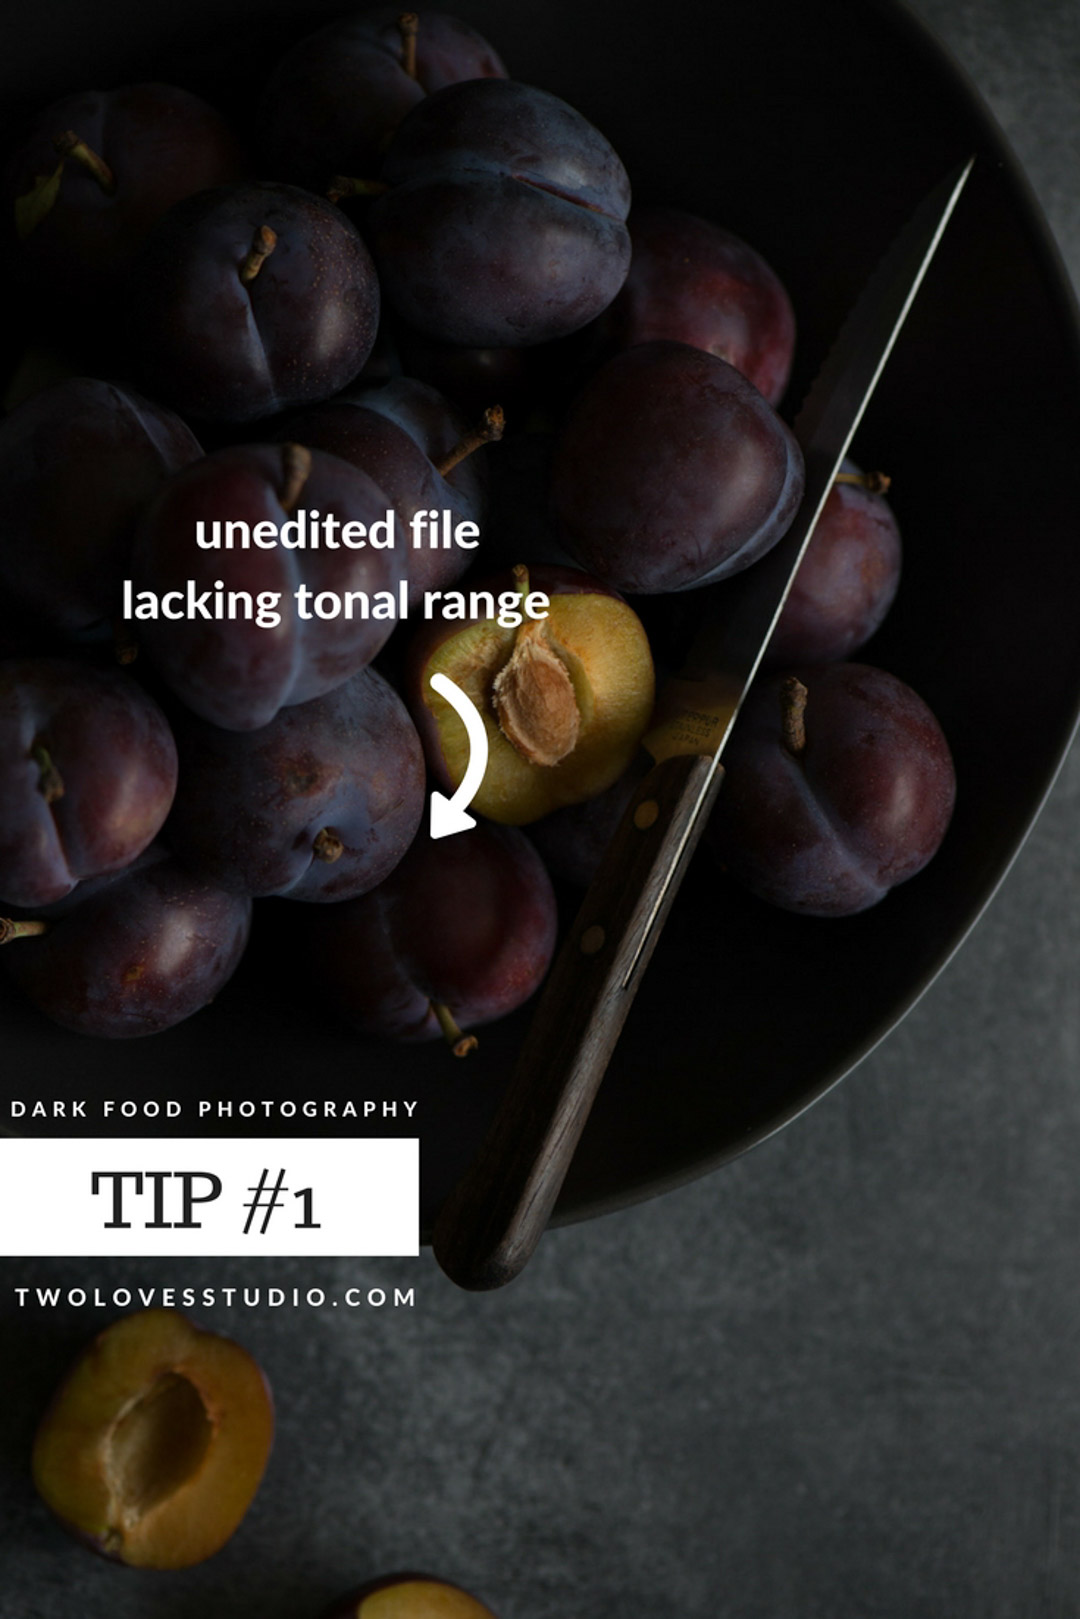
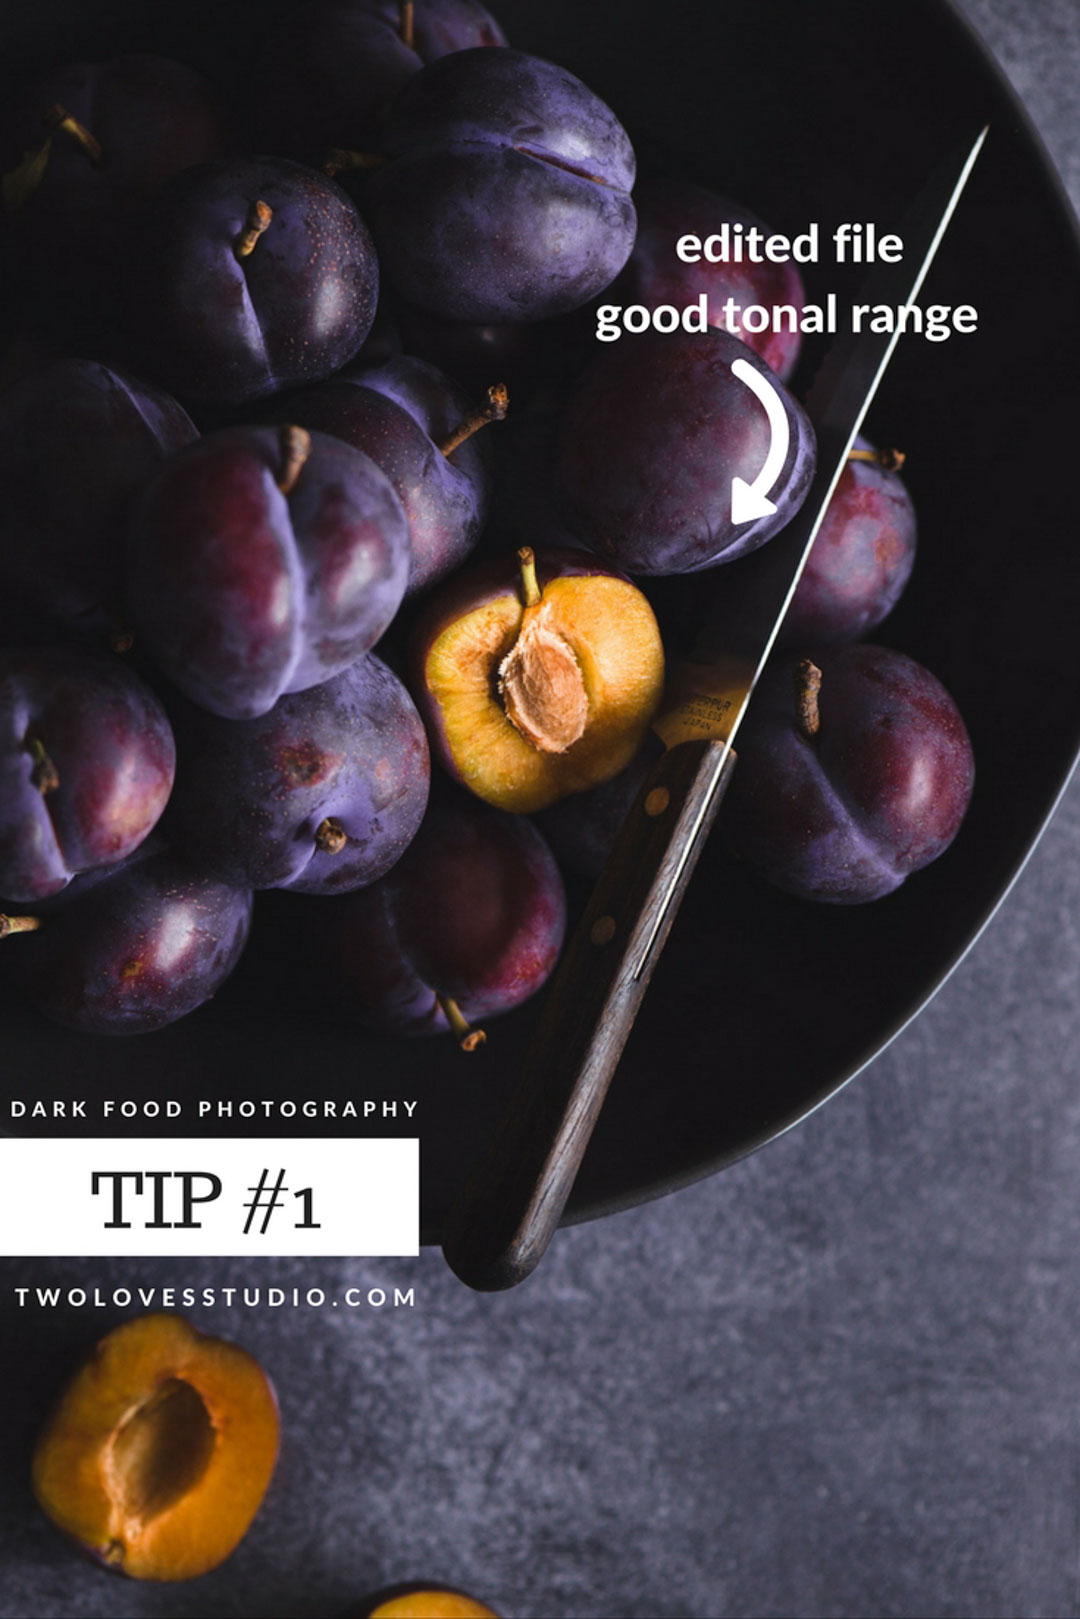
Our eyes are naturally attracted to areas of contrast and with dark food photography, the image will be predominantly dark tones. Incorporating tonal range will allow the image to keep the viewer’s interest.
As I teach in my Lightroom Magic ecourse, dull or unexposed images risk capturing and holding viewers attention and there is a tendency to think that dark food photography must be dark at all costs.
That all tones should be dark.
Shadows, as we know, are really important in food photography, but if our shot is too dark, underexposed or lacks tonal range then we also risk losing our shadows. This, in turn, can reduce the amount of dimension and depth that our subjects have.
You don’t need to go crazy on the bright area of contrast, but it’s a good idea to have something in the frame of importance that has some brighter tones.
This will usually be the subject or something that adds to the overall story that you’re trying to tell.
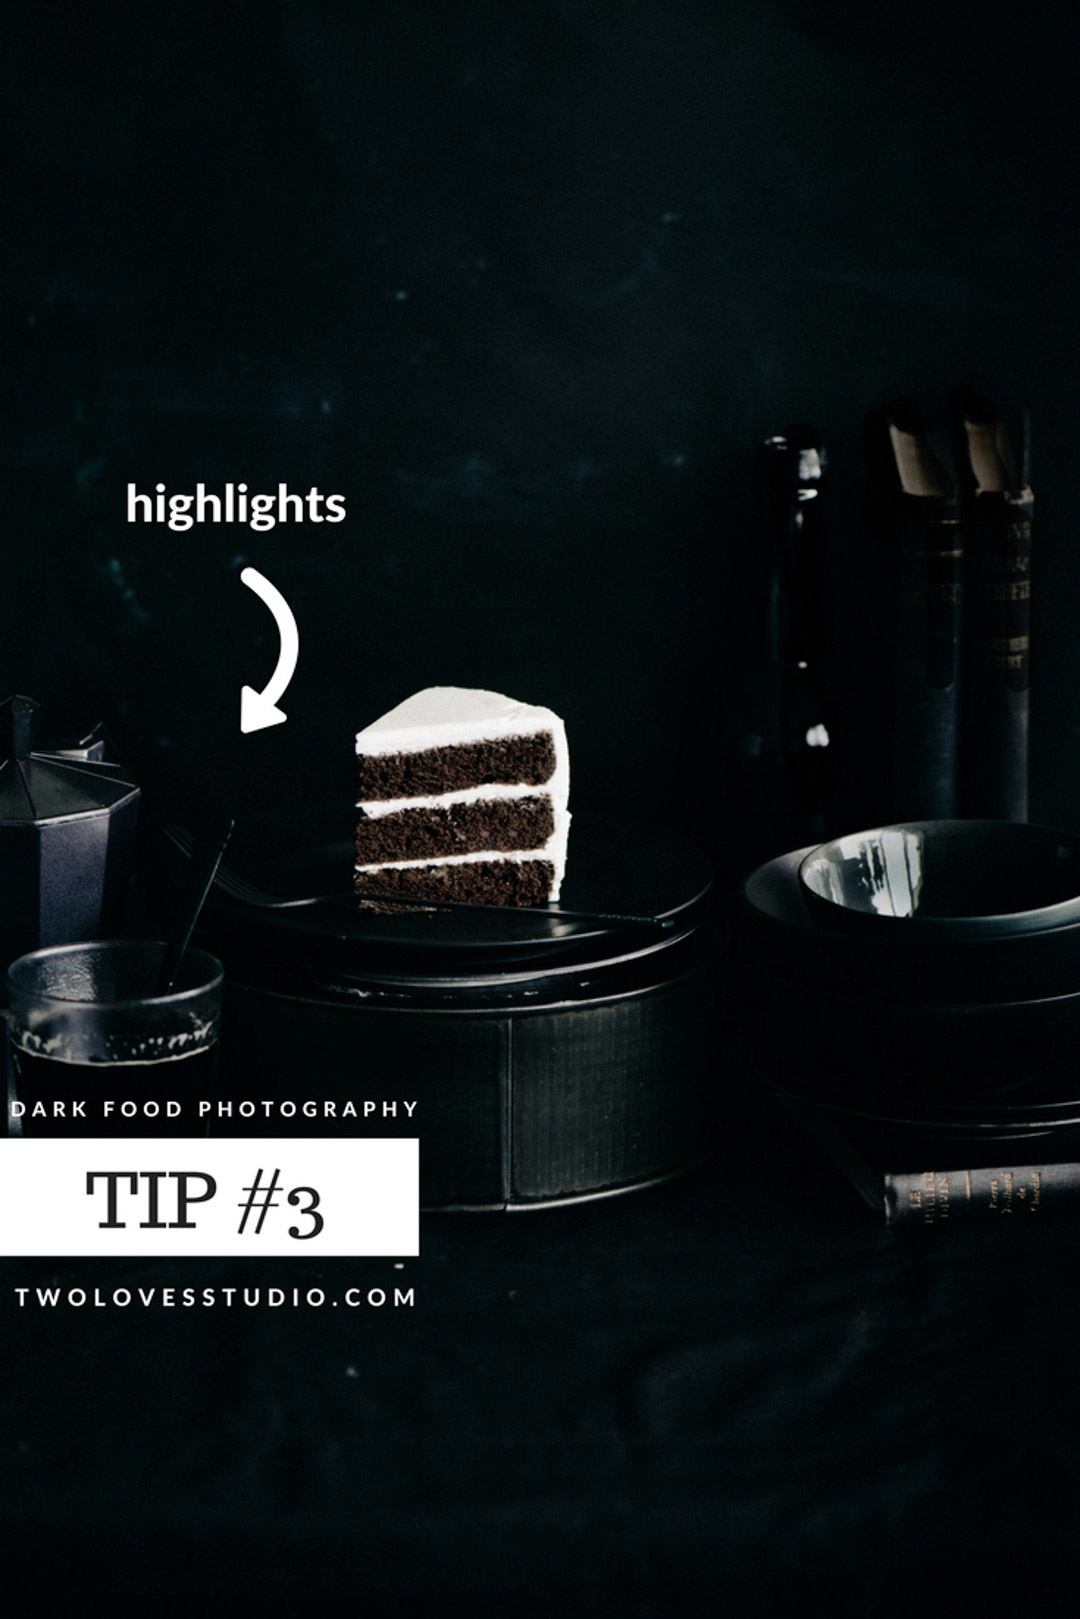
TIP #3 Incorporate Highlights
This point is an extension of the are point. The best way to get some bright tones into your dark food photography is to incorporate highlights.
With good lighting, you should be able to read your histogram to ensure that the tonal range that you are capturing includes some highlights. In post-production, it is vital that you play around with your highlights in dark food photography to create some interest.
In my ecourse Lightroom Magic, I teach how to adjust tonal range for the most impact on your work.
Another great way to capture highlights in dark food photography is to create a dish that has a lot of specular highlights when presented in the right light and at the right angle
Read: Two Crucial Food Photography Lightroom Concepts
Personally, my favourite food that has gorgeous specular highlights is anything sticky – with loads of sugar. Such as syrups, chocolate ganache, anything that glistens really.
Be sure to explore a range of angles to see which best picks up the specular highlights on your dish.
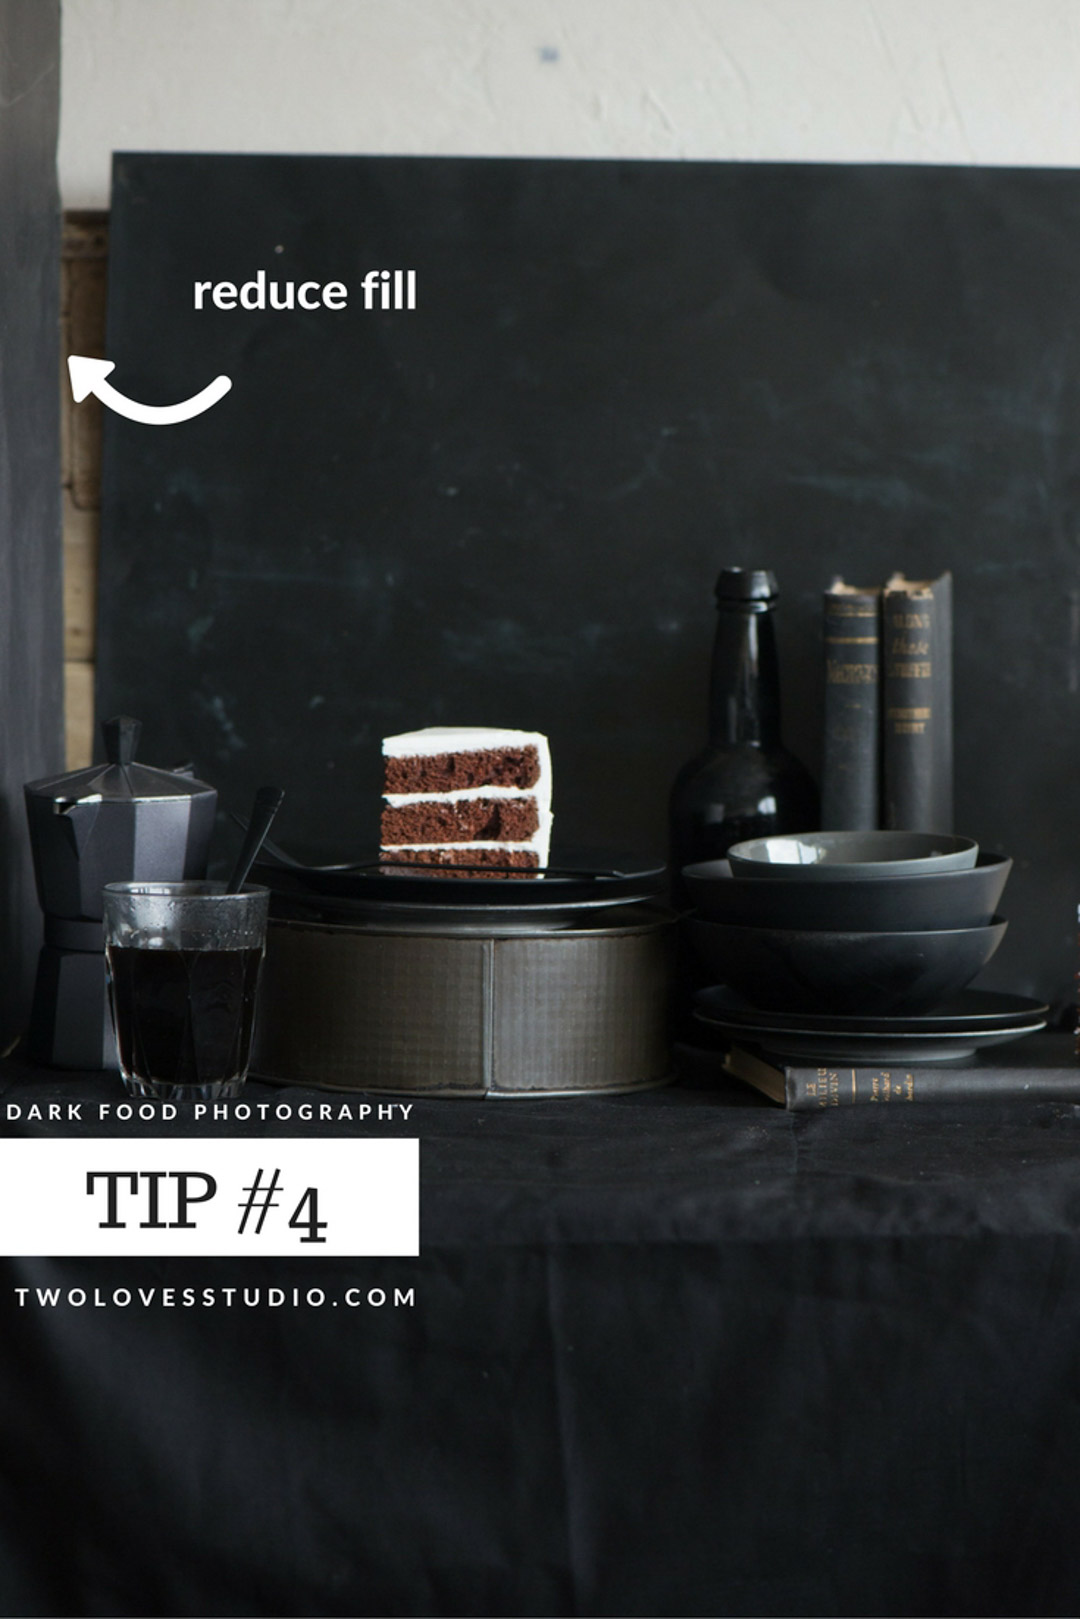
TIP #4 Enhance Your Shadows by Reducing Fill
Now we did touch on shadows above as being an important element in any still life photography, but there is a difference between having shadows in your fame and have an underexposed image.
To create dark food photography, a very important aspect is to reduce the amount of fill light that you have bouncing around your subject and set.
Fill light is any light that reflects off white or bright surfaces and fills in the shadowed area in your scene.
To reduce fill for dark food photography, the best way is to reduce the amount of white walls (if you’re shooting at home) that surround the scene you’re shooting.
Related: How To Create Dark Food Photography, (With Just A Box)
You can use any negative fill cards or sheets to reduce light bouncing back onto your subject and reducing the shadows on set.
If you’re lucky, you may have a room in your house that has dark coloured walls, which will be perfect for reducing fill and enhancing your shadow area.



Todd
Regarding dark backgrounds, slate is all the rage right now, and it’s a beautiful component. Not cheap though. I’m curious if you have any experience with natural and faux (melamine) slate. Is the real thing worth the investment?
Rachel
It sure is! You can get some realistic faux options, but they are hit and miss. I have seen studios using tiles that are made to look like slate. That could be a cheaper option. Same for marble. I think for me, marble is worth it as I would also use it for make pastry on. So thinking about if you can get more use out of it 🙂
Bailey
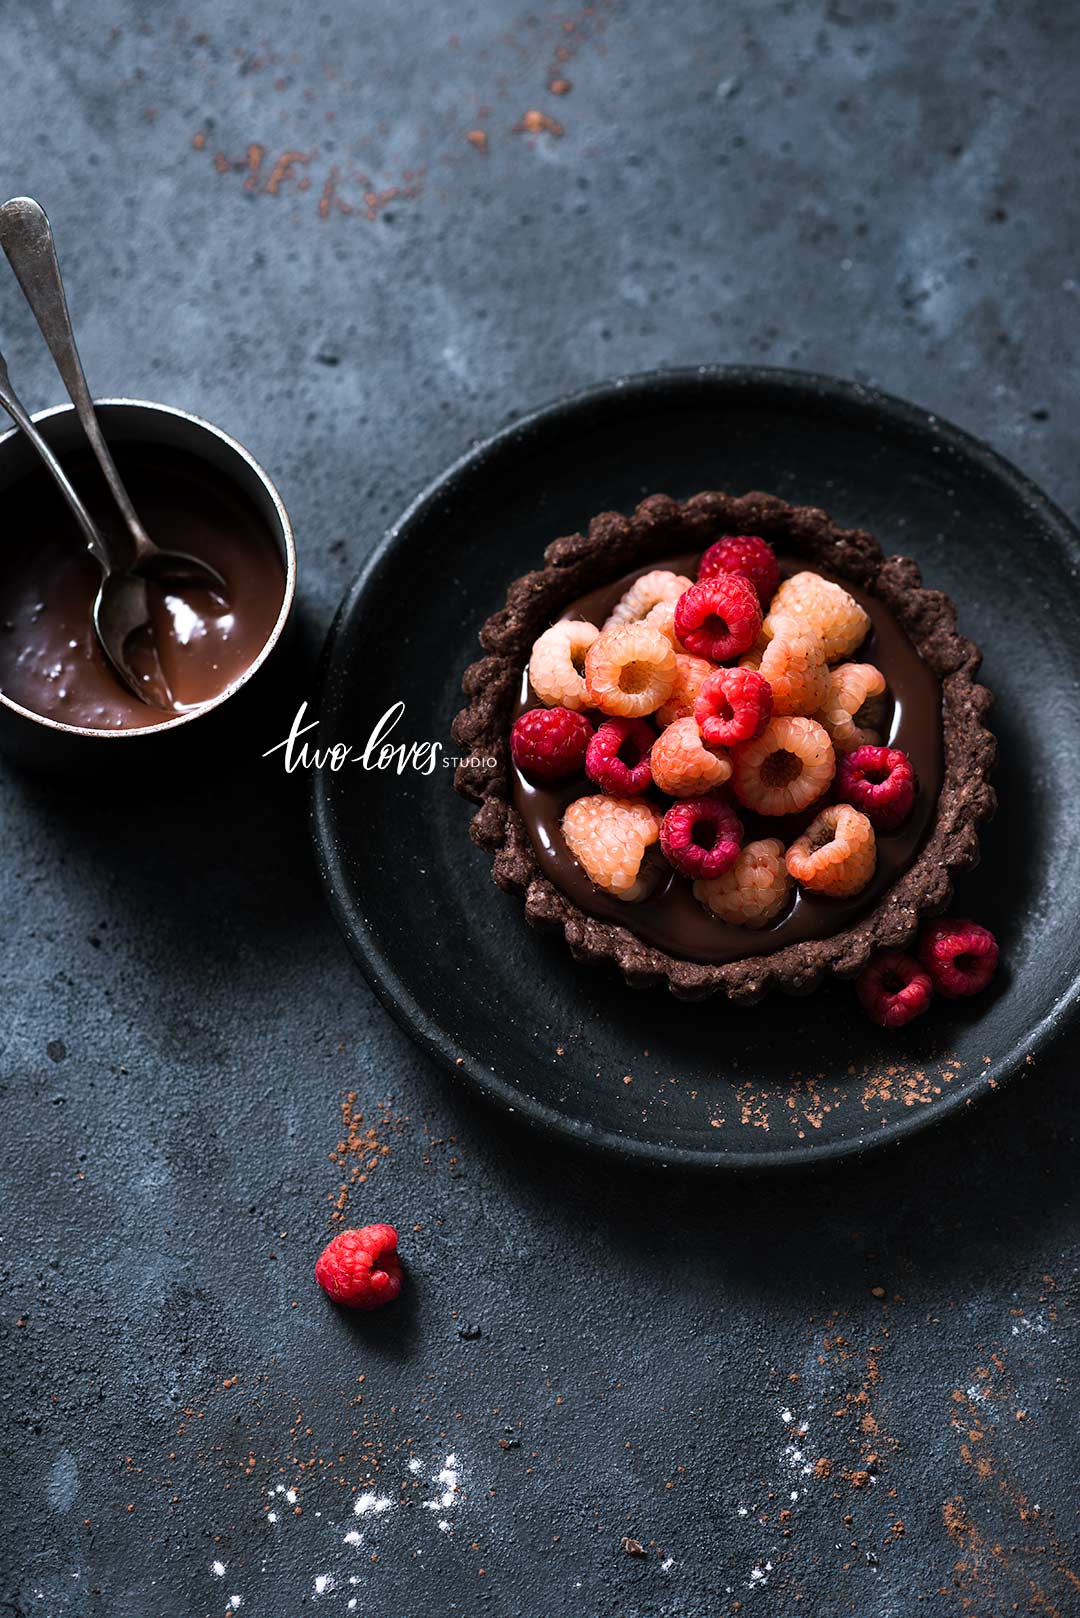
Can you tell me more about the surface you used to shoot the raspberry chocolate ganache? Was that handmade, where did you get it, how did you make it, how can I have it? I need it. I love it. I want it.
Rachel
Love your enthusiasm Bailey! I did make this one myself. You can find a couple of tutorials on how to do that on the blog and via Instagram. Check out my tutorials here: https://twolovesstudio.com/blog/best-diy-food-photography-backdrop/ and here on my IGTV.
Emma
Hi Rachel
I’ve started taking my food photography up a notch – thanks for all the awesome tips! I’d really like to star getting some paying clients. How will I know if I’m ready to take the step forward to becoming a professional? I’m really quite nervous to put myself and my work out there.
Rachel
Hey Emma! Totally, I think it’s normal to feel nervous. I certainly know I did. I think there is a client for everyone at each stage of our journey. I would recommend starting with some smaller local clients and small businesses. Even free shoots for people you know to build some skills and confidence. I do run a mastermind on the business of photography called Food Photography Pro. I do recommend having some experience with running your own business or having client work before joining, but something to keep in mind for the future.
Lea Schor
I am a very new beginner of taking photographs for my website/blog. My product is jewelry. Would black photography be something of value for me and my project? Would your course help me? Or is it only for taking pictures of food? Thank you!
Rachel
Hey Lea! I think it depends on what look you are going for and where you images will be posted. Sometimes for product shots, it’s nicer to have lighter images so that people can see the detail. If you are looking to take composition essentials, then it can help anyone who wants to learn still life composition. I have others that don’t shoot food, but knitting, flat-lays, flowers etc.
Lauren Martin
One thing that I really need to devote my time with, is learning editing. The stark difference between raw and edited photos is just so amazing.
Rachel Korinek
Definitely Lauren! Although editing comes at the end of the process, it’s just as important as all the other parts of taking a photo. It’s where we can really make it shine and put our unique style onto it!