This post may contain affiliate links from products and services we love and trust.
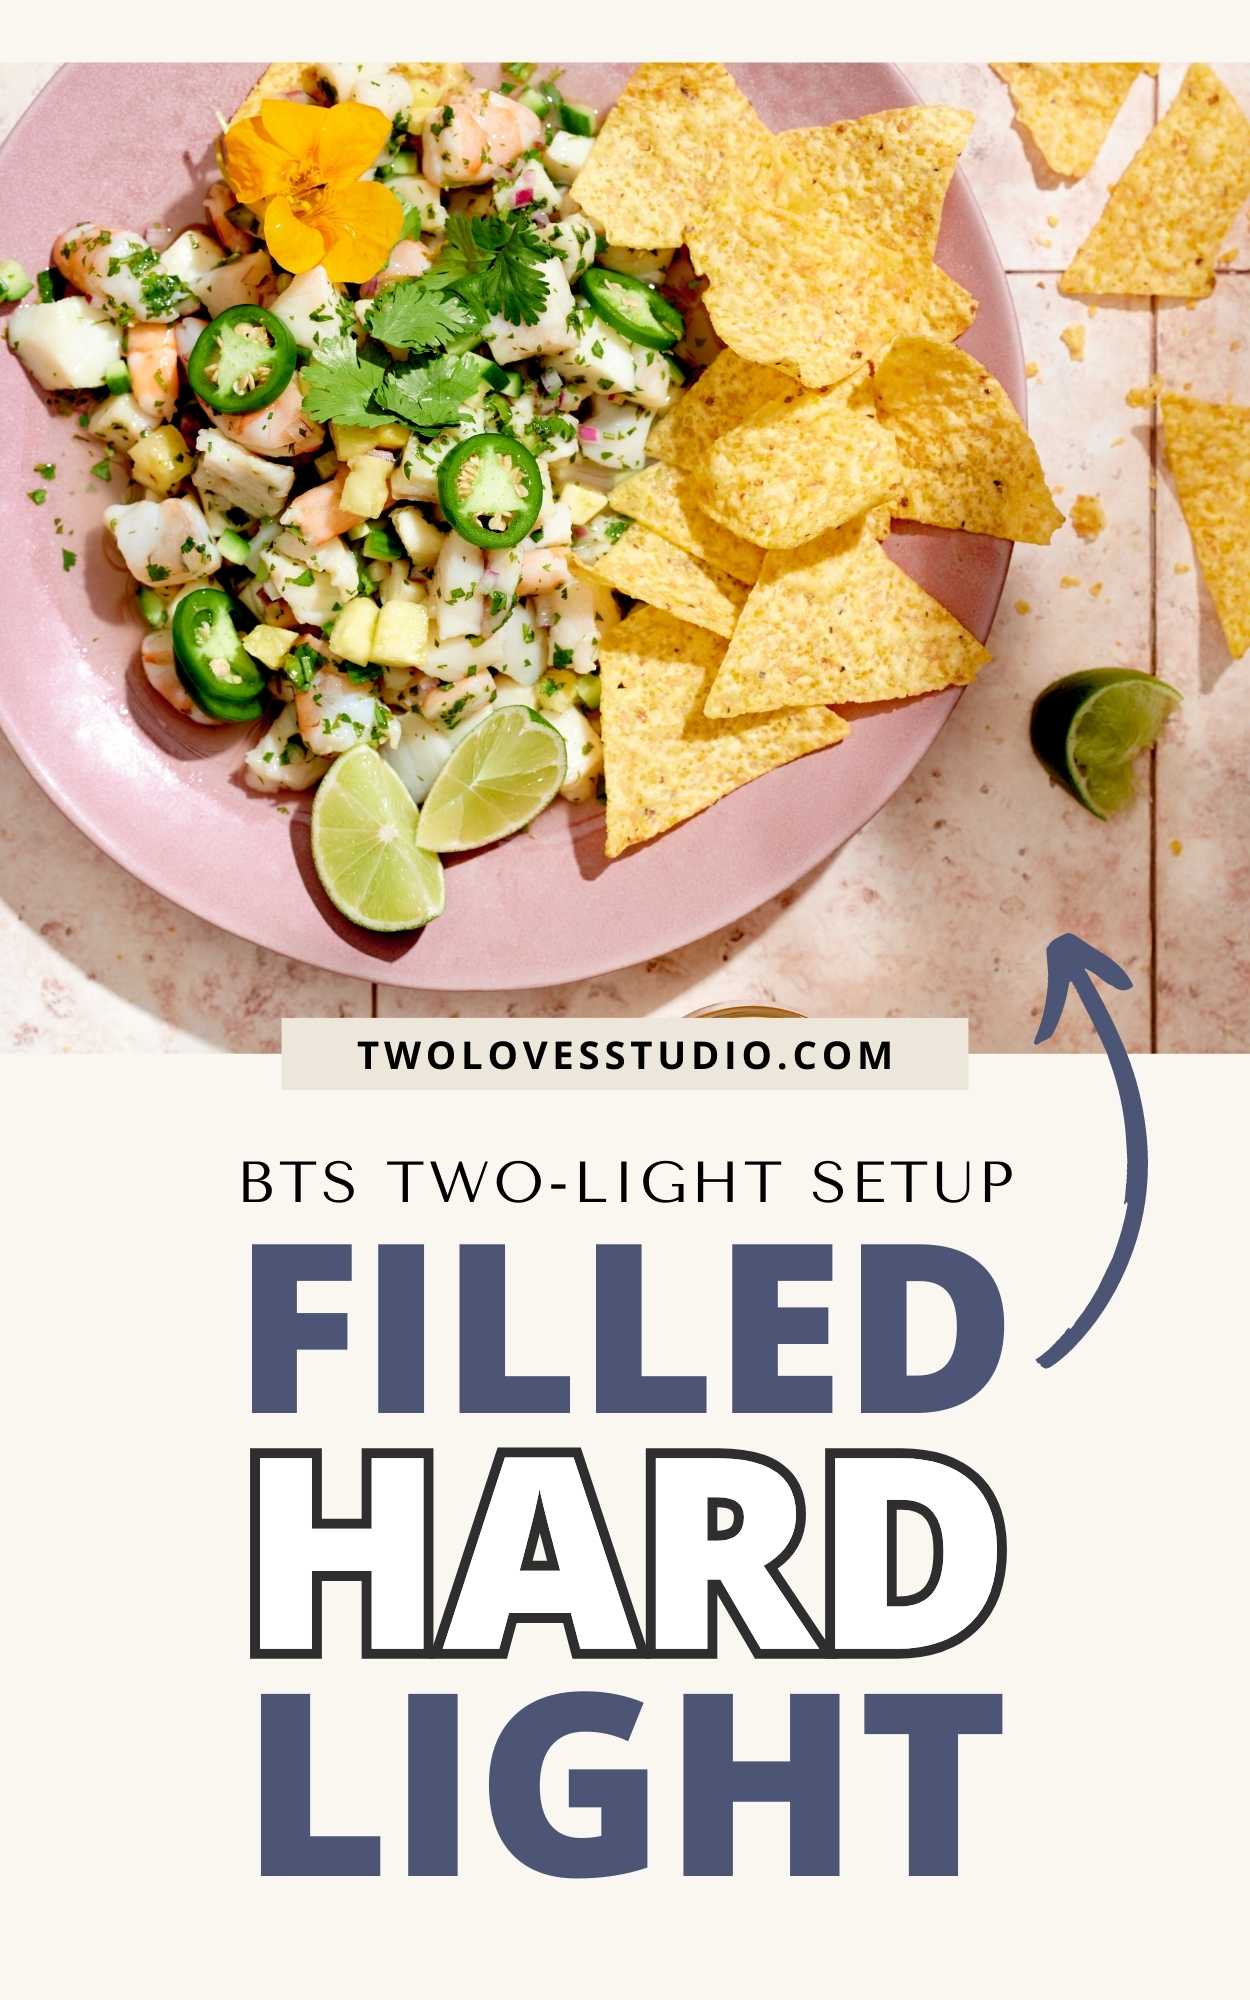
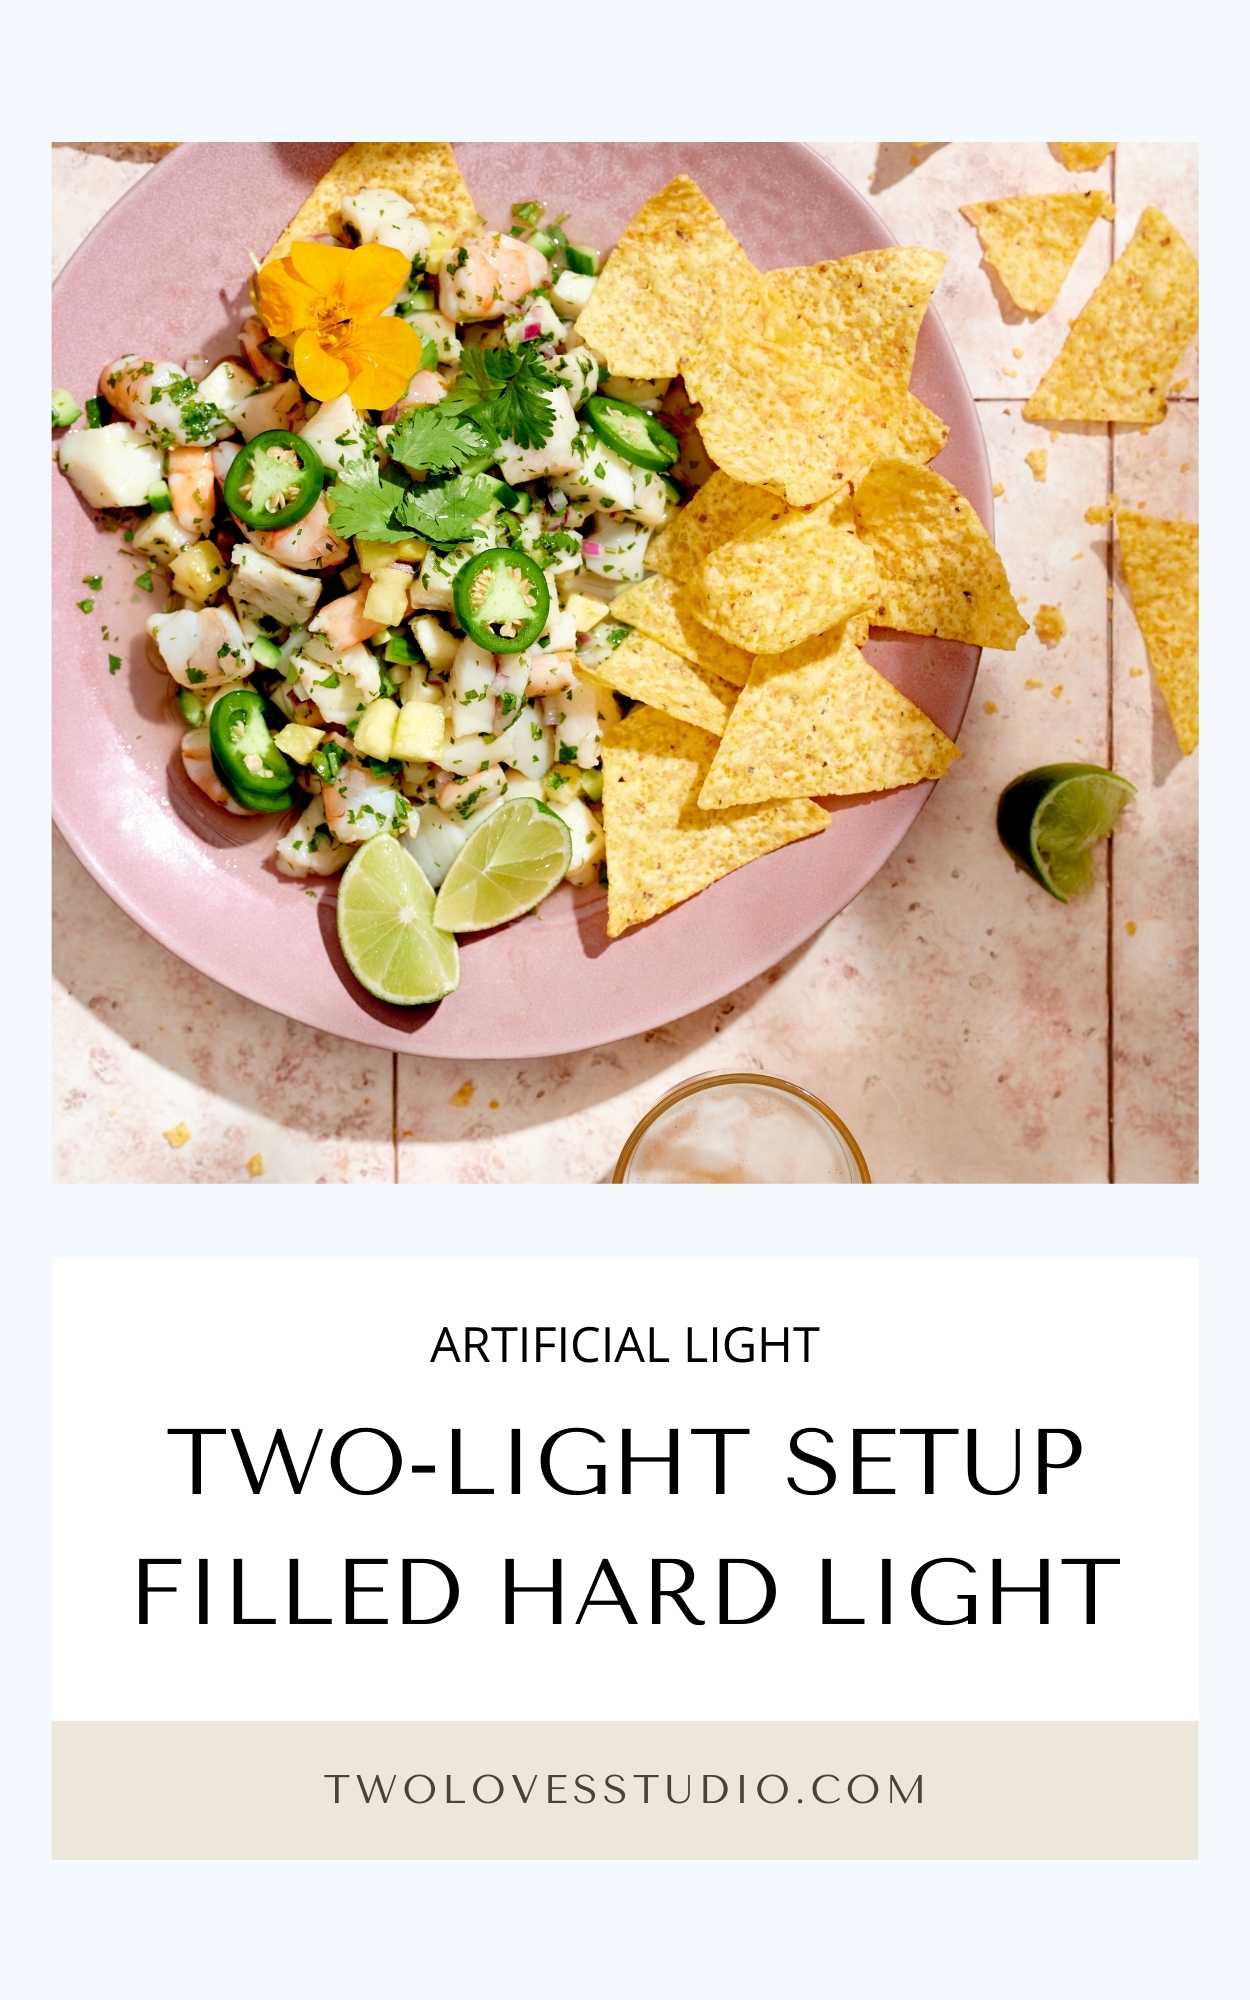
Hard light food photography has become more and more popular and it’s not hard to see why — it’s beautiful!
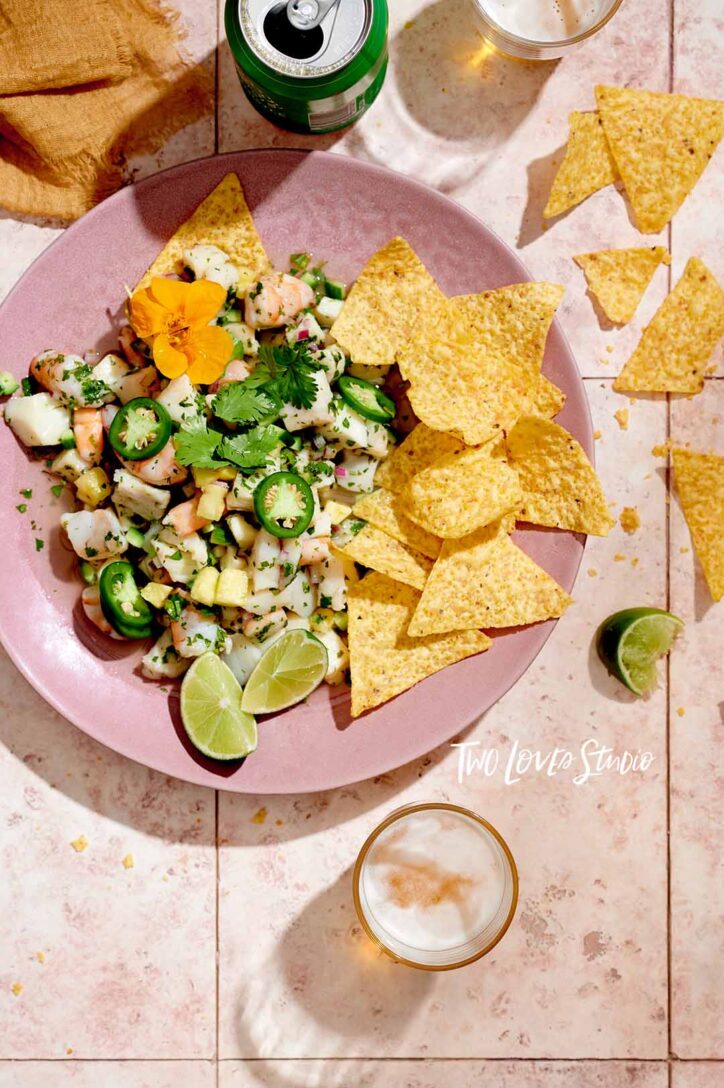
This post is an advanced lighting tutorial for those wanting to create filled hard light for their next photoshoot. I’ll be using my Profoto Strobes and a few modifiers to get this look.
Prefer to watch instead? Check out my YouTube video.
Gear I Used to Create This Filled Hard Light Shot
I tend to mostly be a minimalist when it comes to my gear or lighting setups, but it’s also important to challenge yourself with larger, more intricate setups.
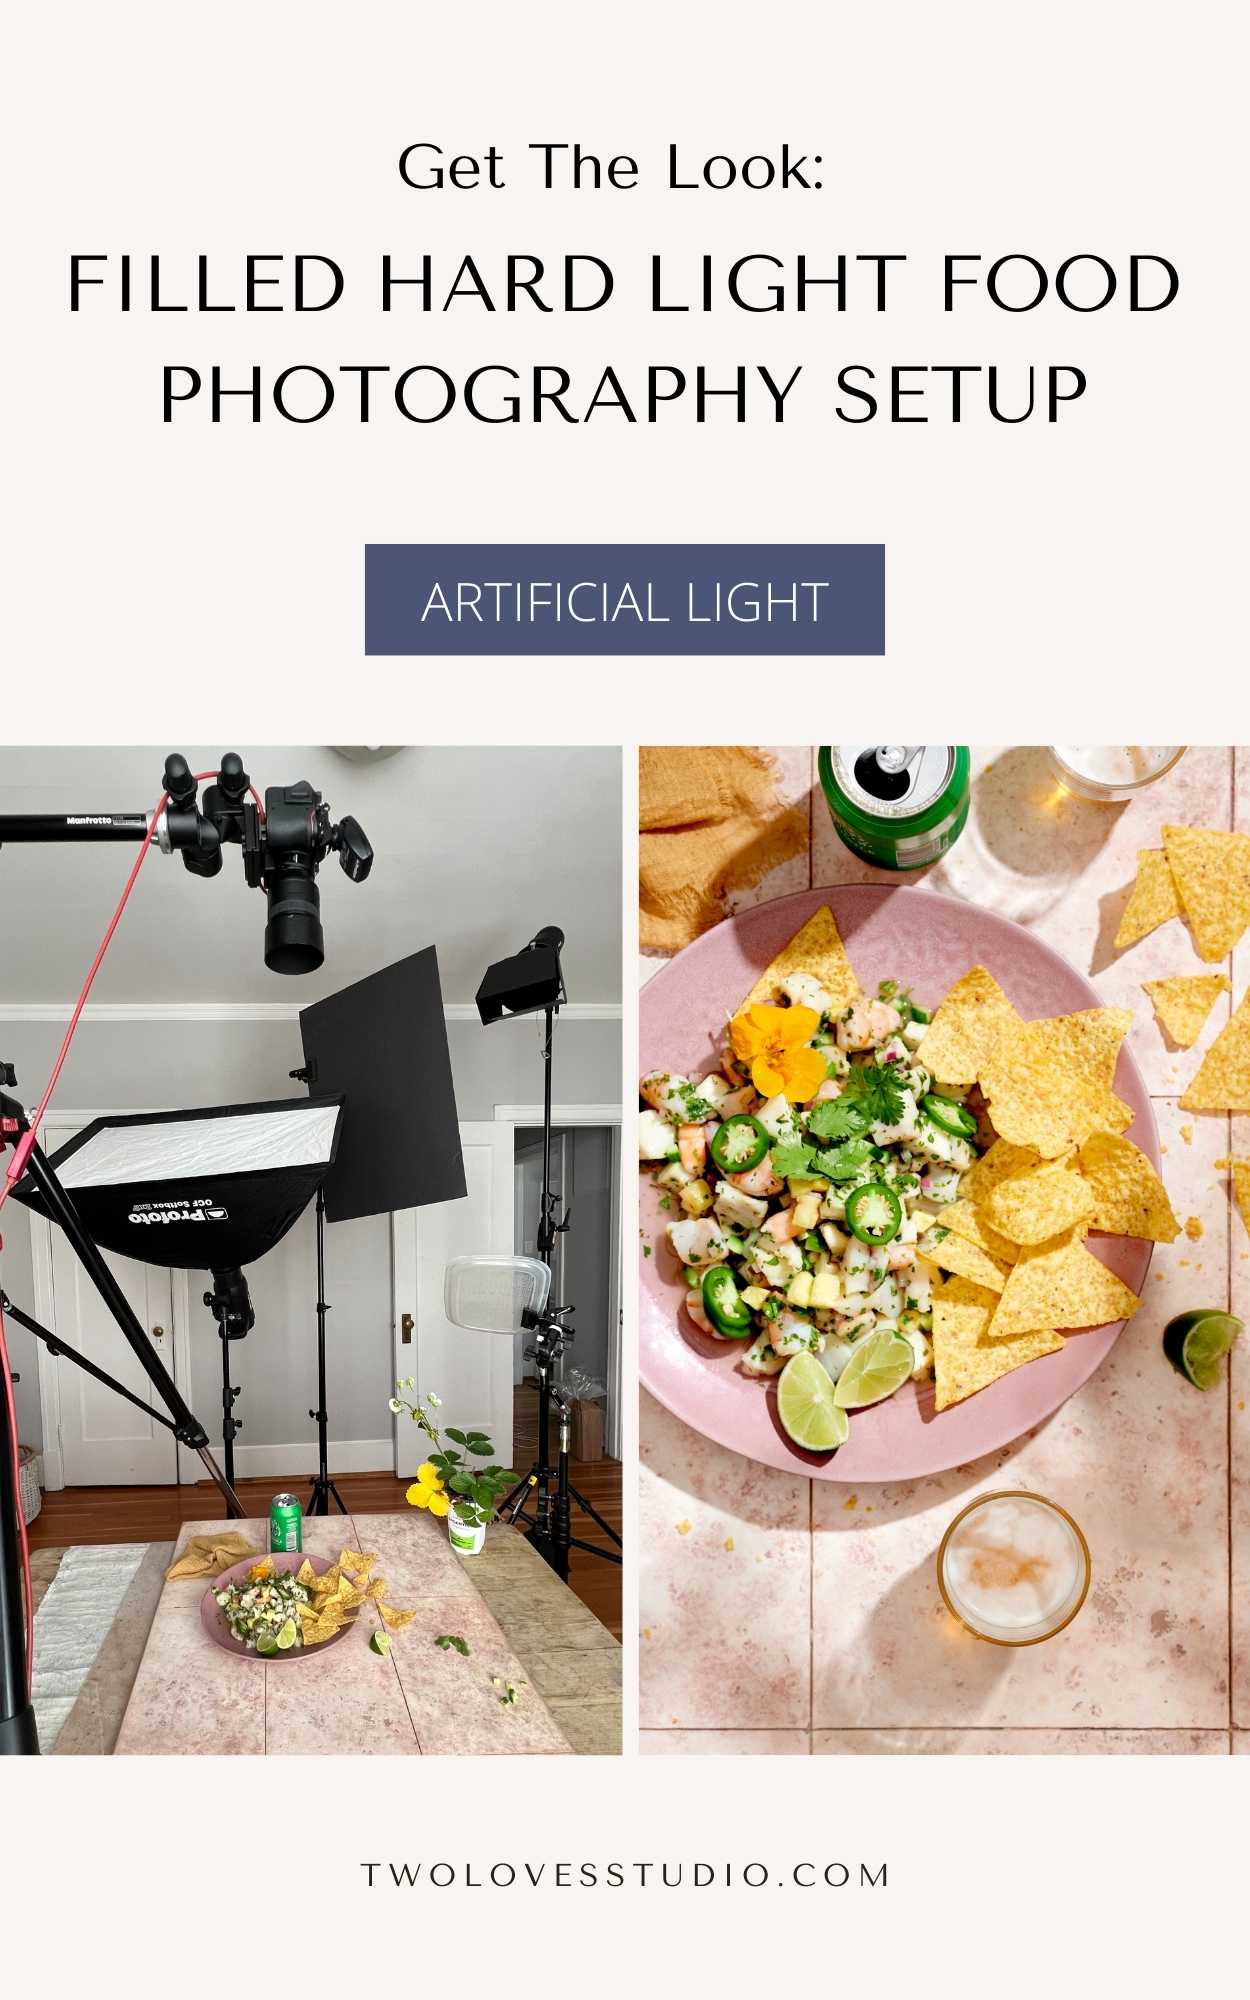
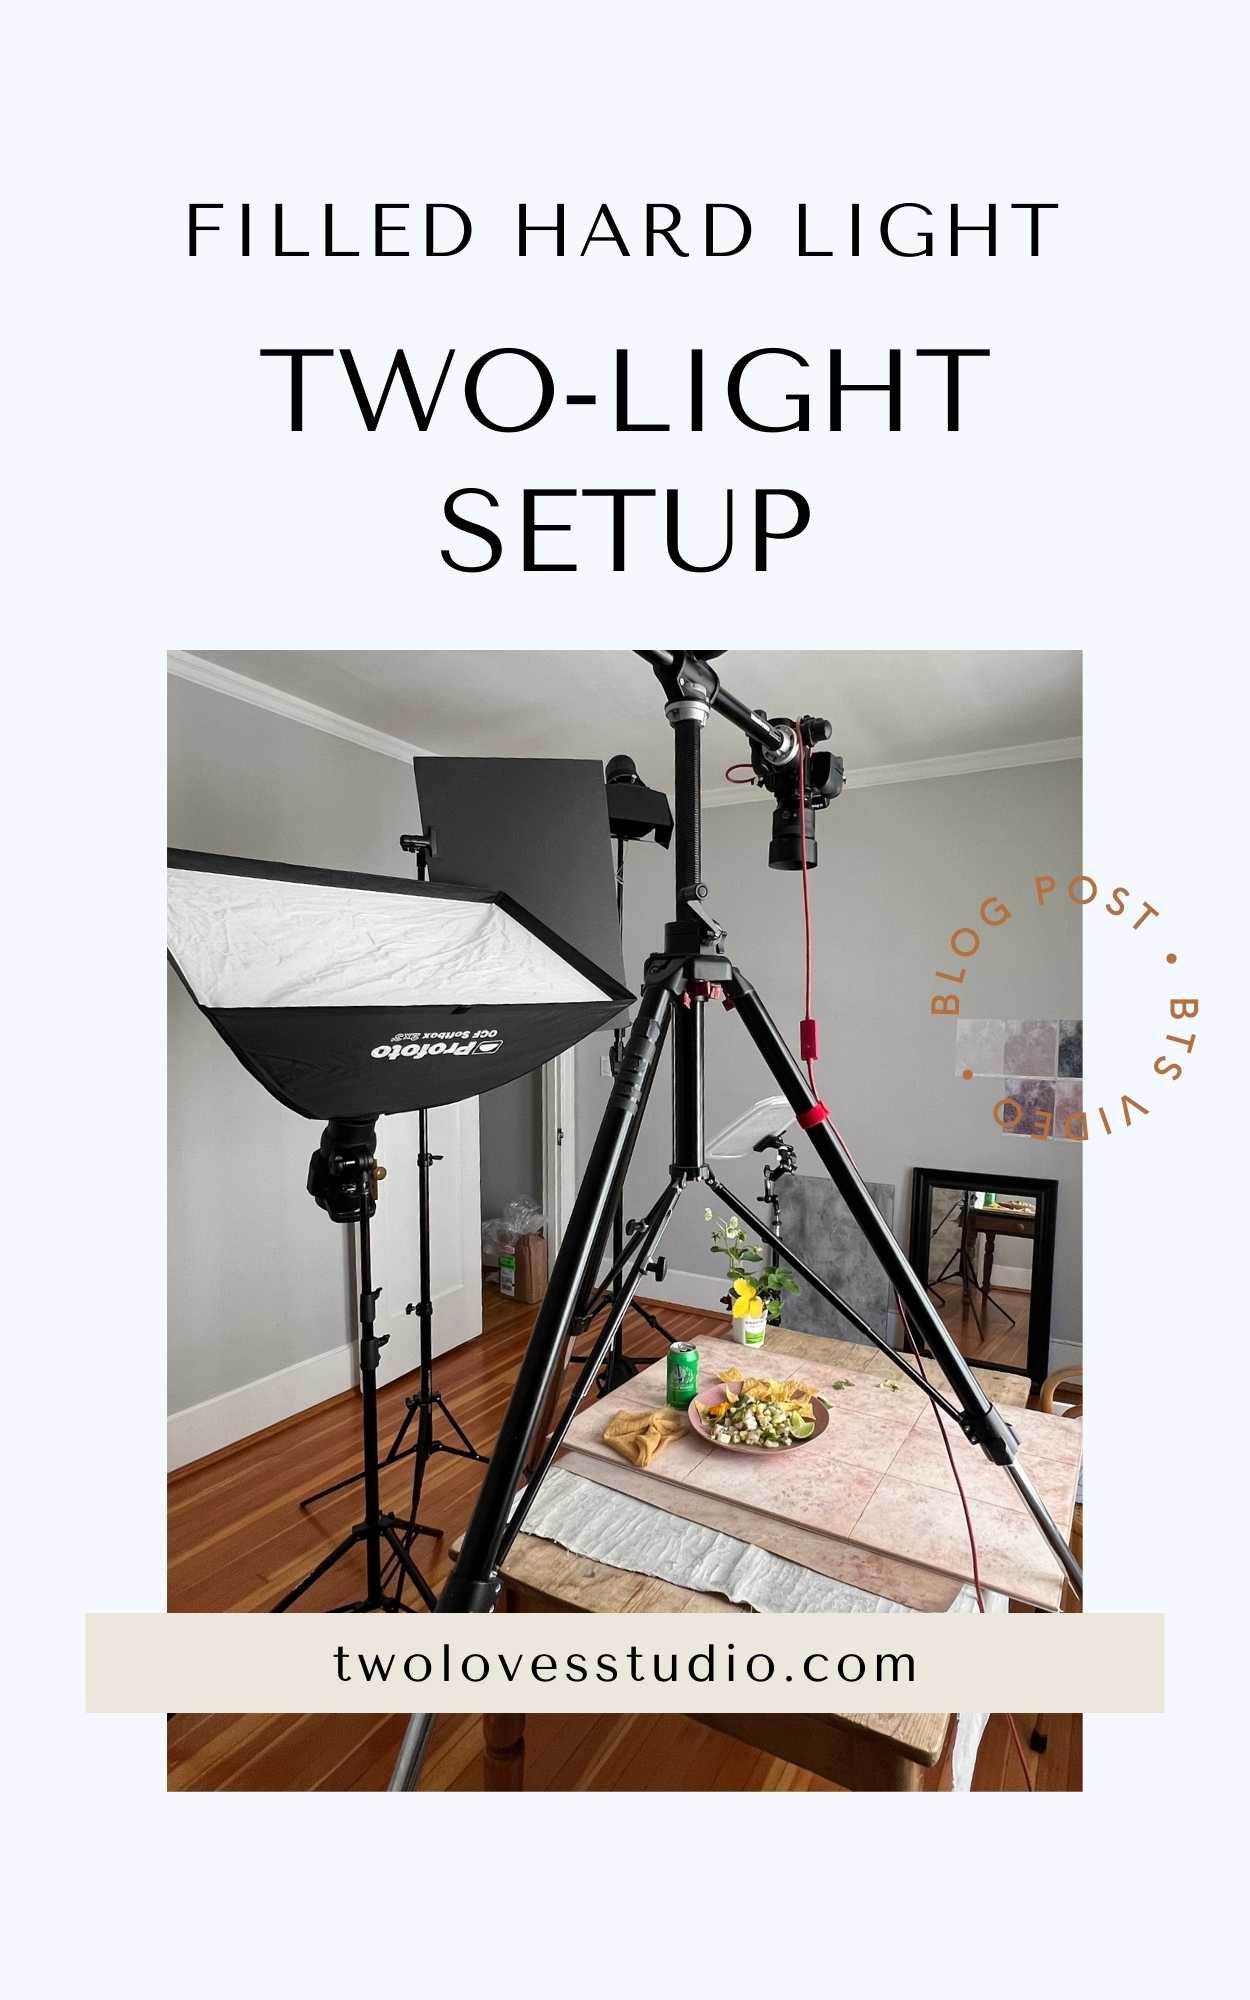
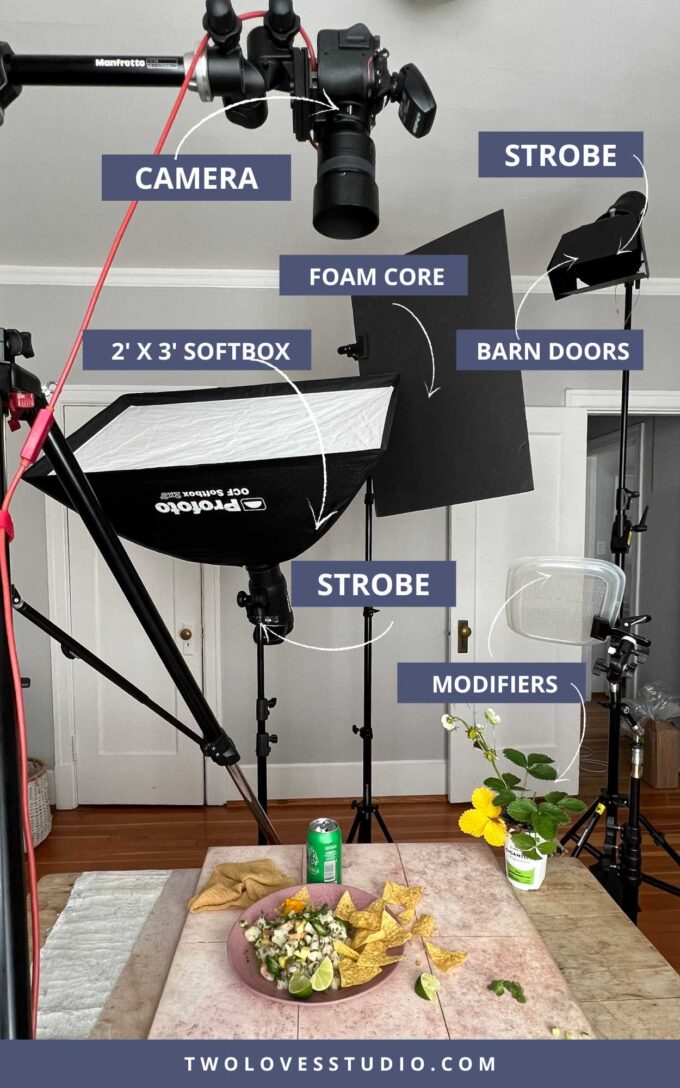
Here’s a list of lighting gear items and modifiers I used for this shot:
- Profoto B10X 250 w/s + Profoto B1 (discontinued)
- Profoto 2′ x 3′ Softbox
- Aputure Barndoors with Honeycomb Grid
- Manfrotto Boom Stand
- Strobepro 7′ 2GO Lighting Stands
- Black Foam Board
- Plastic Lid of tupperware container + indoor plant
The main reason that we are using two lights here is to help ‘fill’ the hard shadows. Hard light can often have deep, contrasty and unforgiving shadows.
What is Filled Hard Light and Why do we Fill it?
Hard light is a type of lighting and is categorised by shadows that have ‘hard edges‘. This happens when the transition between the light and shadowed area is abrupt. It creates a defined edge or ‘hard shadow’.
Side note: Hard light isn’t always ‘harsh’. Calling lighting ‘harsh’ is a judgement call. It’s not a type of lighting. The correct term is hard light.
The best way to think about hard light is in the midday sun on a clear sunny day. The shadows on the ground have a hard edge, and the shadows are usually deep, (unless filled!)
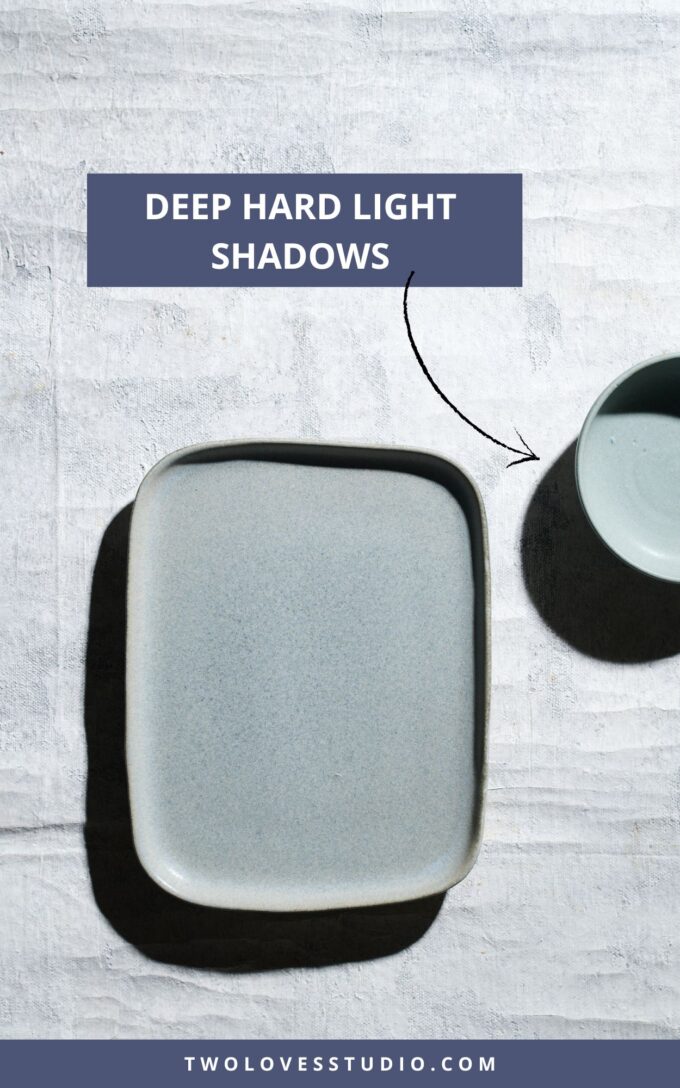
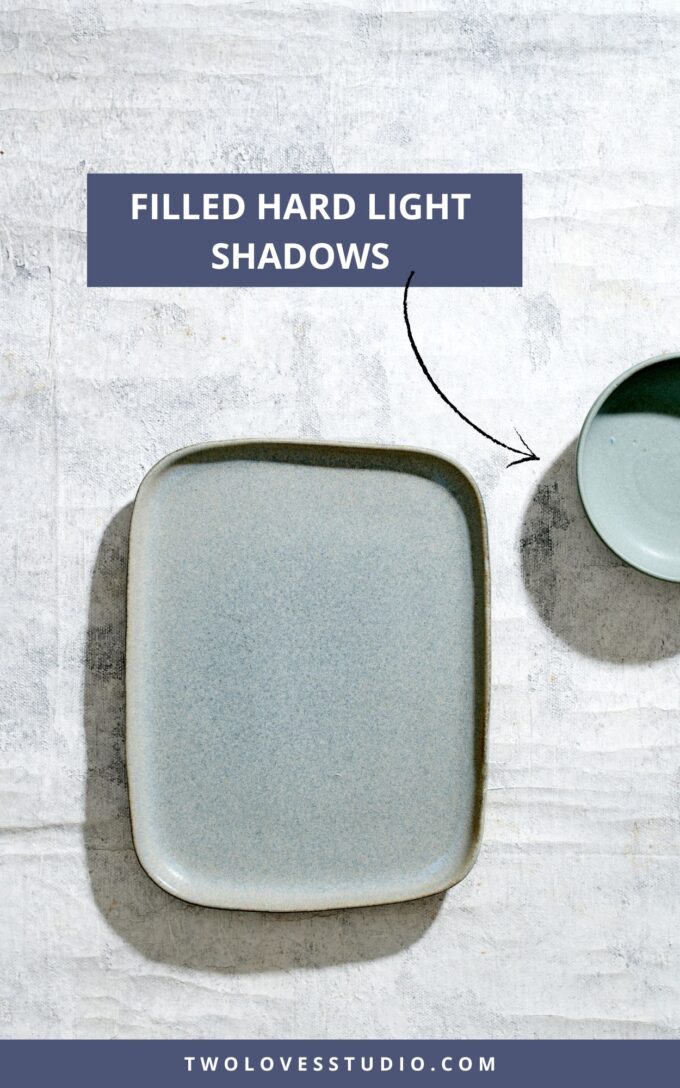
Hard light can be both filled or unfilled.
When we ‘fill’ hard light, the shadows essentially become lighter because we are using light to ‘fill’ or bounce into those areas.
If you’ve ever sat under a tree in late summer, surrounded by dead grass or concrete, you’ll notice the shadows feel lighter — because they have been ‘filled’.
Using Modifiers to Create Filled Hard Light Food Photography
People often refer to hard light as ‘harsh light’ but hard light isn’t always harsh. The lighting in this shot isn’t harsh feeling. It’s quite calm and warm feeling thanks to the filled shadows.
If you’re after a bright summer feeling, dappled-filled hard light is a great way to light your photo.
Let’s go through the lighting modifiers I used to create hard light food photography.
Aputure Barndoors with Honeycomb Grid
The barn doors are used to shape light. Often if you use a bare strobe, the light tends to shoot out in all directions. You use the flaps on the barndoors to control the shape of the light to control spill.
I’ve used it here to create a very concentrated, rectangular beam of light.
Paired with the Honeycomb Grid, I can control the amount of light.
Plastic tupperware Container Lid
This is literally the lid off a container of flatware (props) and you can think of it as acting like a diffuser. At its height and position, it’s creating very slight diffusion to help soften the light coming through the barndoors.
My typical diffusers or a sheet cut too much light out.
Indoor Plant
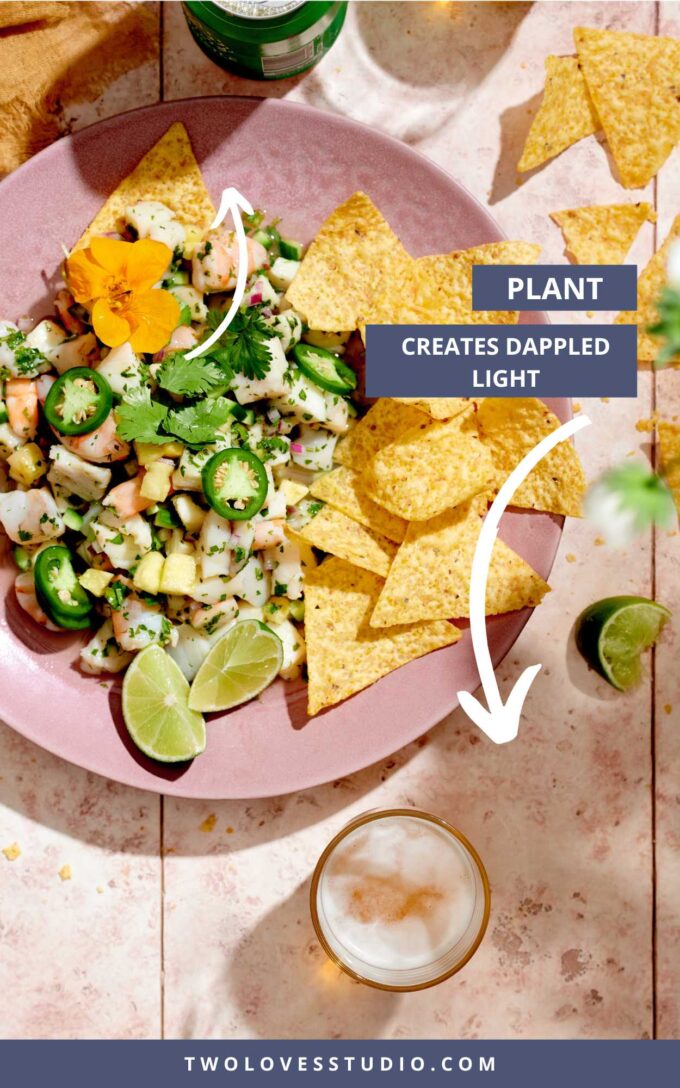
I used a strawberry plant that I had left over from another shoot and placed it on the side of the frame. The idea here is that the light shoots through the plant’s leaves to create dappled light.
Just like you see sitting under a tree in summer. You can use any indoor plant that you have, small sparse leaves work the best.
Second Light with Profoto 2′ x 3′ Softbox
The idea behind the use of the second light is to create ‘fill’.
Now, I didn’t want to point it straight at the scene because I don’t want it to be the key light. Pointing it up at the ceiling, the light will indirectly bounce off the ceiling and onto our scene — creating fill light.
Where to Position the Lights
Now that we’ve covered what hard light is and the modifiers used to create filled-dappled hard light food photography, let’s talk about the placement of the lights and modifiers
The Key Light: Profoto B10 250 w/s with Aputure Barndoors
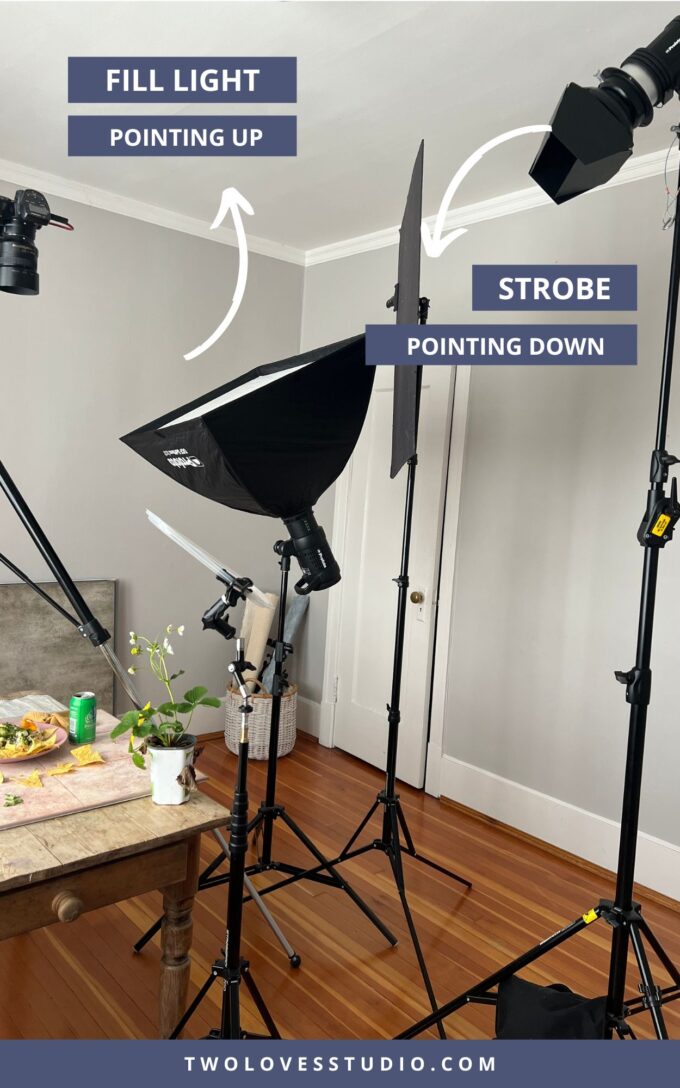
I placed the key light for hard light food photography high above your scene and pointed down towards the setup.
I had my lighting stand extended fully at 2m (6.5ft) tall — almost touching the ceiling. It was approximately 1.5m (5ft) distance from my scene. Positioned to the top right of the frame for directional lighting.
The black foam board is to further control spill light and is just in front of the key light without being so close it cuts out light completely.
The Fill Light: Profoto B1 (discontinued) with Profoto 2′ x 3′ Softbox
We also positioned the fill light to the top of the frame, but on the left side. The most important position here is that the light and softbox are pointing upwards towards the ceiling.
The light will bounce off the ceiling and create ‘fill’ on our scene and creating light, hard shadows.
The power of the light is also very low. It’s below half the power of our key light.
Modifiers: Tupperware Lid + Indoor Plant
I placed these to items closer to the scene to act as a very light diffuser (the tupperware lid) and to create dappled light (strawberry plant).
I played with the position and height of the strawberry plant so as to create dappled shadows in the bottom corner of the frame and not over the hero food.
Further reading: if you’re interested in reading more about Lighting setups –
How Learning Low Key Product Photography Improved My Creativity
Photography Flags: Add Stunning Dimension & Contrast to Your Food Photos.
Softboxes For Product Photography: What You Need to Know.
Create Dappled Light Using a Speedlite: How to Guide.


