This post may contain affiliate links from products and services we love and trust.
I’m excited to share my experience in flash for low key product photography with you in this post. At the beginning of my photographic journey, I was entranced by using natural light, shaping and controlling it. As I progressed, I believed it was the more noble, honest approach.
In complete truth, I admit that I was absolutely intimidated by the thought of using artificial light – the technical gear, cost of it, everything about it. My mind was closed. I felt anxious that I still had so much to learn in those early stages and that learning something new seemed almost arrogant to me.
Learning is linear, you don’t need to be perfect in one field before trying another.
After my first paid shoot, my mindset changed. The brief was ‘Summer Salads’ with a light and airy mood – it was the middle of winter.
I quoted for a half-day shoot and it ended up taking me a week of chasing light around my house in the dullest, stormiest weather ever. It was a nightmare. I found the situation to be so stressful that I decided I couldn’t let that happen again.
My busy family life with kids in high school and shortened daylight hours in winter meant that I had brief time slots for shooting, whilst my growing passion meant my frustration was off the scale. Has this ever happened to you?
A Few Tips to Remember on Low Key Flash for Product Photography:
Finally, I decided to take the plunge after having a look at Joanie’s The Biteshot, free online tutorials. I highly recommend her reasonably priced online course – Artificial Academy. You can start learning flash photography with quite cheap gear. Who knew!
After I completed the course and practised A LOT with personal projects, I found I could shoot anytime, in any weather! Yay!
Of course, there were times where I did still make rookie mistakes and while they were not disastrous, they did cause stress and cost time.
If you are struggling with the same things, here are a few of my tips:
The Importance of an Equipment List
I’m fearful of forgetting something, looking unprofessional or delaying a shoot. While this hasn’t happened to me yet there have been a few close calls. Below are my tips on how to combat this.
- Make a checklist of all required equipment for a shoot, then tick them off every time you go out on location.
- Organize carry cases before you go to a shoot.
- Invest in extra batteries.
- Don’t underestimate the amount and weight of equipment.
- Remember to bring chargers and power cables on shoots.
My Equpiment List for Low Key Product Photography
- Canon EOS1DX camera
- Canon Speedlite 430EX II
- Godox Speedlight V860 II
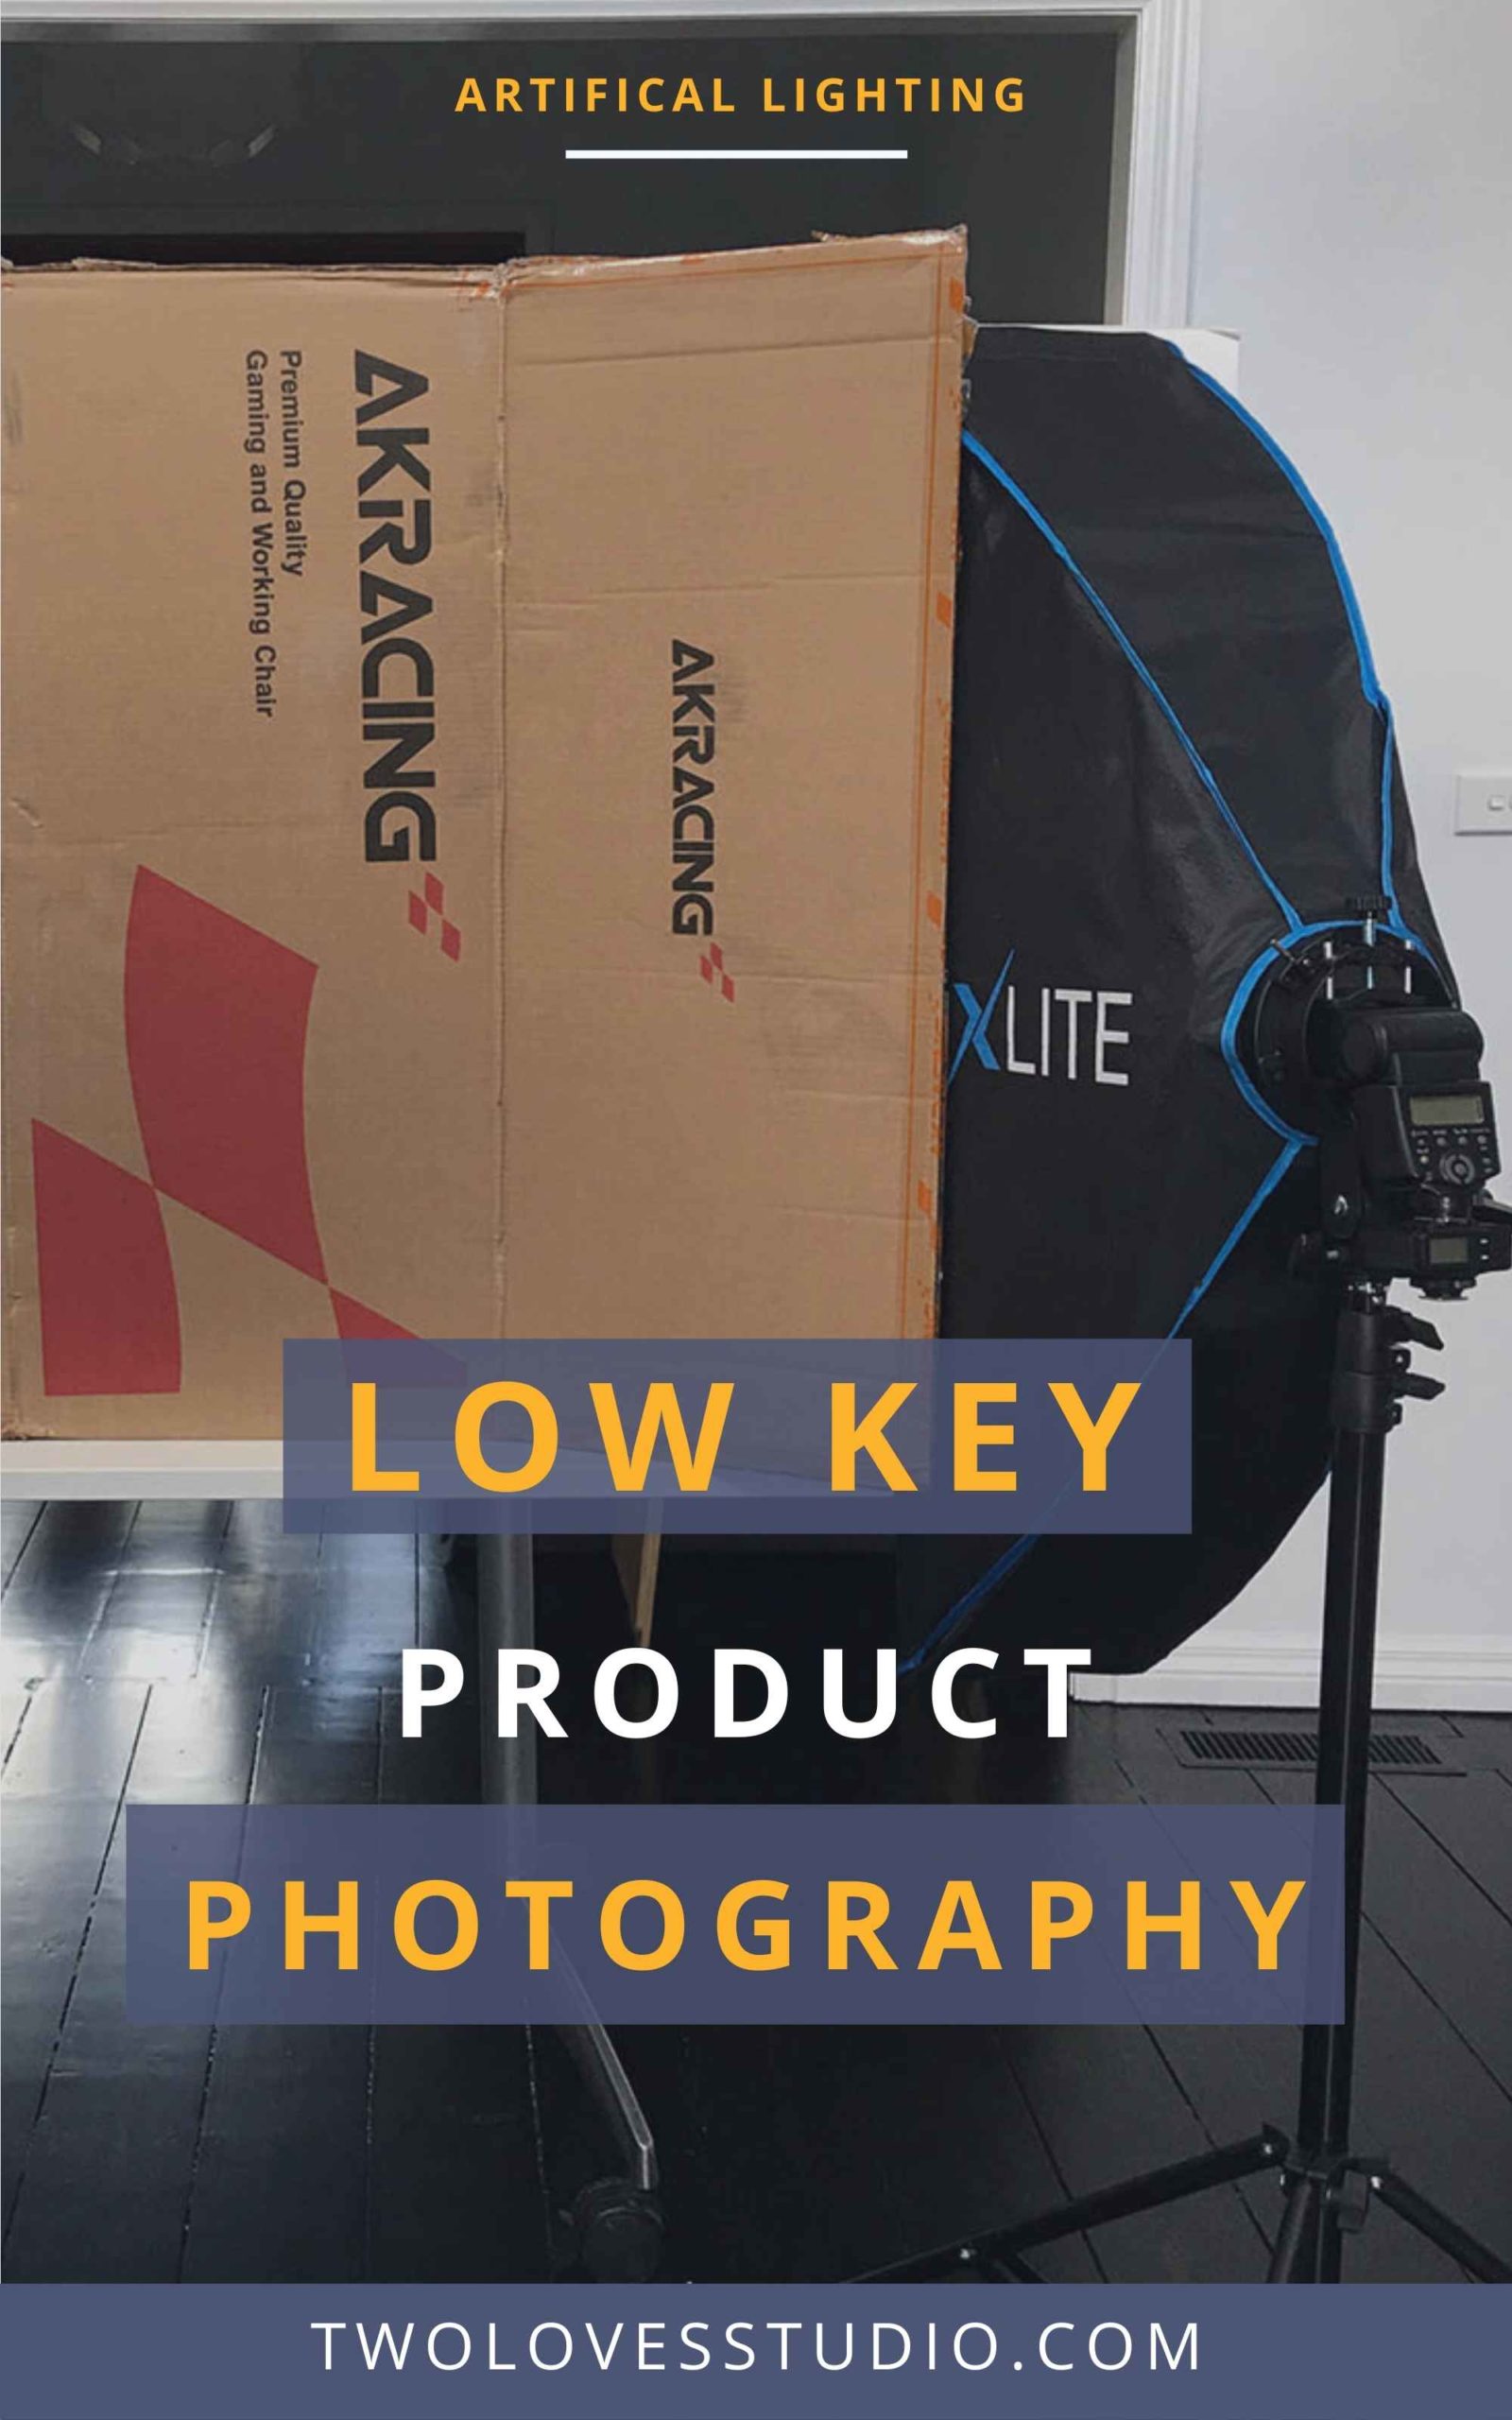
- Xlite 25x100cm Strip Softbox
- Canon EF100mm f/2.8 Macro lens – ISO 100 f/11 1/200s
- Sigma Art Series 50mm f/1.4 lens – ISO 100 f/6.3 1/200s
Using Rim Light to Pick Dark Objects Off a Dark Background
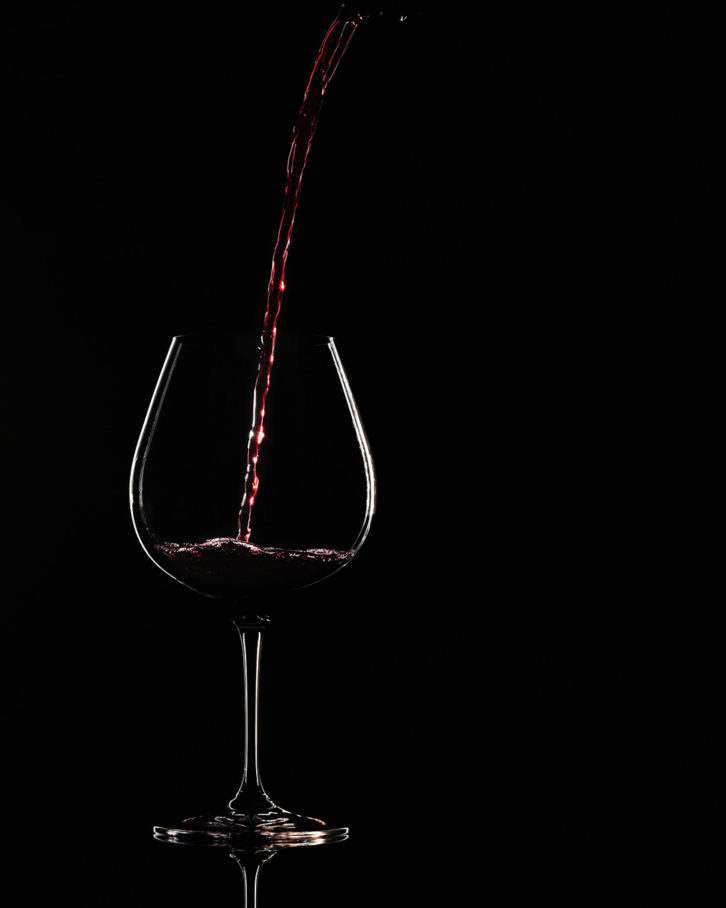
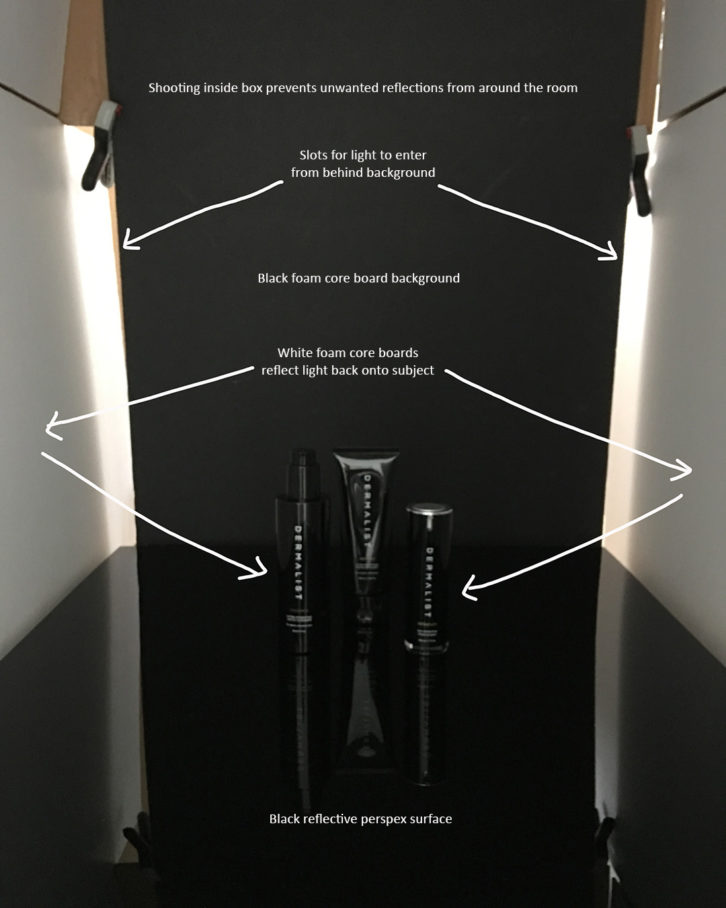
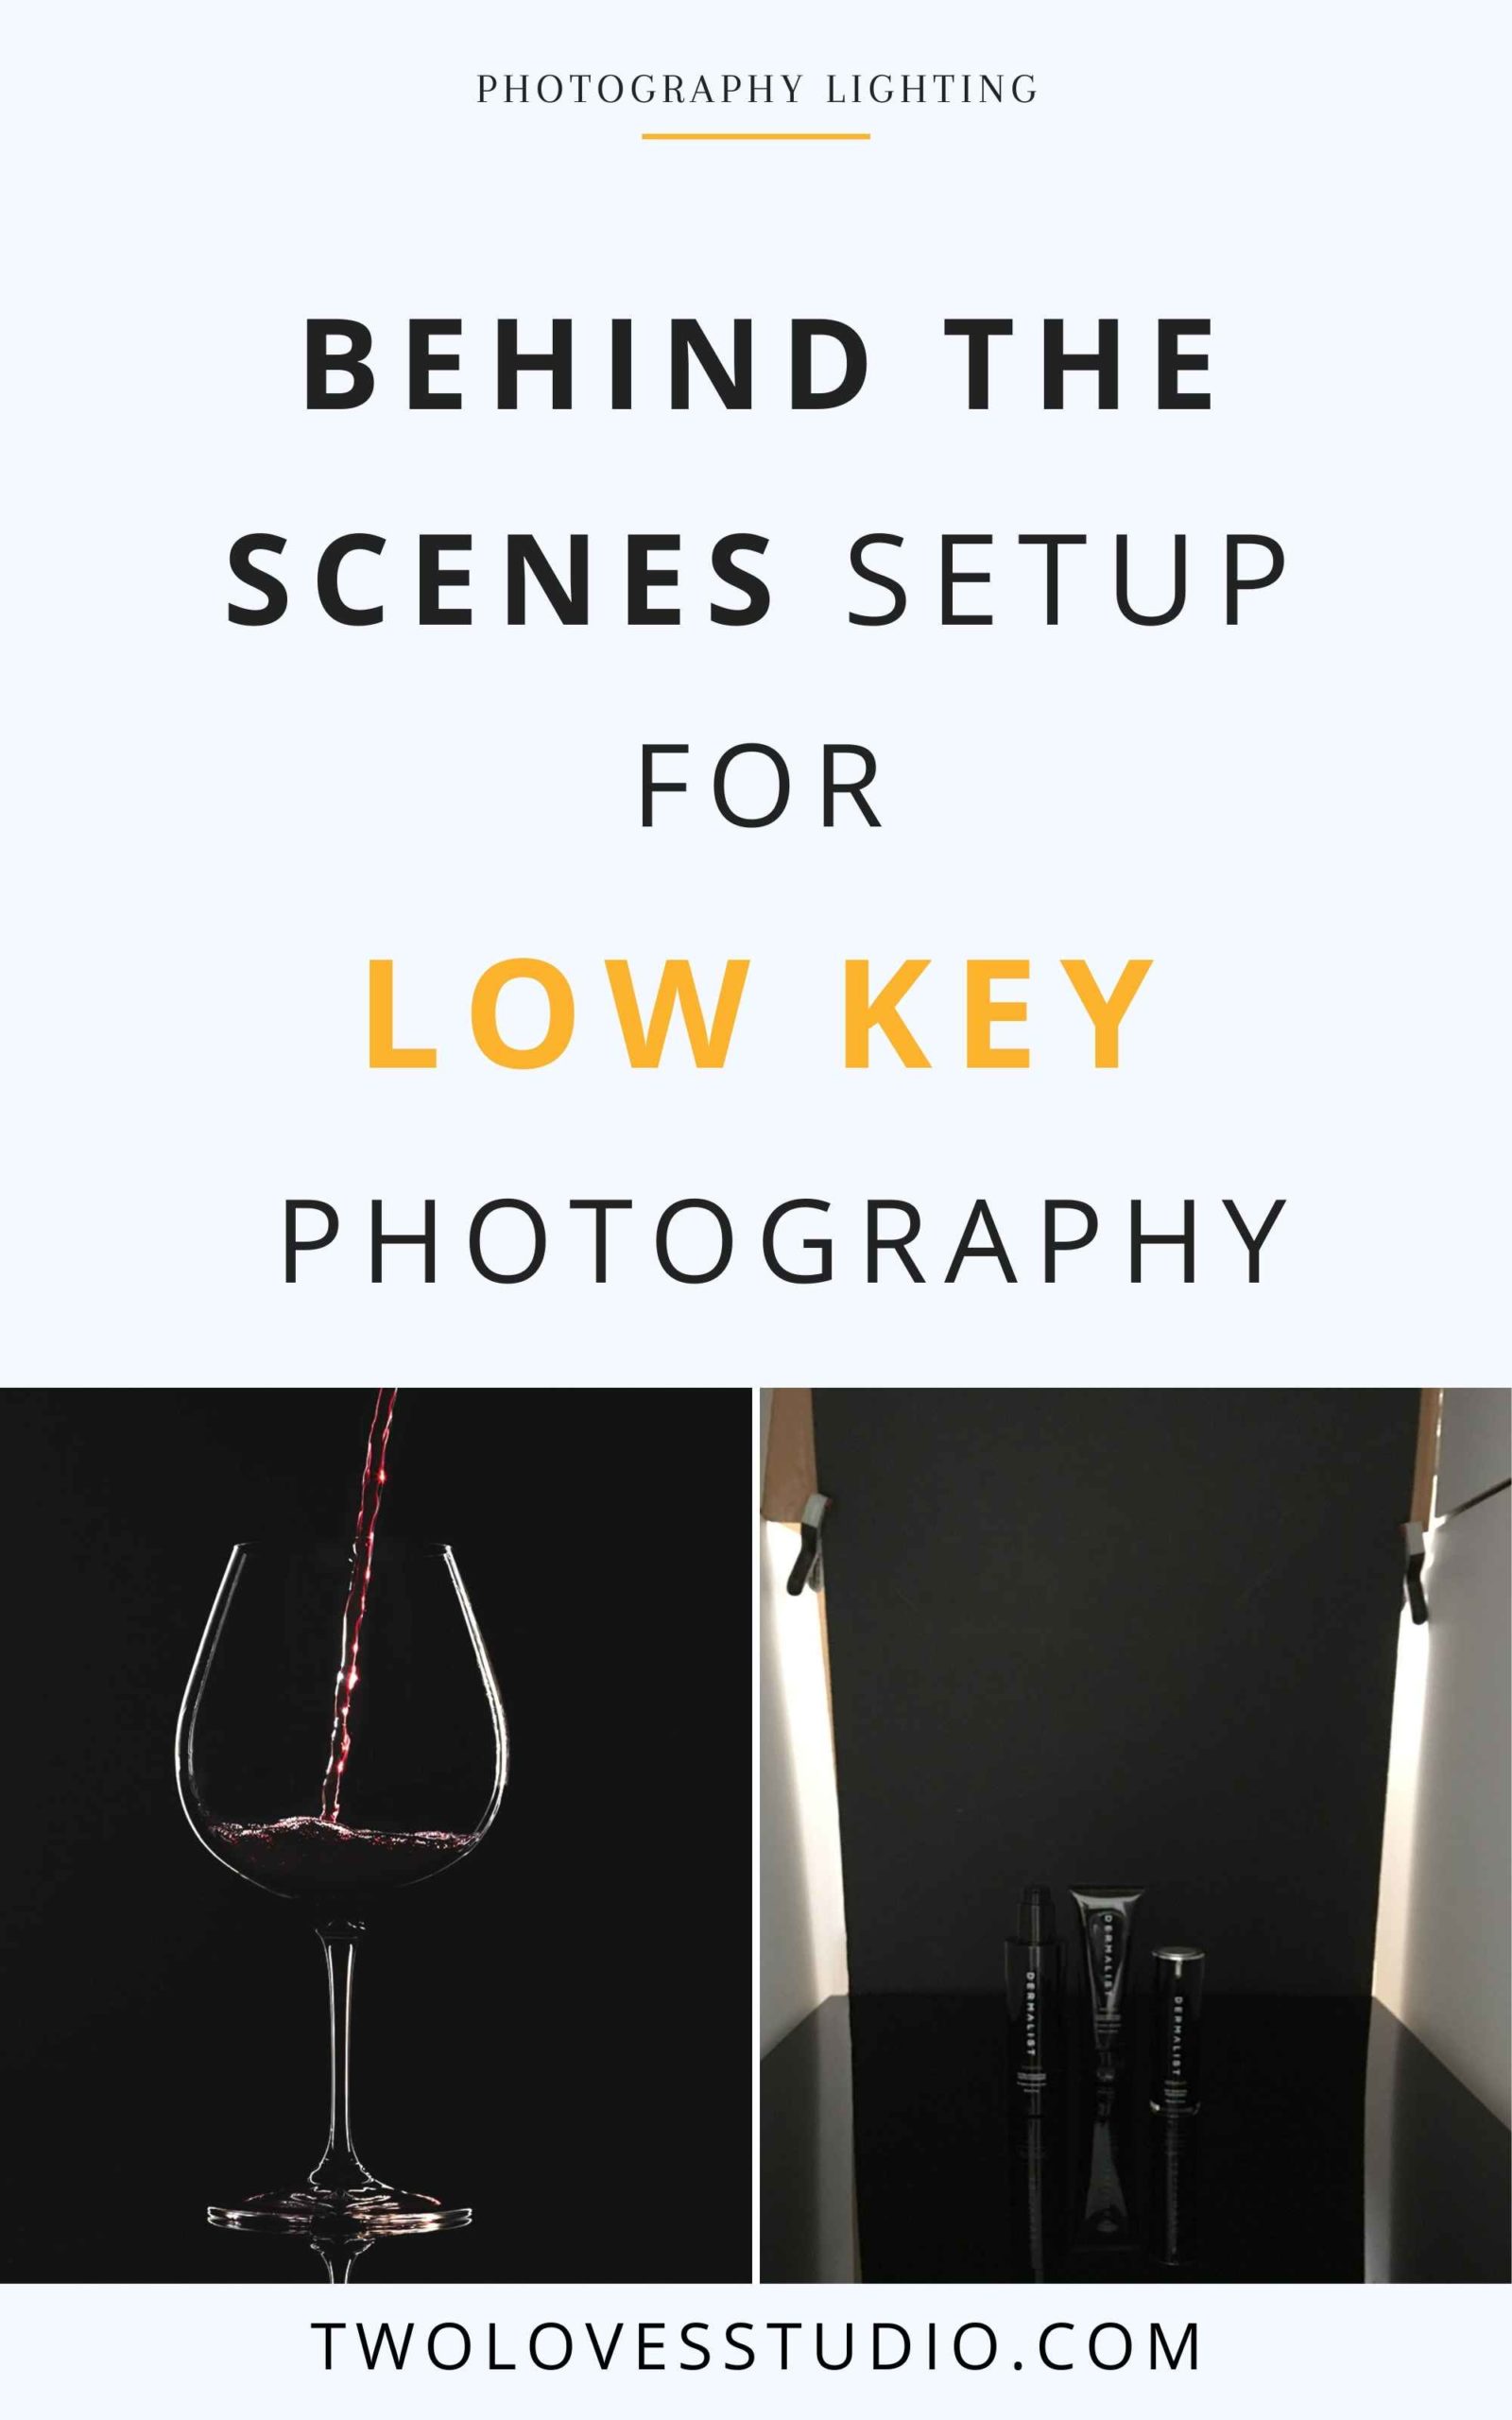
Let’s check out below, how I used what I learned shooting skincare products to create this dramatic wine shot with exactly the same setup. I learned this kind of lighting after accepting a job to create website imagery for the launch of a new skincare brand.
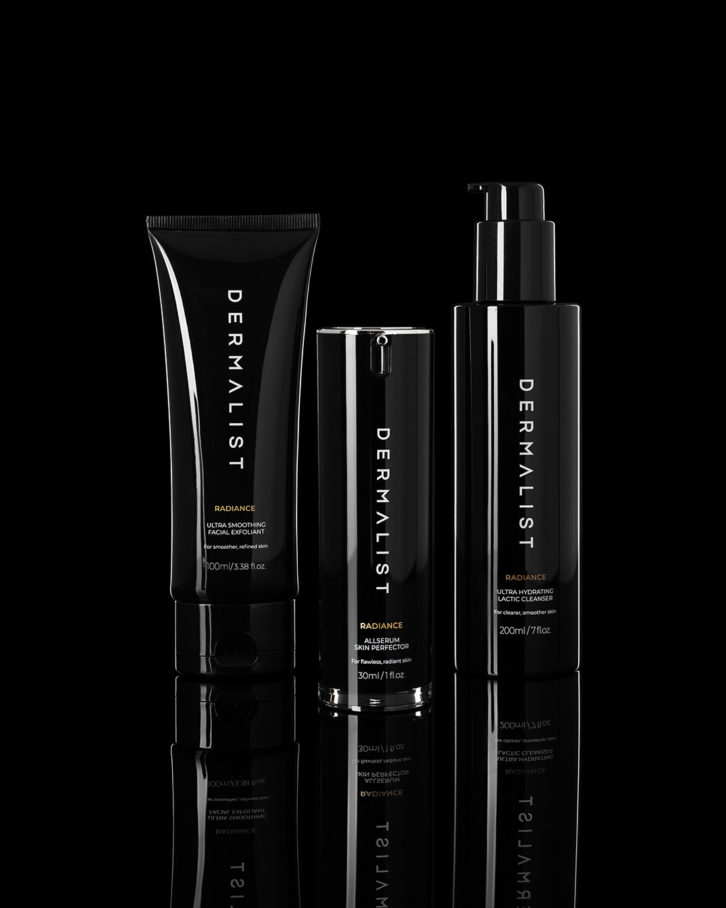
The packaging was black and shiny. The client brief was to shoot the product with a black background on a black reflective surface.
Because I had not done this kind of low key product photography with flash before, I worked out how to light the product using a mix of YouTube tutorials and inventiveness.
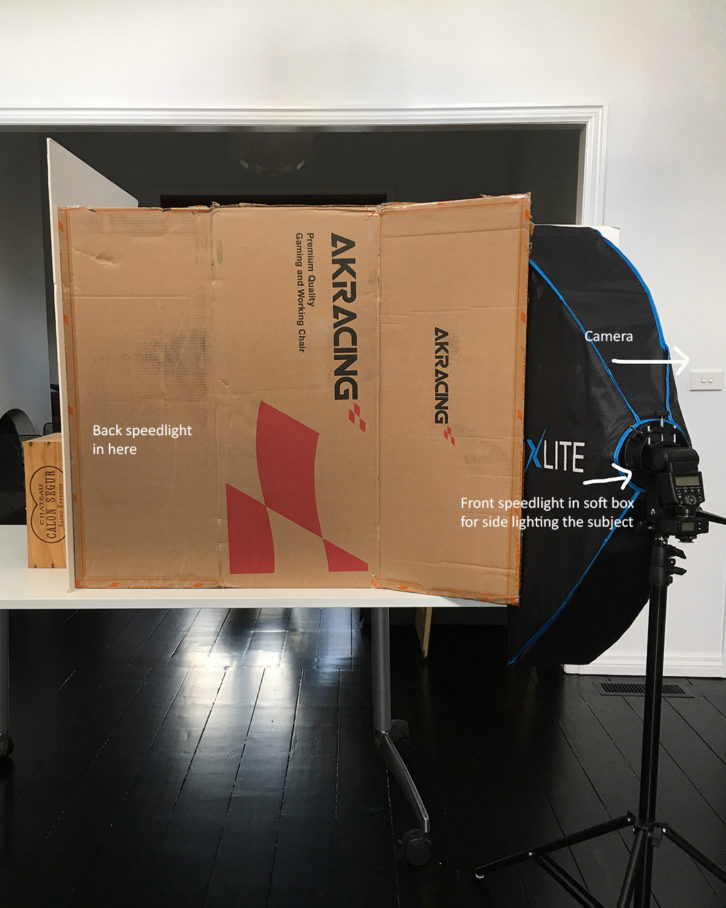
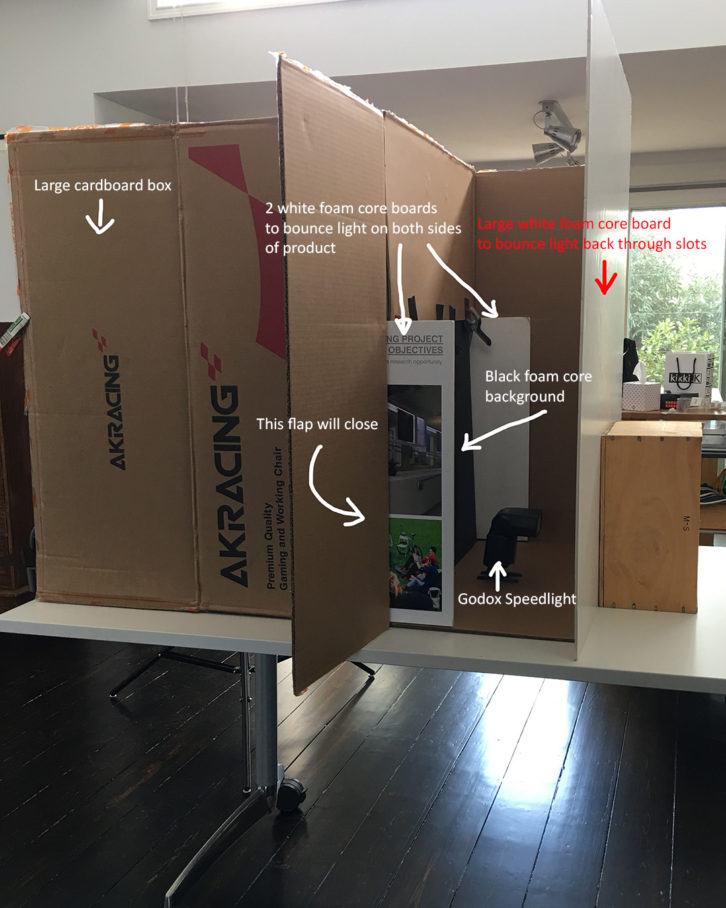
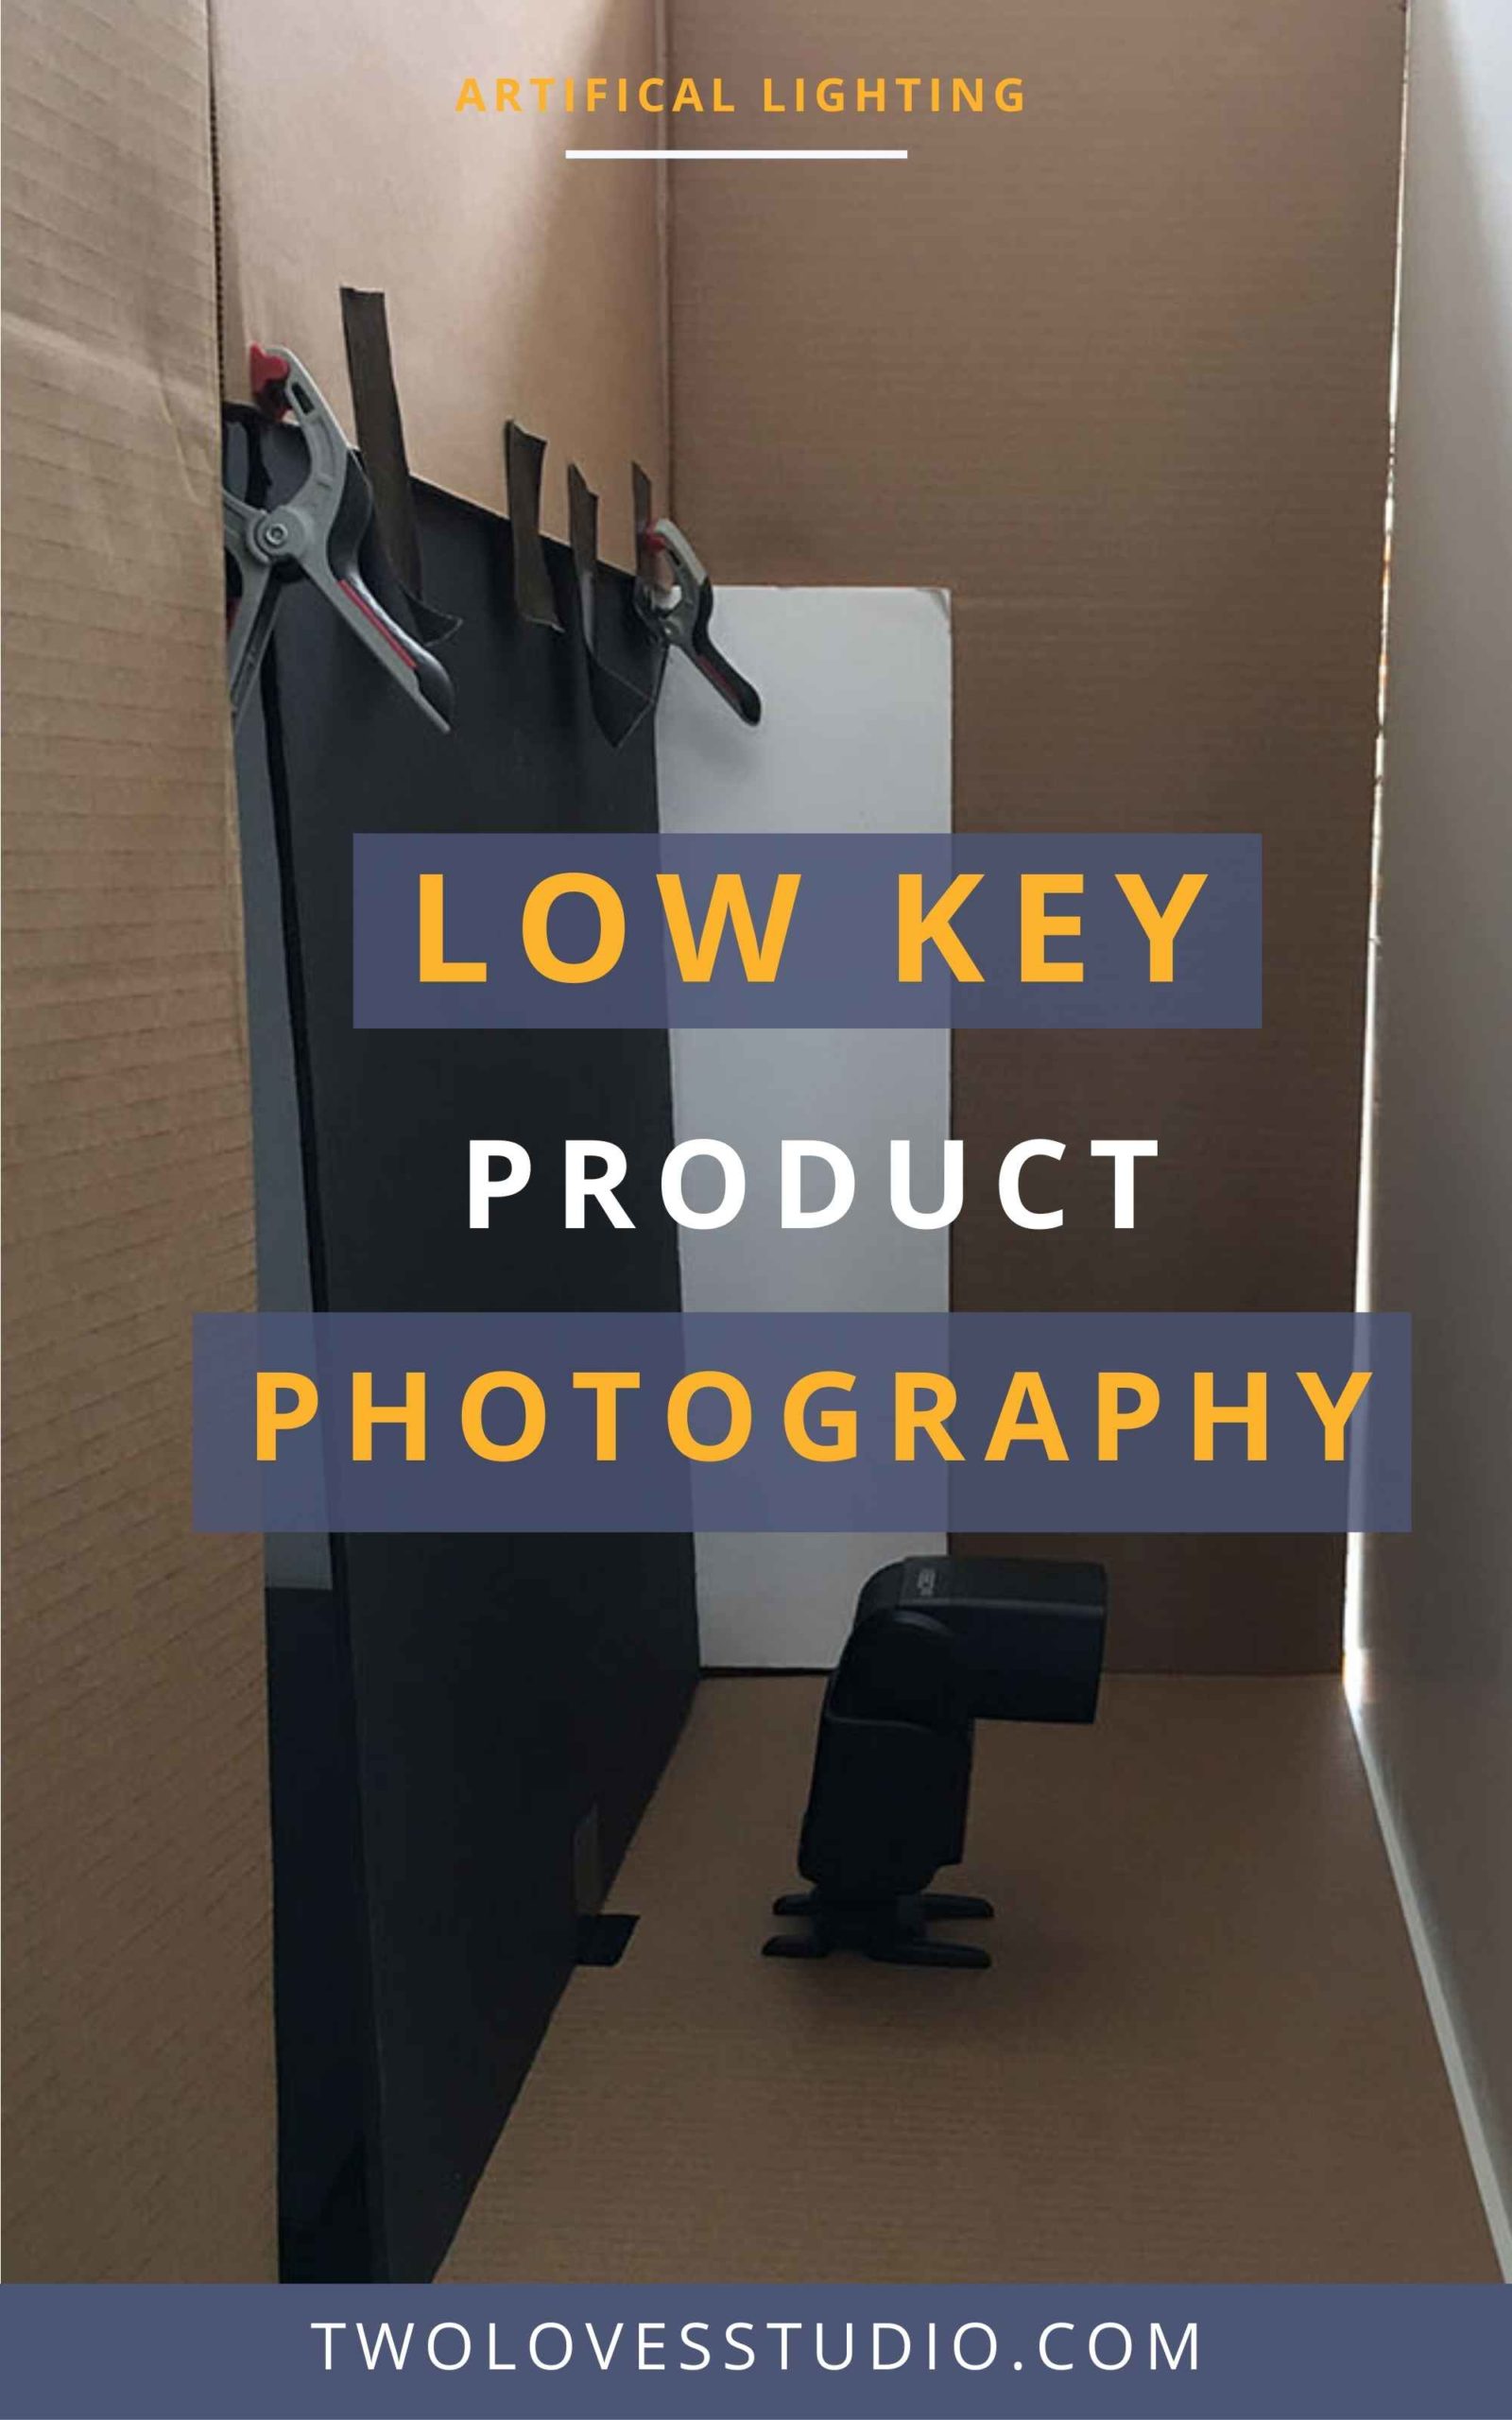
I achieved these results by using 2 speedlights along with black and white foam core boards, as well as using 1 light behind and either side of the subject for the rim light and 1 light to the left side/front to illuminate the subject.
A total of 3 light sources. At the time I had only 2 speedlights.
Practice Brings Confidence
Practice a lot, don’t underrate how putting in the hours will make you a better photographer. Putting together my flash equipment has become second nature now, and as my confidence has grown, my equipment has been upgraded. This has allowed me to carry out test shoots beforehand, rather than rolling with whatever light presents itself on the day.
I absolutely love planning how to achieve the light I want for the shot and knowing how it will look without the uncertainty shooting with natural light brings.
For example a series of dishes, I had shot over several days, with the continuity of light required for the client’s online menu left me loving the control I had which then led to more freedom and creativity in my work.
This newfound confidence and creativity led to opportunities in product photography. In conjunction with Rachel’s fantastic Retouching Food Photography course, learning to use flash for product photography has helped land me these high-end beauty product jobs where I have achieved those slick effects you see in magazines.
I would never have dreamt I’d produce work at this level, and it’s been liberating. Now my mind is wide open, and I am excited to learn and push myself more.
I now use flash in probably 90% of my work and this newfound creativity has spilled over into my food photography practice.
Further reading: if you’re interested in reading more about Lighting tips –
Simple One Light Photography Setup: Moody Black Forest Cupcake
Create Dappled Light Using a Speedlite: How to Guide.
Photography Flags: Add Stunning Dimension & Contrast to Your Food Photos.
Natural Lighting Food Photo Tips You Need To Know For Chiaroscuro Effect.
Softboxes For Product Photography: What You Need to Know.
This post was written by Therese Bourne. Thank you Therese for sharing your BTS lighting setup.
Therese Bourne
Photographer – The Urban Nest
Hi, I’m Therese, a freelance food and product photographer living in Melbourne, Australia. My work is inspired by the emotion and drama that can be evoked through light and shadow. Come say hi on Instagram.
Two Loves Studio was not paid to write this post, however, it may contain affiliate links. If you purchase an item from an affiliate link, we do get a commission on the sale which helps us run this site. Only affiliates for products/services we believe in appear on this site.


Sabrina @purple.avocado
“using a mix of YouTube tutorials and inventiveness.” I feel this SO MUCH.
As a photographer you’re often no more than a problemsolver and improvice and learn as you go. With every project there is something new to learn (it’s amazing).
And lordy, that low-key wineglass shot brings me back to my first year of my photography studies at uni.
It’s a gorgeous image but our teacher wouldn’t have let one pass with that result – the rim of light had to be even and a continuous line surrounding the entire object. Shooting analog, no editing allowed. It was a true nightmare and it taught me so much.
Rachel Korinek
Hey Sabrina, I can totally imagine your photography teacher! Some people are definitely technical purists right? So glad you enjoyed Therese’s post 🙂