Post-production, or editing, comes at the end of our creative process. It should, however, never be an afterthought.
A powerful editing workflow that creates stunning images, from RAW to WOW, happens in the little, finer edits. The small attention to detail.
After teaching thousands of food photography students how to edit, I’ve seen a lot of common Lightroom editing mistakes.
Let’s explore those in this post.
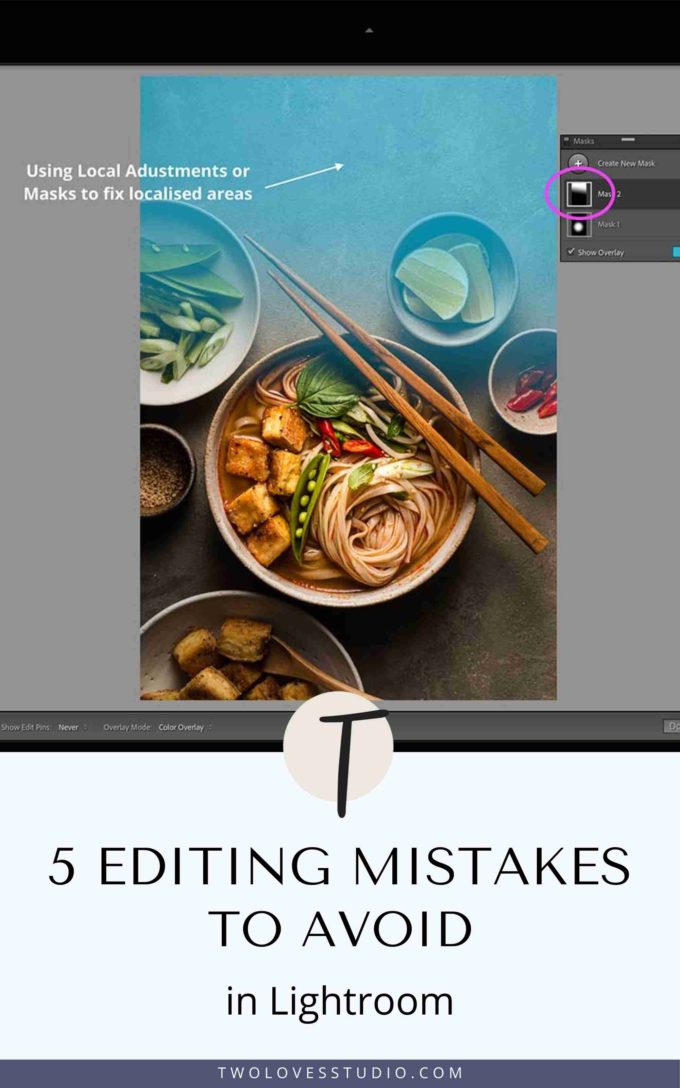
Not Reading Your Histograms When Editing in Food Photography.
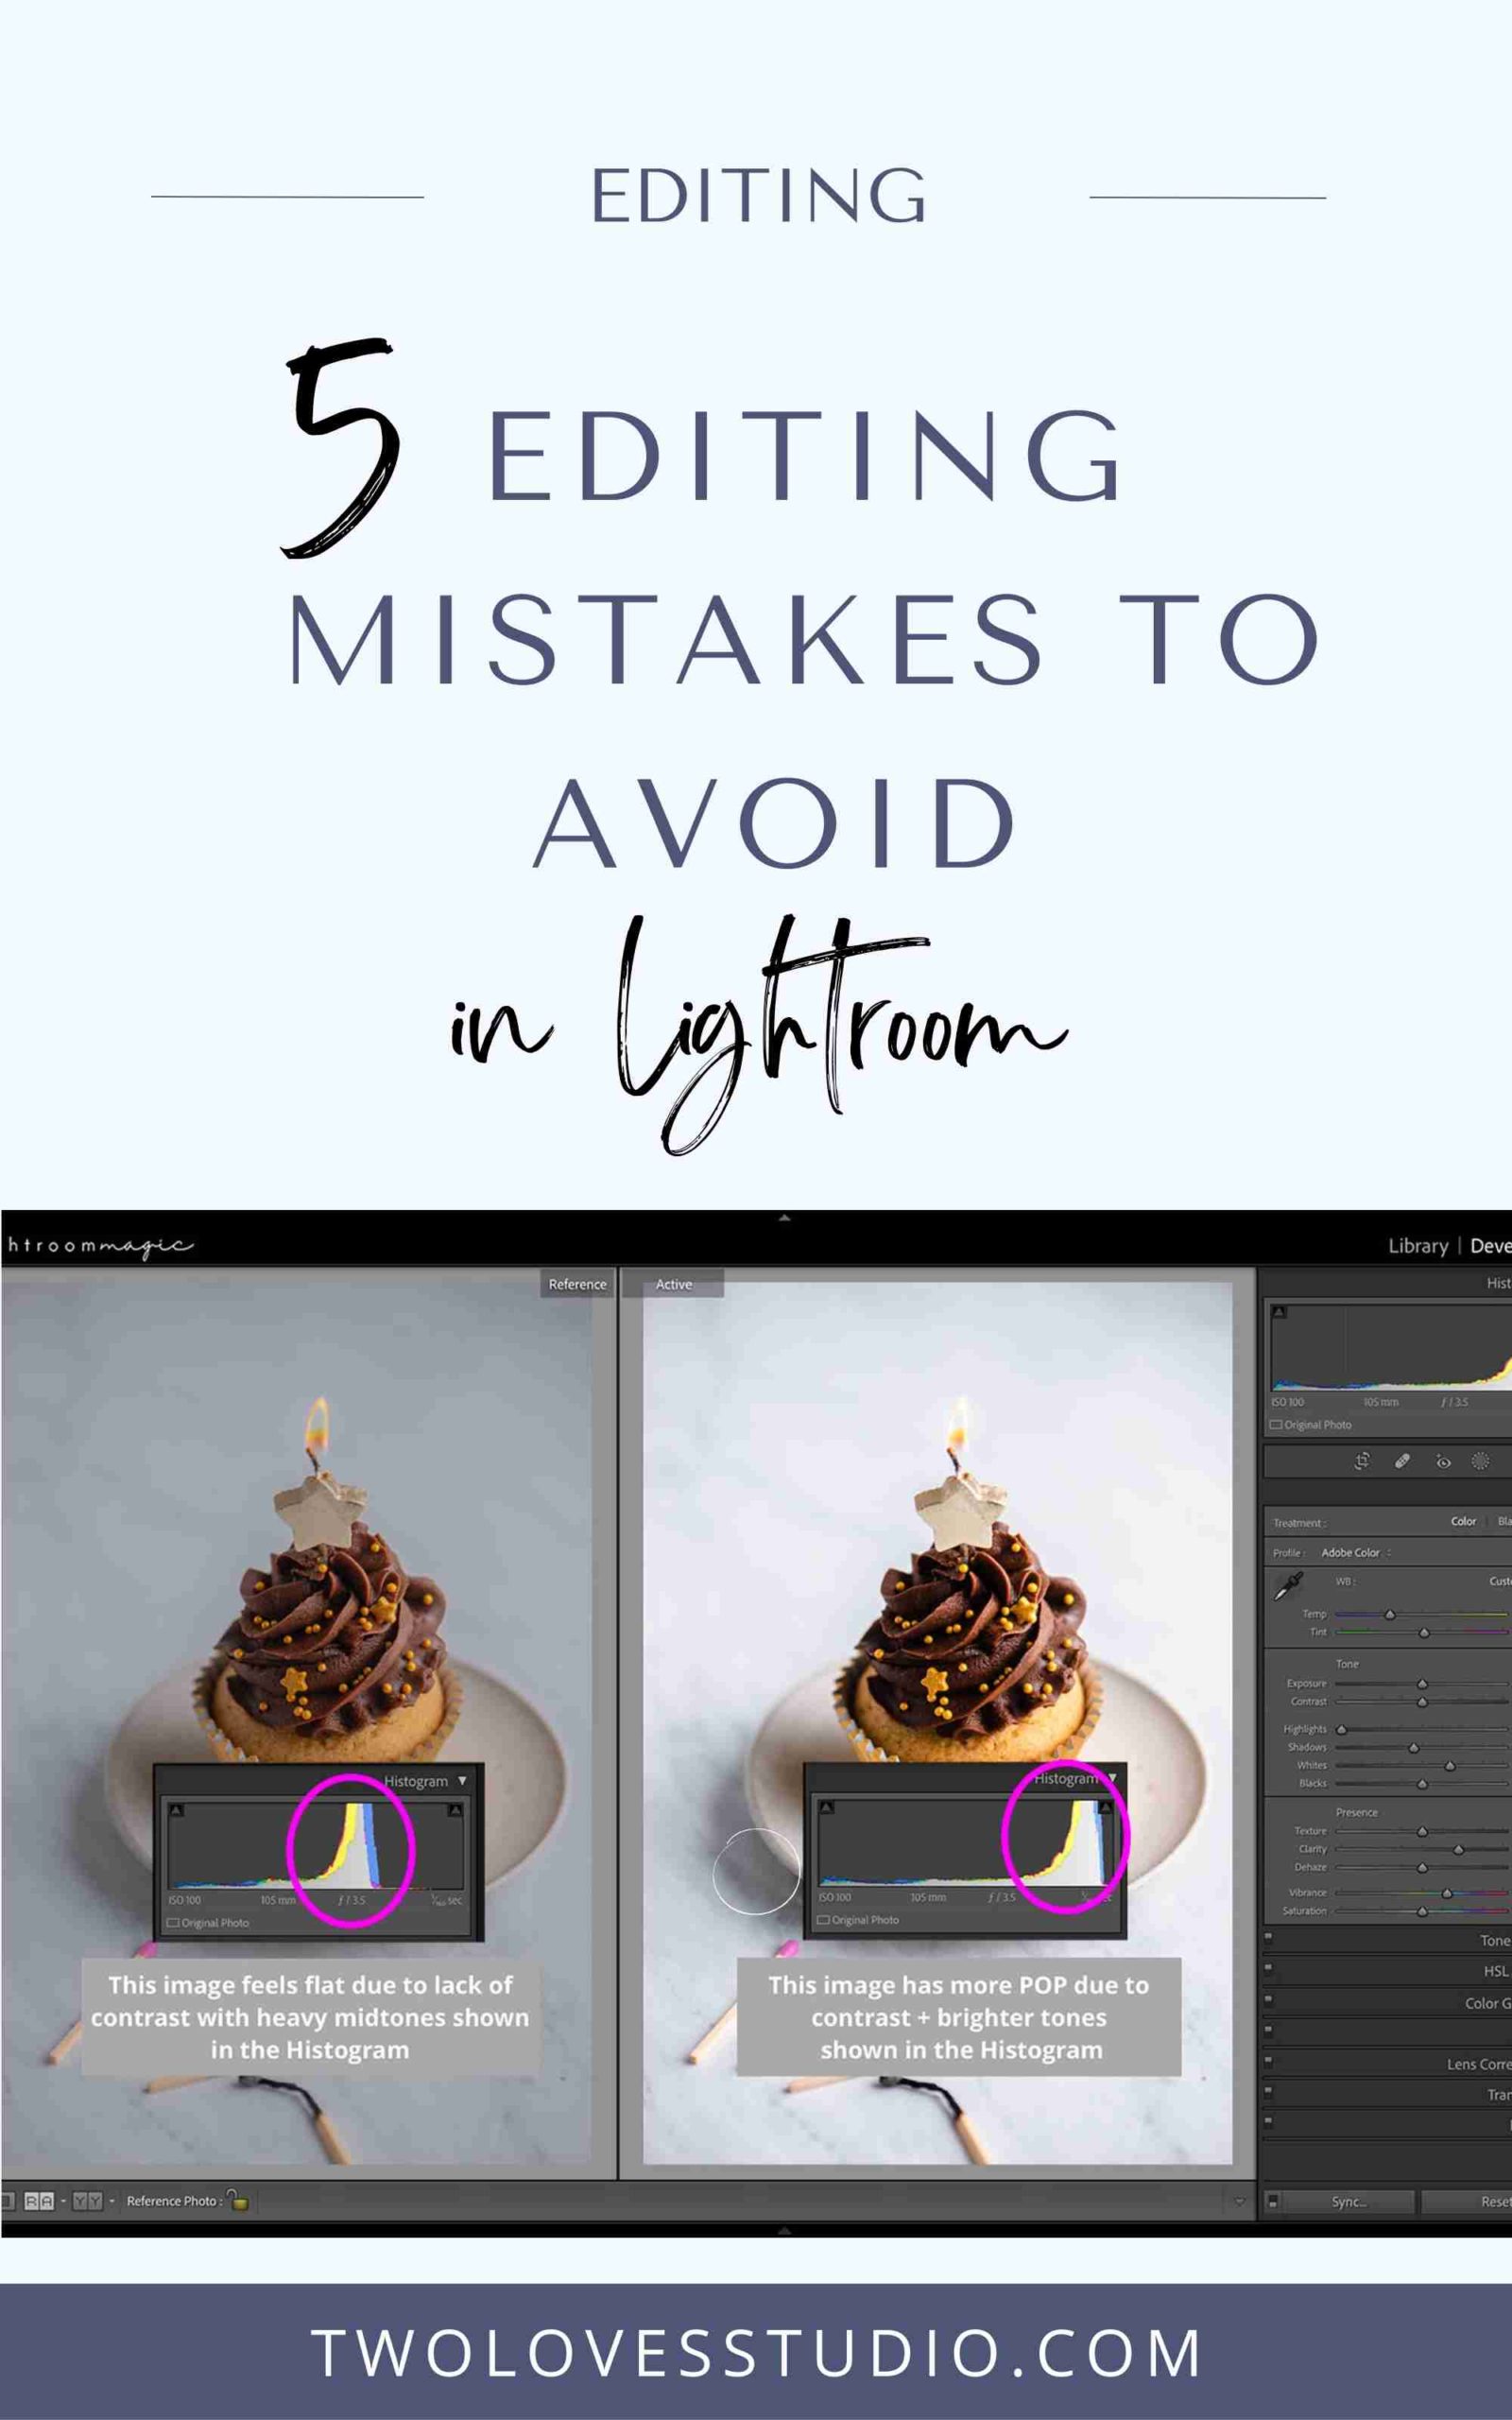
Our Histograms are a wealth of information. They tell us all about the types of tones in our image and their particular brightness.
Histograms tell us about our blacks, shadows, midtones, highlights and whites. Their volume and if we’ve clipped any information in our image.
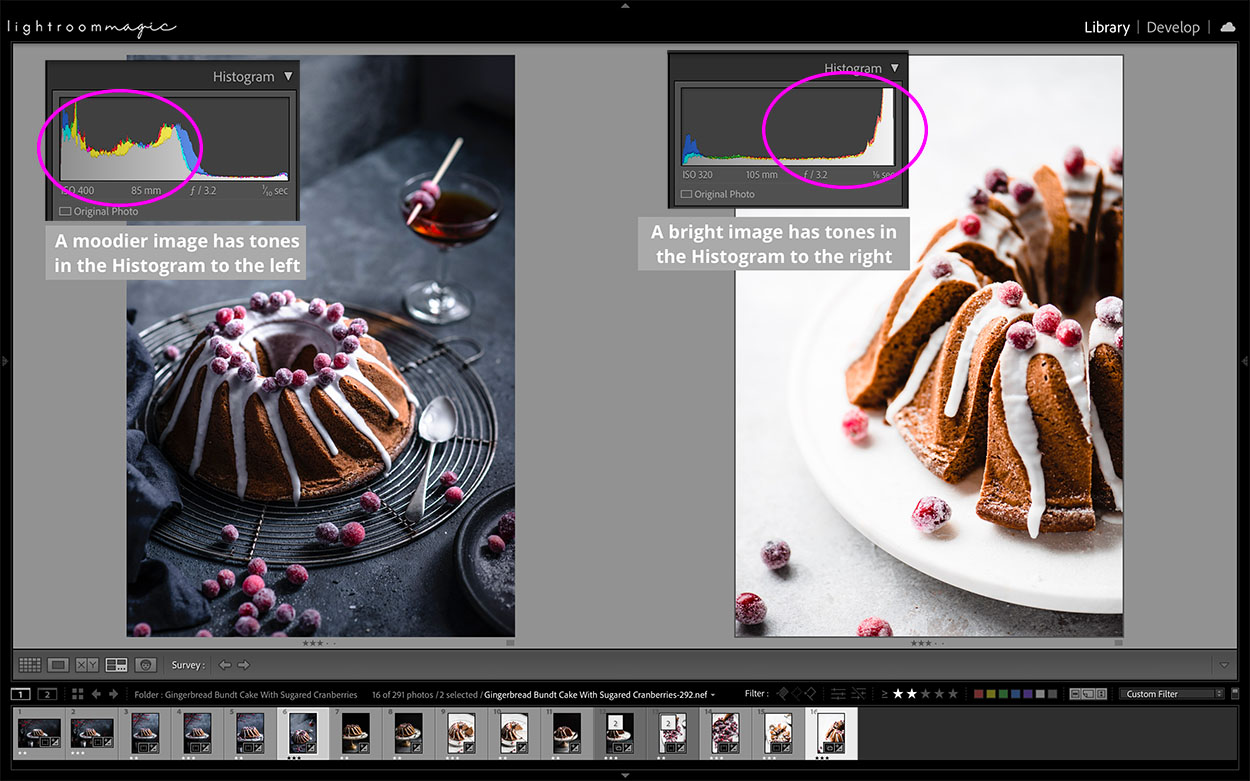
So why is that important? The fundamental reason you’d want to be able to read your histogram is to:
Be able to identify where your tonal values sit and if you have enough dynamic range to make a GREAT image.
Lightroom editing mistakes: You should use your Histogram to
- Understand if you have good tonal contrast to make an image POP.
- Make exposure (or tonal) adjustments to match the type of mood you’re looking for.
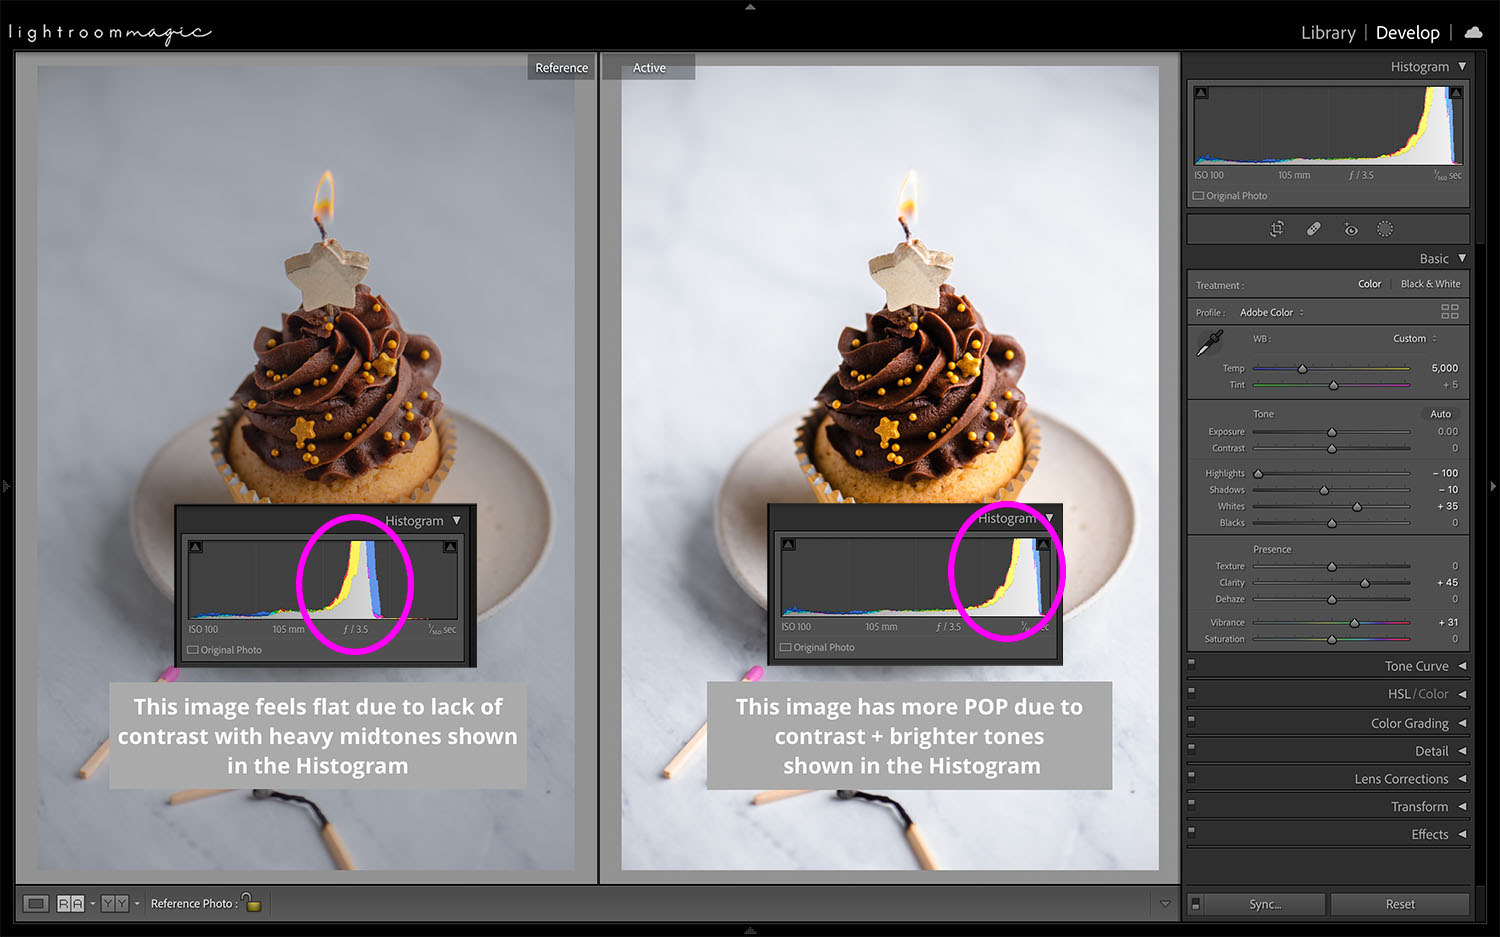
- View your midtones and if a large percentage of midtones is making your image feel ‘flat’.
- Prevent clipping your black and white tones, causing blown-out highlights and shadowed areas.
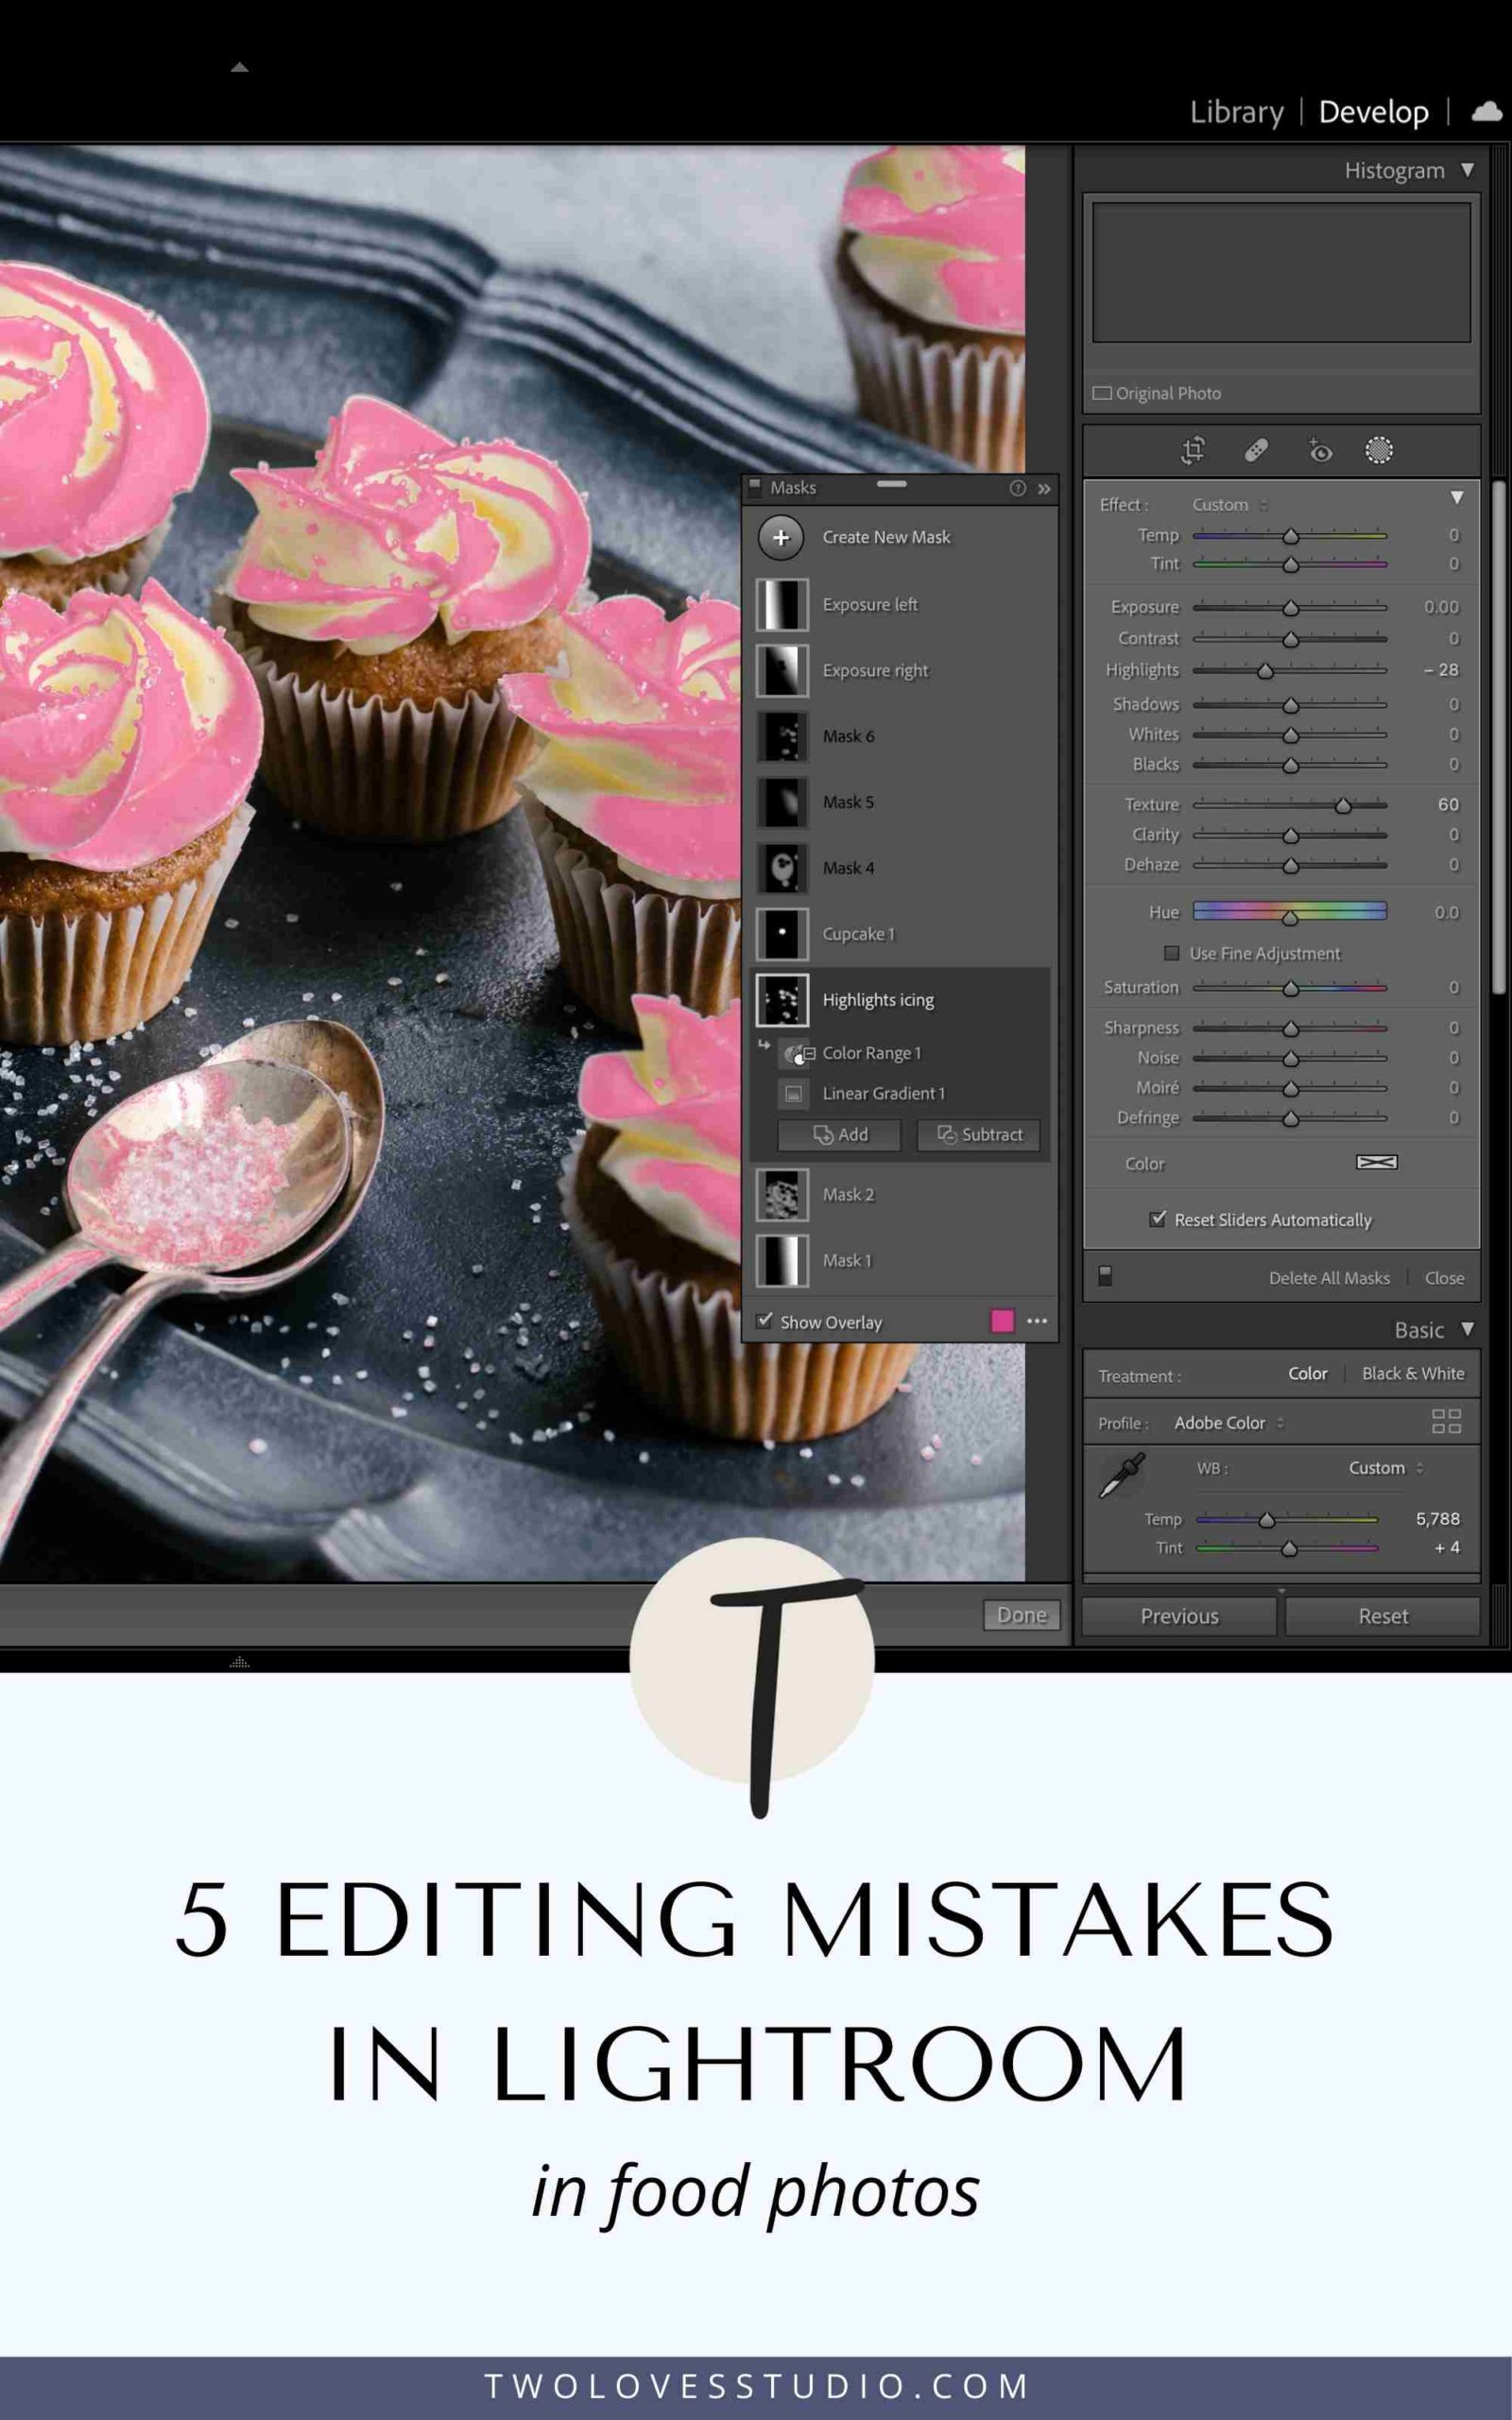
Only Making Global Adjustments to Your Images.
Firstly, let’s talk about what a global adjustment is.
A global adjustment is when we use tools that make edits to our entire image. When editing in Lightroom, all panels except the Masking Panel are examples of global adjustments.
Global adjustments are great and should be part of your workflow.
But they don’t always fix every editing issue we have. Like colour correction. This is where local adjustments or masking enters our workflow.
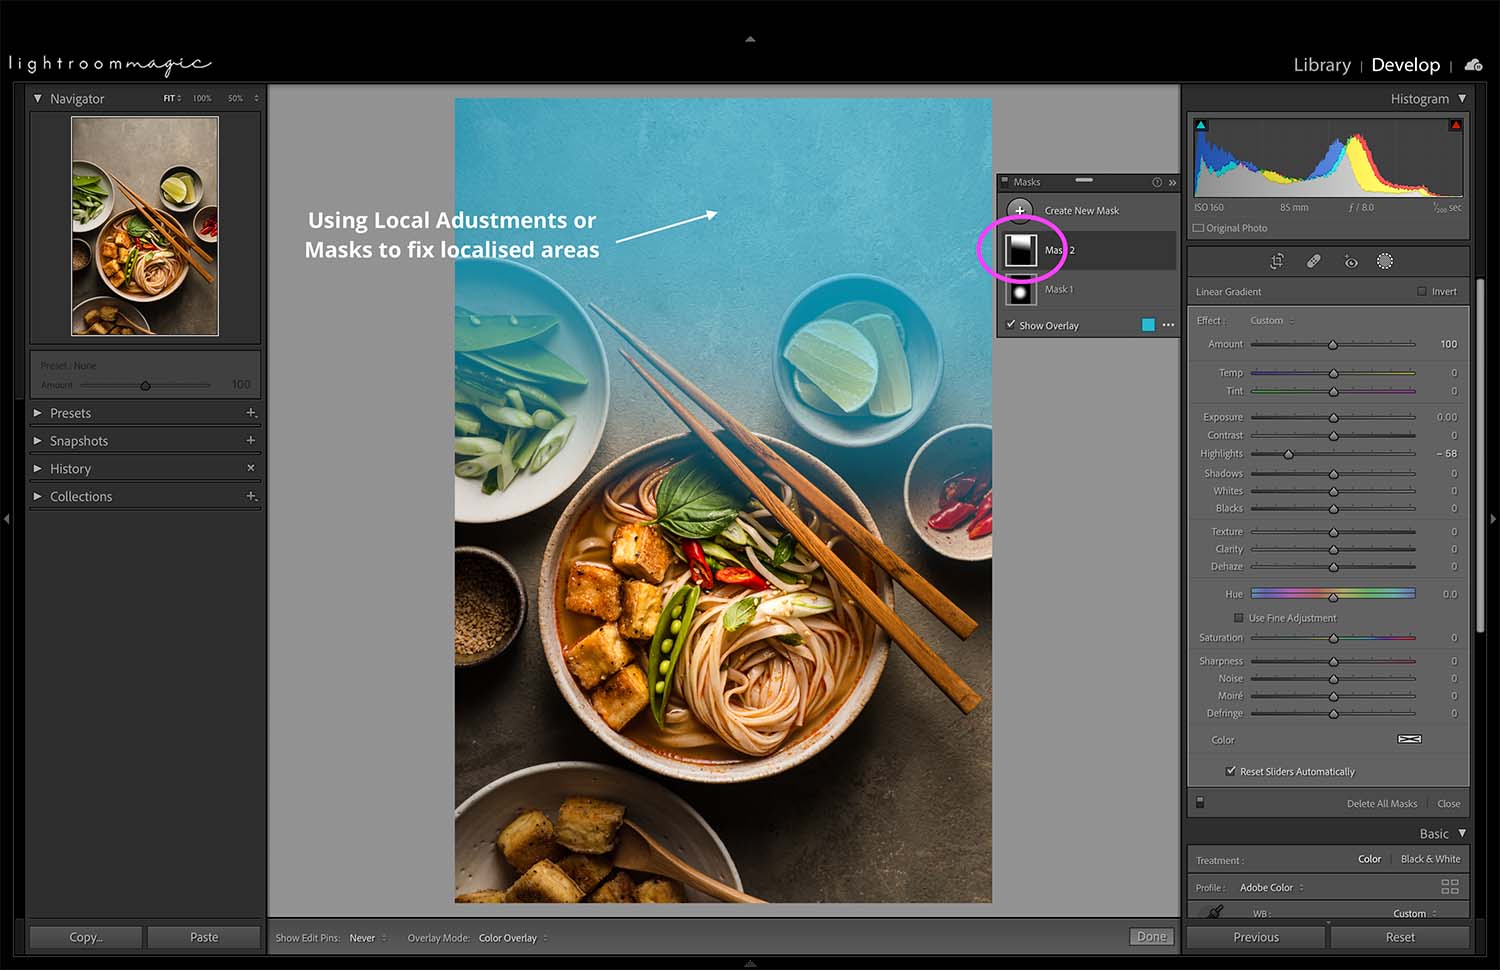
For example, you would use a local adjustment or mask over a global adjustment for the following edits:
- Reducing brightness/exposure on one side of our image where the light wasn’t even.
- Correct white balance in a corner of the image
- To reveal the texture of our hero food by lifting our shadow.
Local adjustments or masking usually comes at the end of our workflow, unless you need to do drastic exposure reduction from uneven lighting to even start editing.
Not Adding Adequate Contrast to an Image.
9 times out of 10 when a student comes to me and asks me why their image doesn’t POP, or feels flat — it’s because there isn’t enough contrast in their editing.
Contrast comes in two forms: Tonal and Colour Contrast!
Did you know that there are eight ways you can create contrast in Lightroom and NOT even one of them is using the contrast slider?
Contrast is the separation between the darkest (blacks) and the brightest (whites) area of the image. When editing, you’ll watch your Histogram to view when this happens.
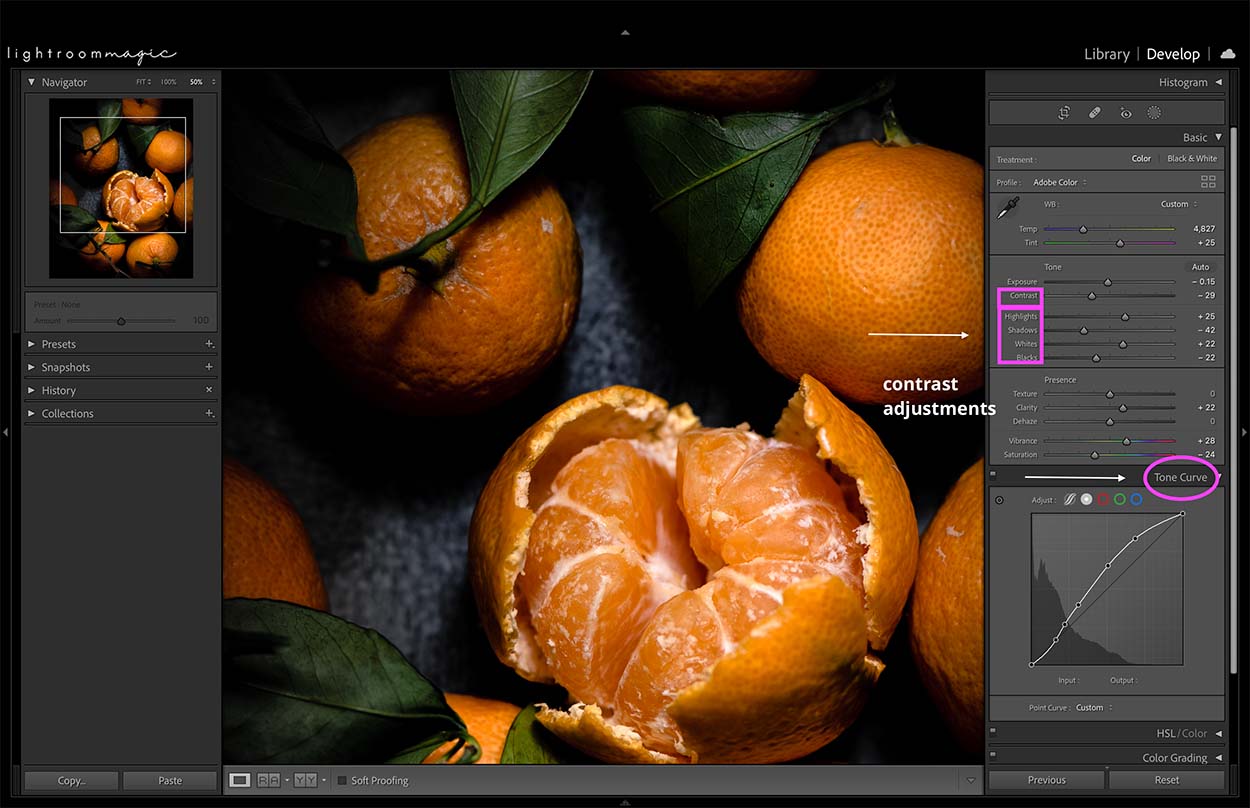
If your image feels flat at all, it’s likely you haven’t added adequate contrast to your image. Add contrast using the following tools:
- Contrast Slider
- Tone Curve
- High Dynamic Range Tools like Black, White, Shadow and Highlight Sliders.
- Clarity
Here is an example of a Histogram that has contrast.
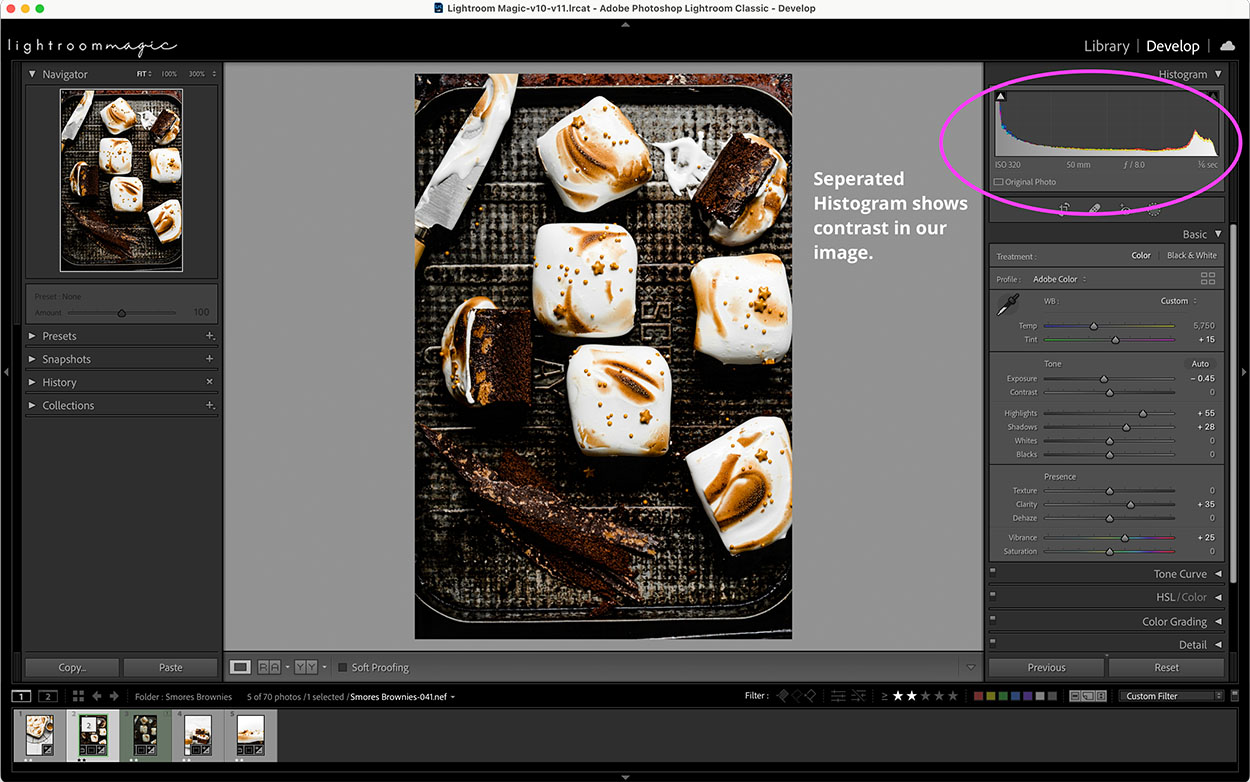
View your Histogram. Are the tones separated?
Colour Correcting Using Just the Eye Dropper Tool
The Eye-dropper Tool in Lightroom is a great place to start when tackling White Balance issues. But we shouldn’t rely on it to tell us what are correct whites for our images unless you’re using a grey card.
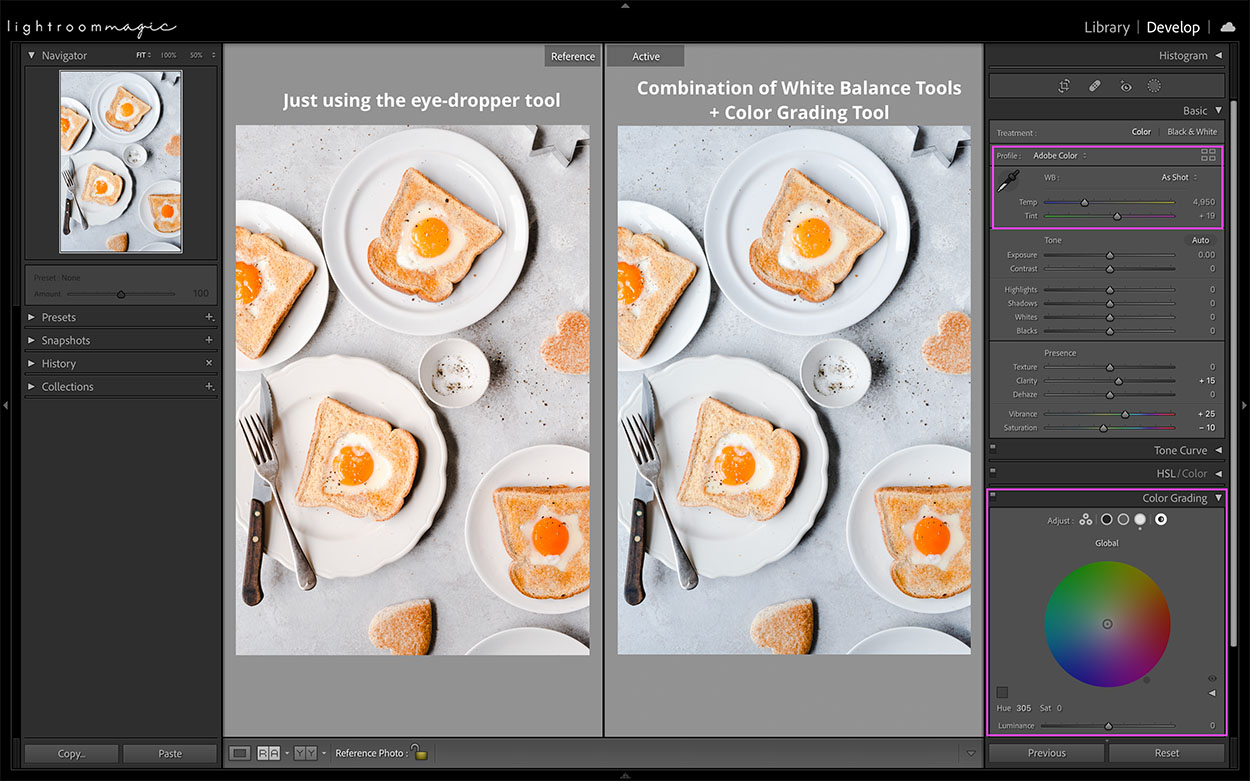
Make sure to combine colour correction tools. Like:
- Eye dropper Tool
- White Balance Sliders
- White Balance Presets
- Color Grading
Sometimes correcting White Balance issues will benefit solely from the eyedropper tool. Other times, you’ll have to use a combination of tools — and that’s ok!
READ – Avoid the Mistakes: Turn your RAW file into a POW file.
Lightroom Editing Mistakes: Over-Saturating The Colours in Your Image.
Colour, colour, colour. More is better, right?
Colour is definitely important in food photography but focusing on saturating our colours isn’t always the best way to edit.
When it comes to editing colour, think beyond just the saturation slider. We can edit for:
- Colour contrast
- Vibrance
- Hue
- Luminance
- Saturation
- Color Grading
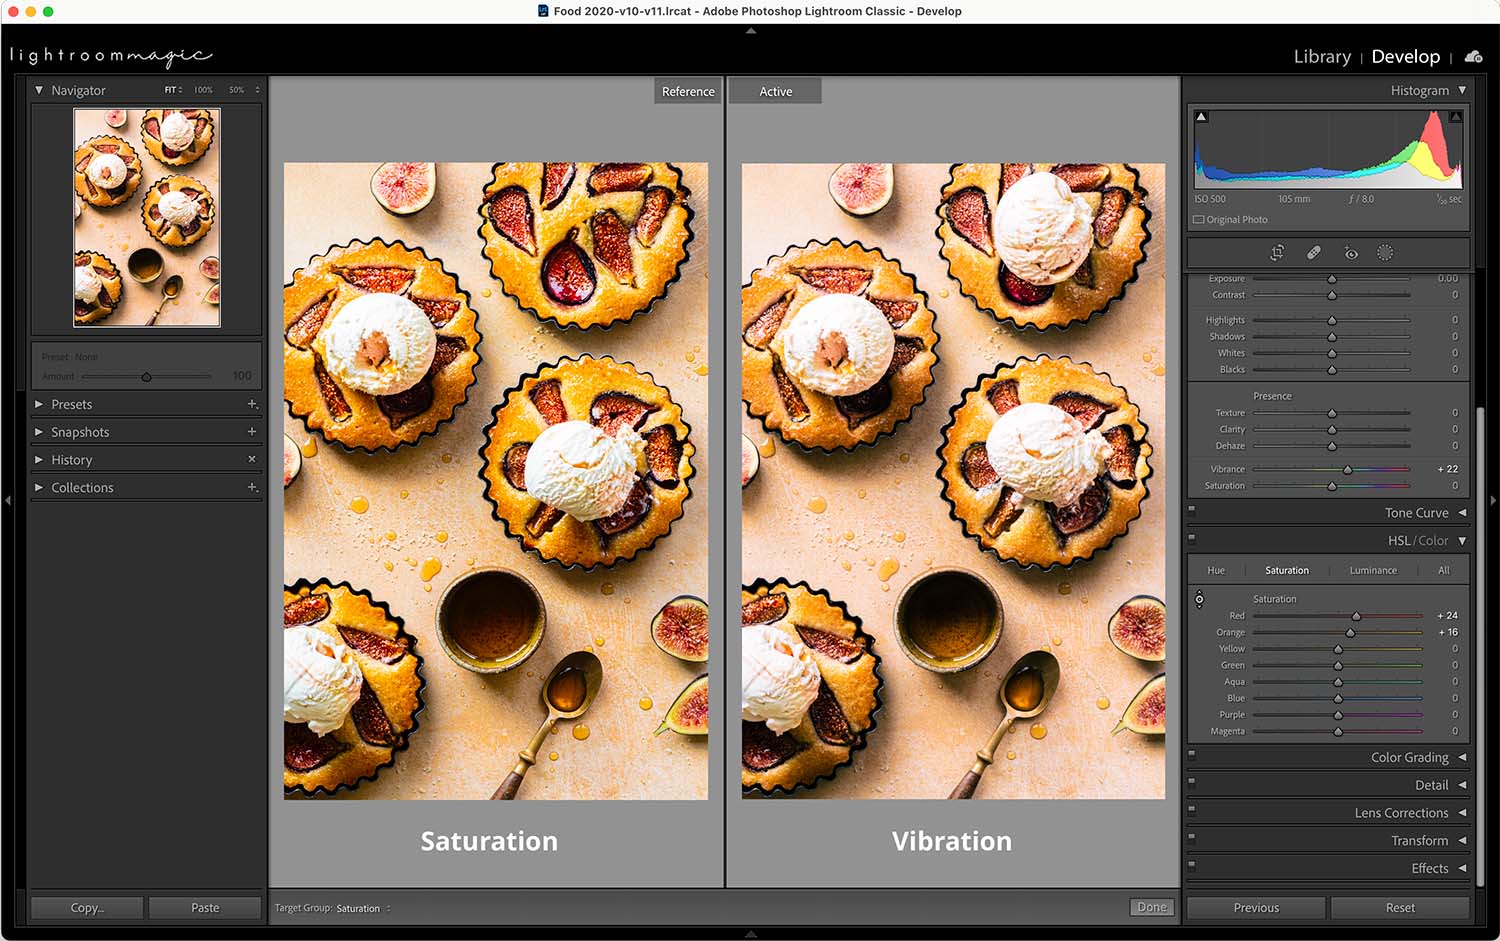
I actively encourage you to explore using the Vibrance Slider or just saturating one specific colour individually in the HSL/Color Panel.
Powerful editing in food photography can often be desaturating your colours too! I do it all the time. Not every colour needs to be saturated.
Brush up your skills in editing by checking out more Two Loves Studio posts on:





Kiki
Hello Rachel, I’m guilty of all of the above mistakes at some point or other 🙂 .
However, I just watched your 3rd Lightroom Magic video, went back into some of my pictures (which I thought had turned out pretty good, hahaha!) and applied your way of editing. And… oh my… what a difference! Thank you so much for doing these videos!
Rachel
Well, that makes two of us Kiki! Mistakes are what makes us learn. So glad that you were able to apply some of the techniques. I would love to see you’re before and after photos. Please send them to me Kiki via [email protected]. Can’t wait to see them 🙂
Rayzel
I just signed up for your course after reading this post – I’m so excited to do better editing with my photos! Up till now I Have actually only used Photoshop and edit my RAW photos there – I’m not actually sure what the main difference is with lightroom, but it sounds like speed? But there’s lots of the raw editing features I just play with but I see I will learn a lot more from your course.
thank you so much I’m excited!
Rayzel
Rachel
Hey Rayzel! Welcome to Lightroom Magic. Well, they both have similar features but are very different programs. Lightroom is a little more intuitive and has an easier workflow. Both are amazing programs, but we are limited to creating ‘magic’ if we don’t fully understand aspects of editing. This course aims to empower you to learn those techniques so you can add this to your style. So great to have you in the community.
smashy road
Thank you for sharing this valuable knowledge!
Clara Lee
Thank you for sharing this useful information. It gave me more insight into the issue! play capybara clicker game free