This post may contain affiliate links from products and services we love and trust.
Dark food photography is actually my favourite ways to shoot food. There’s something so magical about shadows and low-key lighting. To make dark photography work the best, pairing a dark background and moody light is essential.
Those two key elements alone will take you far if you take the time to really plan your concept.
Yet, some photographers find it hard to photograph dark backgrounds. If that’s you, here are some tips to help you get the perfect food with mood shot!

Three Quick Ways to Get Even Lighting On Dark Backgrounds
You may have noticed that when you photograph dark backgrounds seem ‘lighter’ or ‘less black’ the closer you are to your light source or window. The colour and depth feels better further away from the window.
What you’re seeing is called ‘light fall-off’. The light is brighter the closer you are to the light source/window and the power ‘falls off’ as you get further from the window. If you’re interested, this is due to the Inverse Square Law which I cover in my ebook Art of Light.
To get even lighting on our dark background, we need to work with light fall-off and the inverse Square Law. So here are three quick ways to even lighting.
Set Your Scene Further From the Window
Light becomes more even the further you are from the light source. The easiest way to have even lighting is to move your set up further from the window.
The caveat here though is that there is less power the further you are from the light source, so your photos might feel flatter or less ‘lively’. This can actually be a good thing when photographing dark backgrounds. I don’t recommend this for bright or airy shots, however.


Create Even Exposure to Photograph Dark Backgrounds by Blocking Light
Given the choice, I always try to get my photos right in-camera. Which means that if I can, I want to manipulate my light to be as ideal as it can be before I take the photo.
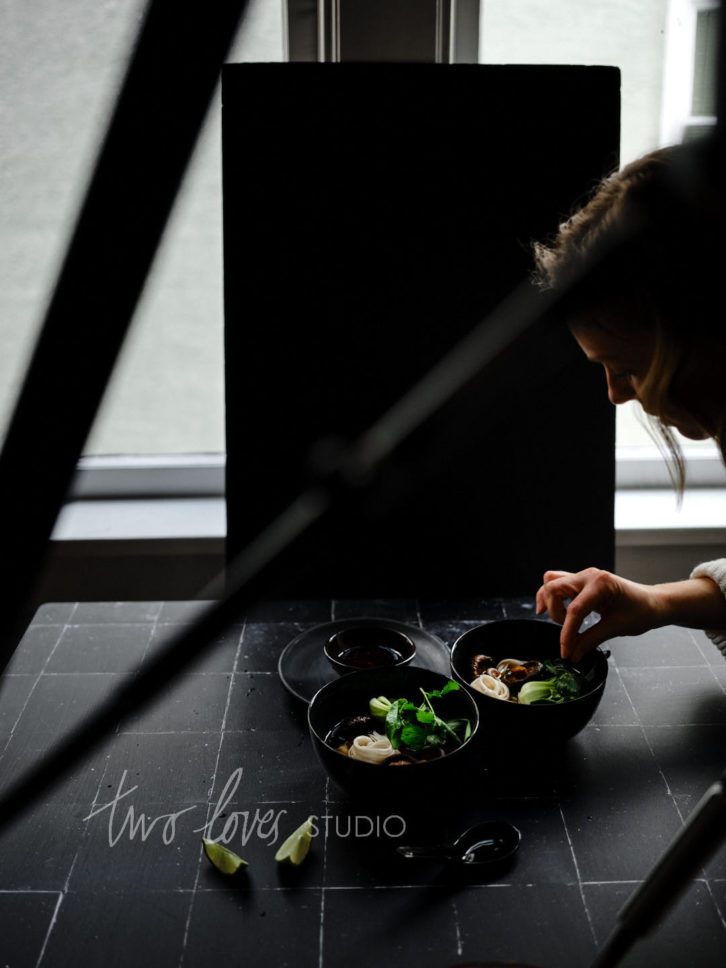
If you’re dealing with too much light at one end of dark background, you can simply add some black foam core directly next to your window to help reduce the light falling onto that part of the frame.
A tip is to play with blocking the light low and high. You will get different results. It’s good to play with both to see which better suits your subject and idea.
Add a Local Gradient Filter or Mask in Post-Processing
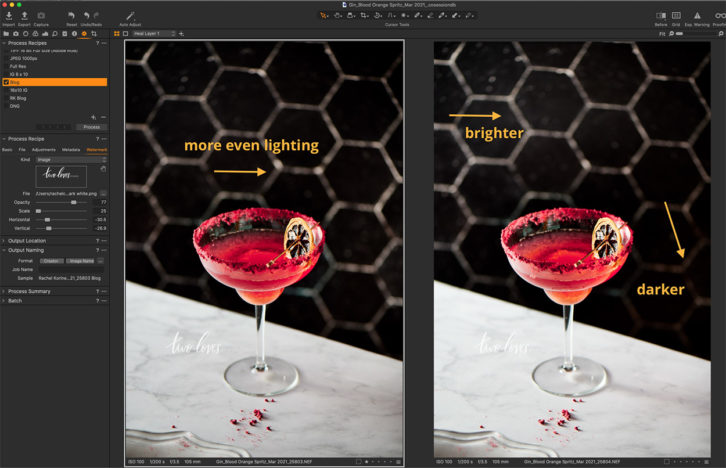
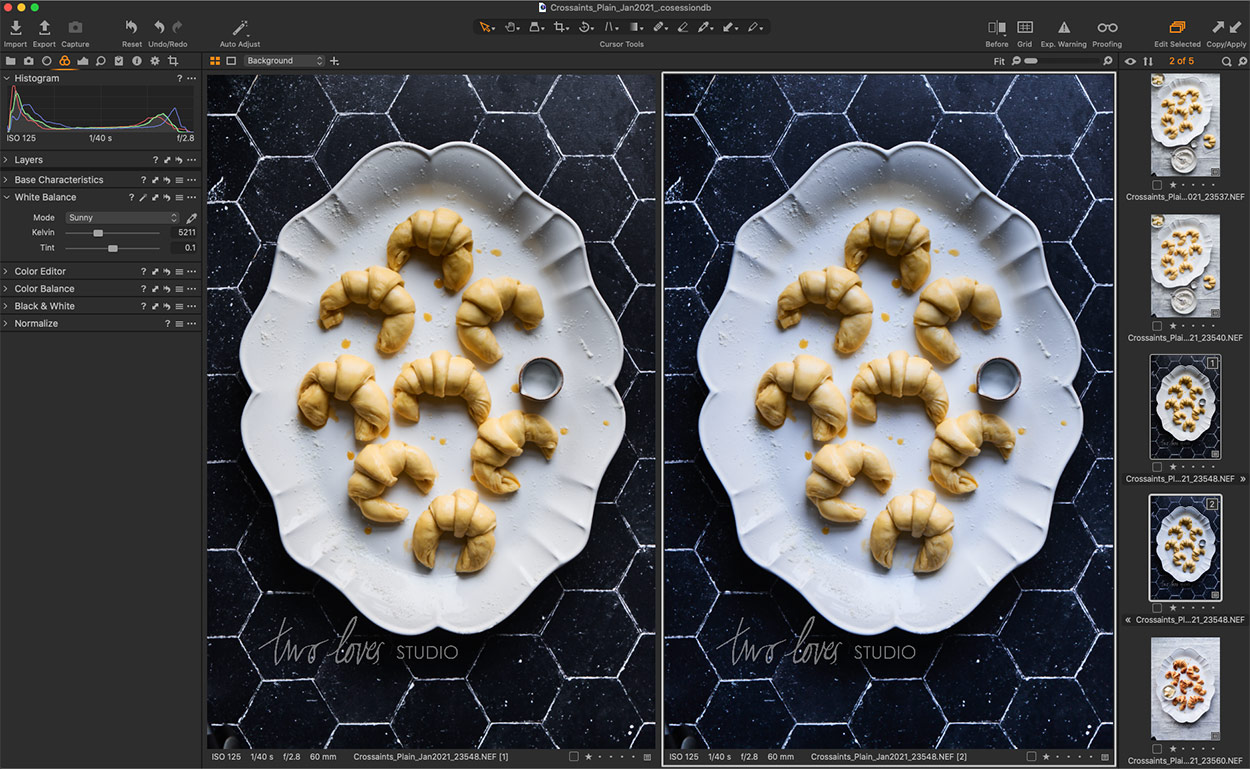
If you tether, this is also very easy and can be applied to each new photo that you take. Whether you use Lightroom or Capture One to tether you can add a Graduated Filter (Lightroom) or a Gradient Mask (Capture One) to help you with even exposure.
Once you’ve added the local adjustment, you can reduce either Exposure, Brightness, Highlights depending on which program you use. I personally opt for reducing Highlights first before exposure. But as you’re the visionary for your art, I recommend playing with a few sliders and seeing what works best.
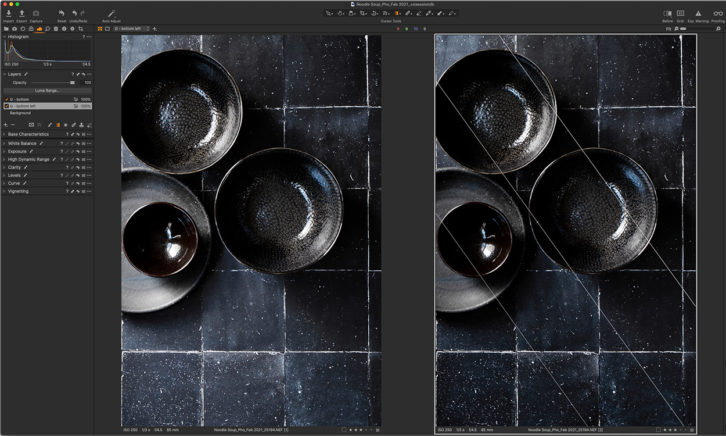
A little bit of post production goes a long way when photographing dark backgrounds if you’re trying to get even exposure.
Change Your Angle to Perfectly Photograph Dark Backgrounds
Reflections and or glare is actually a complex subject if you want to get into the nitty-gritty. For this post, the most important thing to note is that glare or reflections are caused by the position of the light relative to the position of your camera.
To remove glare or reflections when photographing dark backgrounds, you need to change either the position of your light, the position of the camera or the camera angle.
Even if you use window light, you can change the position of the light relative to your camera. Backlight vs sidelight is doing just that.
Try these and see how the reflections or glare change:
- Shoot a different camera angle, like overhead, 45-degrees or straight on.
- Position the camera differently to your window, side-light vs backlight.
- Move your artificial light, closer or further, from side to side.
Working with White Balance on Black Backgrounds
White Balance is important to consider both in-camera and when post-processing with dark backgrounds.
While ‘White Balance’ does refer to how ‘white’ our whites are, it also affects black. We can have cool blacks, warm blacks or anything in between.
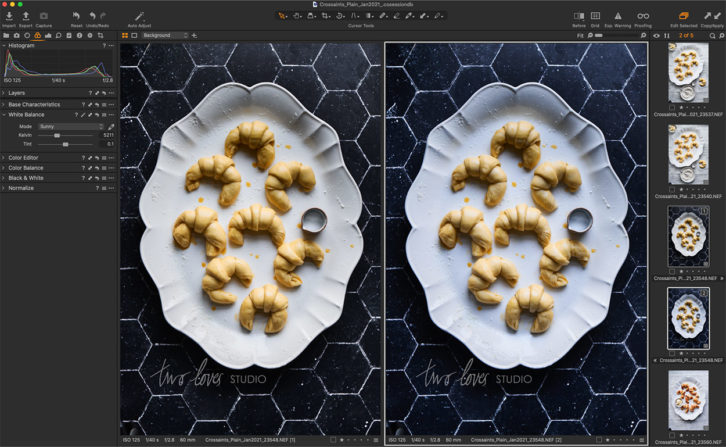
You may find that you can’t use the eyedropper tool well as you can’t find a neutral grey to select. If that’s the case, a tip is to use the preset options that you will find both in your camera and in Lightroom or Capture One.
Anytime I am struggling, I use the presets as a guide. I select the one that gets me as close as possible then use the Temperature/Tint (Lightroom) or Kelvin/Tint (Capture One) sliders.
Use the Kelvin White Balance Option In-Camera if You Can’t Tether
I don’t know about you, but White Balance throws me. When I am tethering I have to get the WB as close as possible for me to continue to visualise the light and the shot.
If I can’t tether, and I need to get the WB to be as close to concept as I am after, I will use the Kelvin setting to set a custom white balance. If you shoot in RAW and tether you don’t need to do this. But if you are able to get it right, it does save on editing time.
Think of it like having the White Balance sliders of your editing program right into your camera.
Black Tile Collection from Bessie Bakes Backdrops
Leslie from Bessie Bakes Backdrops and I created a tile collection together, that looks and photographs like real tile, but is much cheaper and lightweight.
To check out the collection, head to Bessie Bakes Backdrops.


Two Loves Studio was not paid to write this post, however, it may contain affiliate links. If you purchase an item from an affiliate link, we do get a commission on the sale which helps us run this site. Only affiliates for products/services we believe in appear on this site.


shibani
Super handy tips.. when I have job coming up using black background only..I use form board to block mostly.. otherwise it has a washed out look..
Also Rachel.. setting the light way will create even look.. what about using a layer mask or radial filter to enhance the food on the plate ??
Rachel Korinek
Of course, you could do that! As you know, we cover that in Lightroom Magic! This post mostly focuses on the black background as so many people told us that they struggled to photograph black backgrounds.