This post may contain affiliate links from products and services we love and trust.
You’ve lit your subject perfectly, but there are areas of the image that are distracting and pulling the focus away from the hero. Has this ever happened to you?
As photographers, we find ourselves in an endless pursuit of light, however, it’s important to recognize when unwanted light falls on areas of the scene around our focal point, creating a distraction. By taking away light, we can create more intentional contrast in our images, resulting in increased depth and dimension to make your hero shine–naturally.
Regardless of the light source and modifier, I’m using, there is one widely available and very affordable tool that I continually reach for to create beautiful dimension, depth, and contrast to an image and that’s photography flags.
In this post, I’ll share with you how I use photography flags to create a strong image with beautiful contrast that still looks natural.
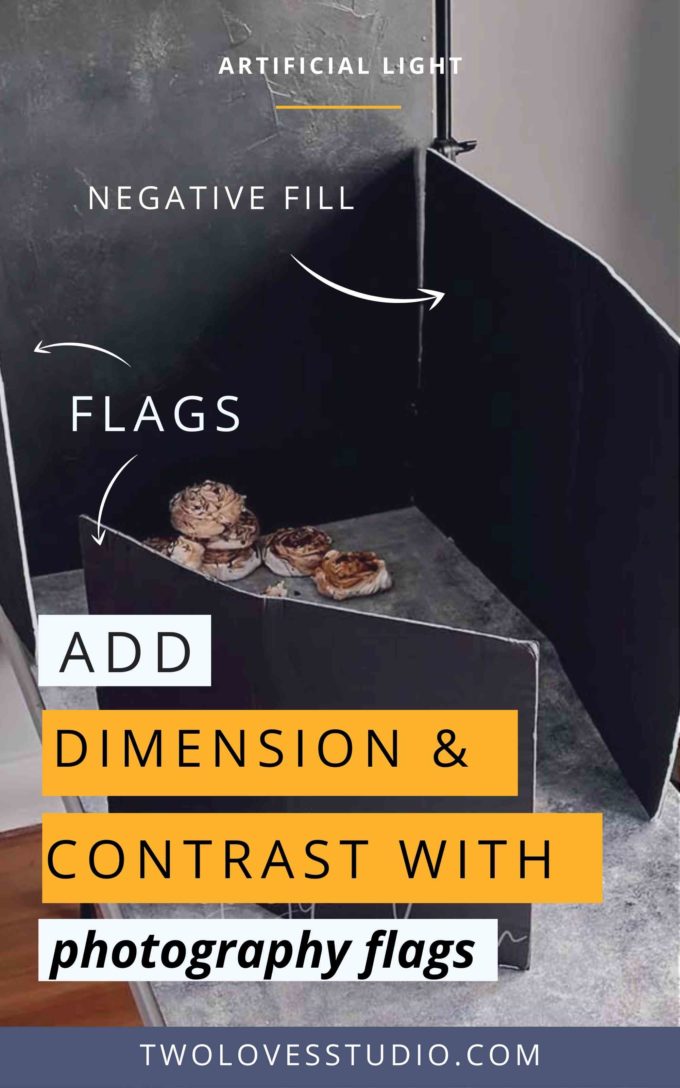
What Are Photography Flags?
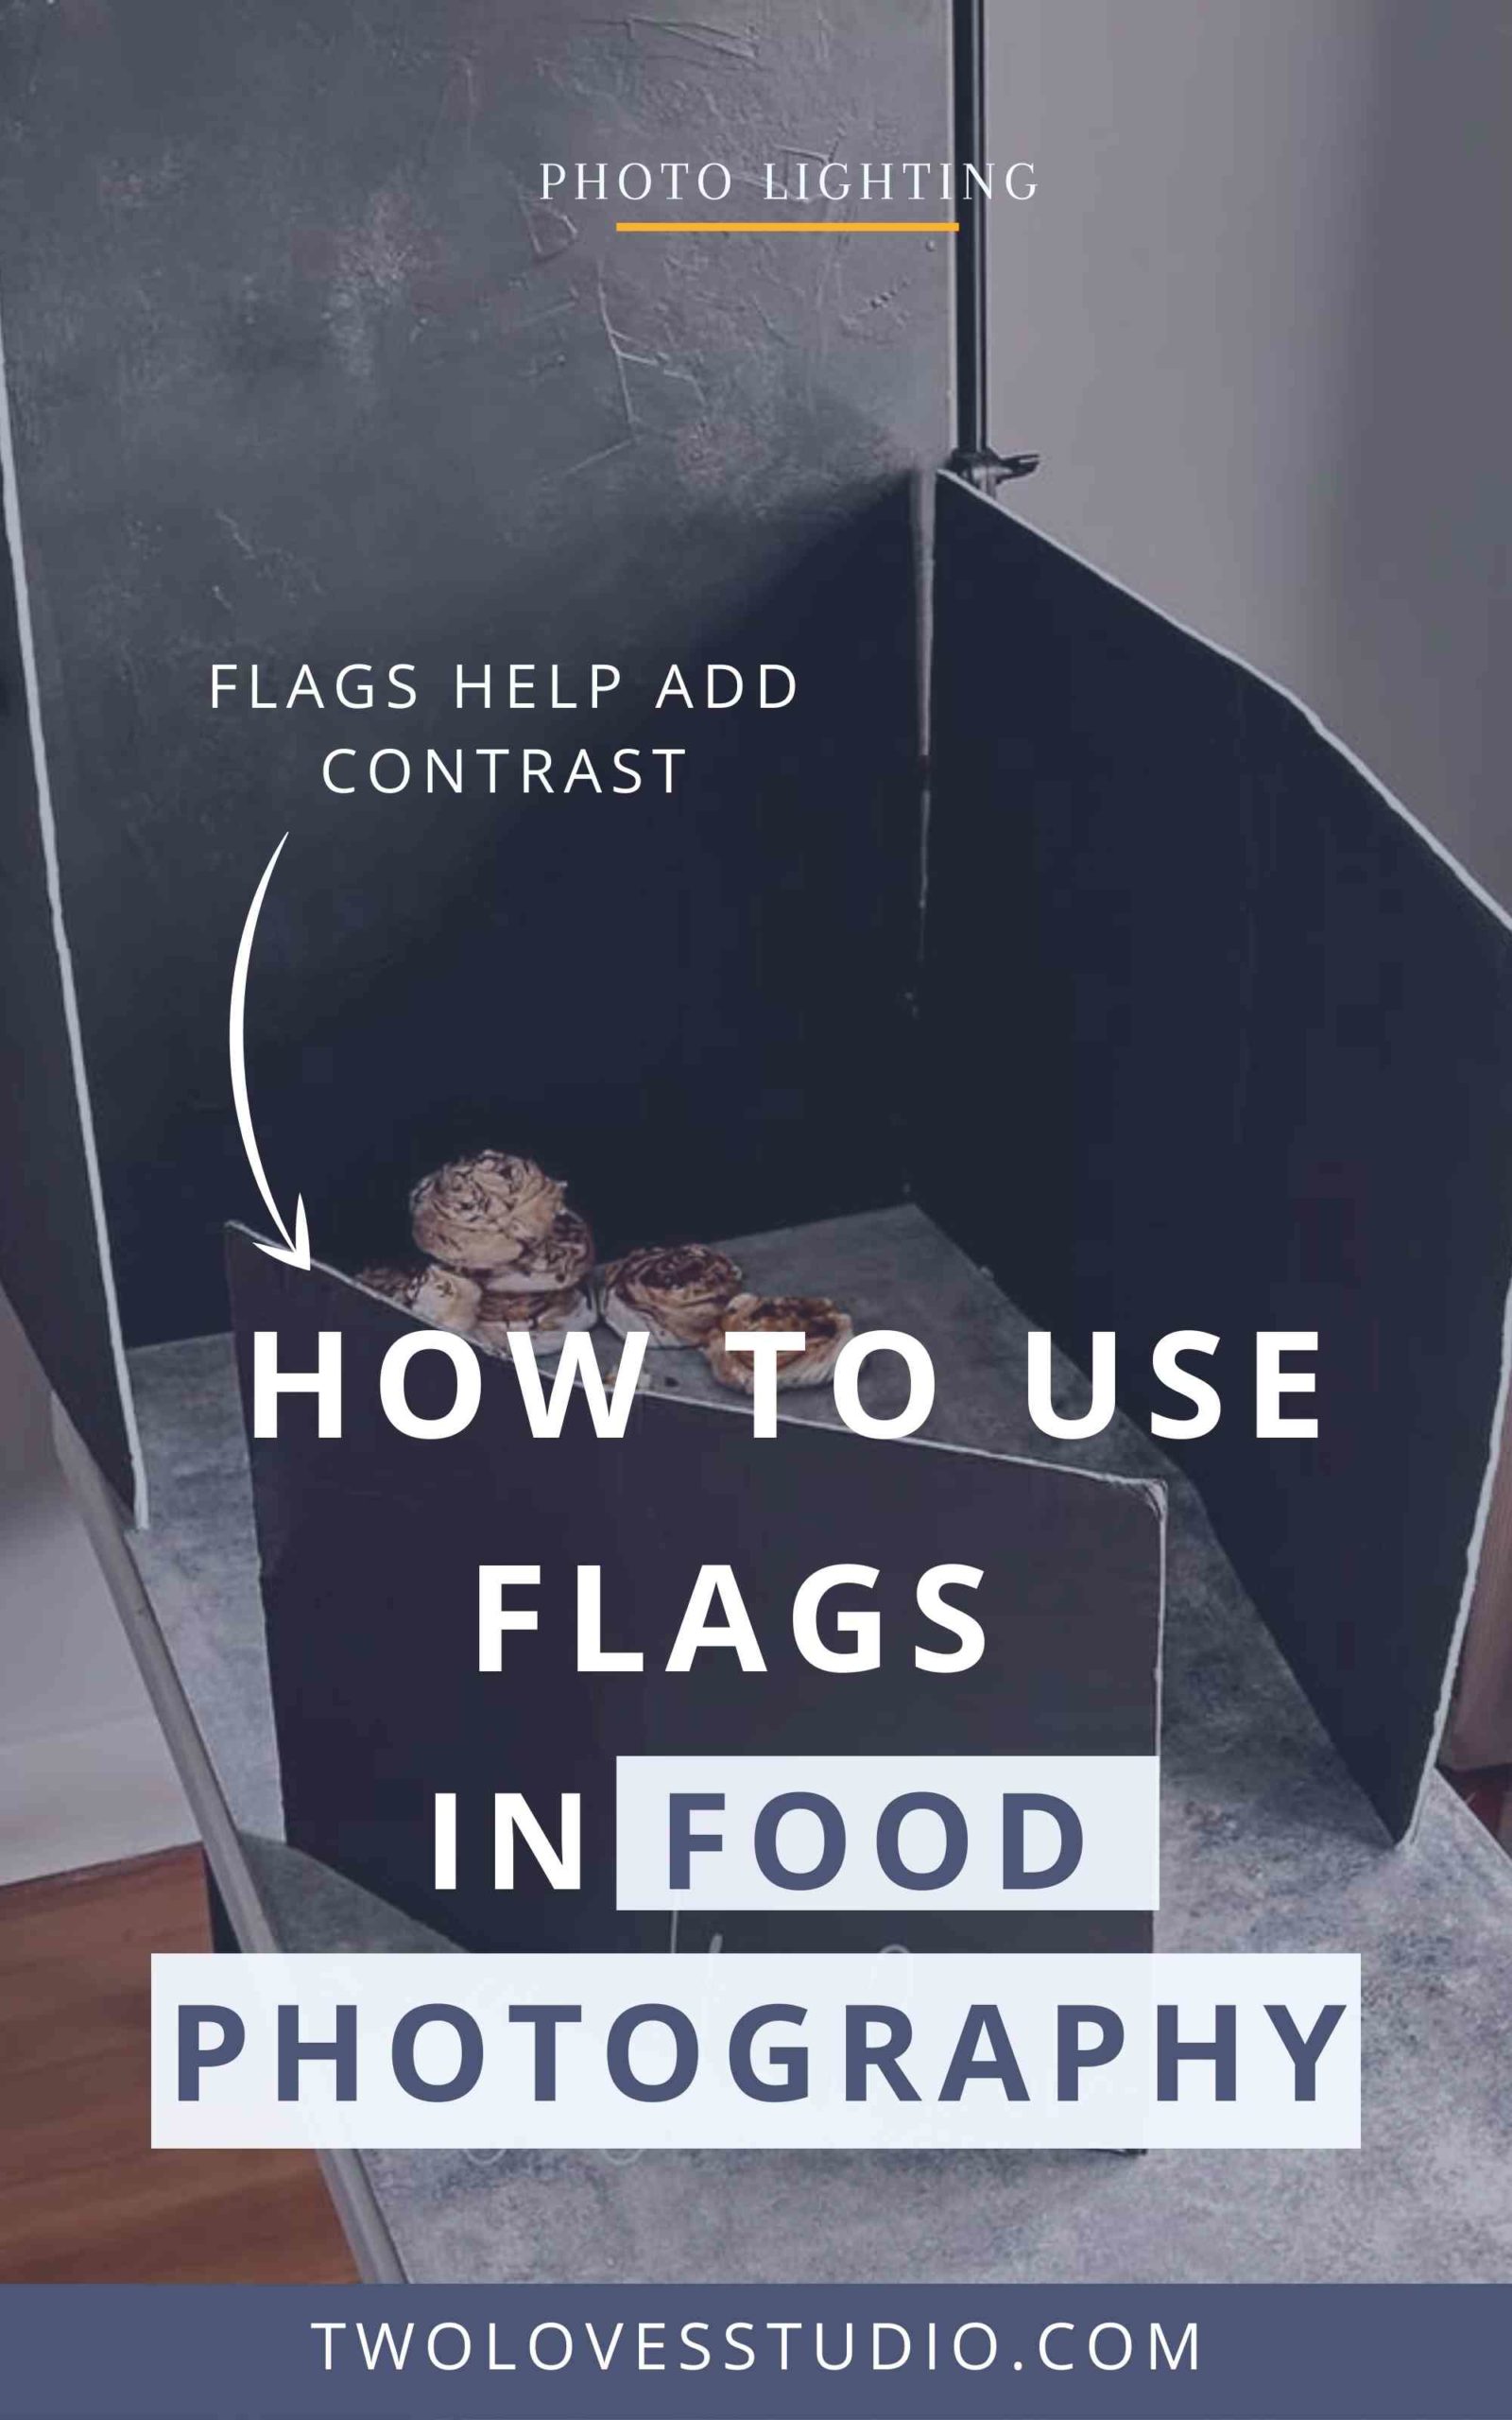
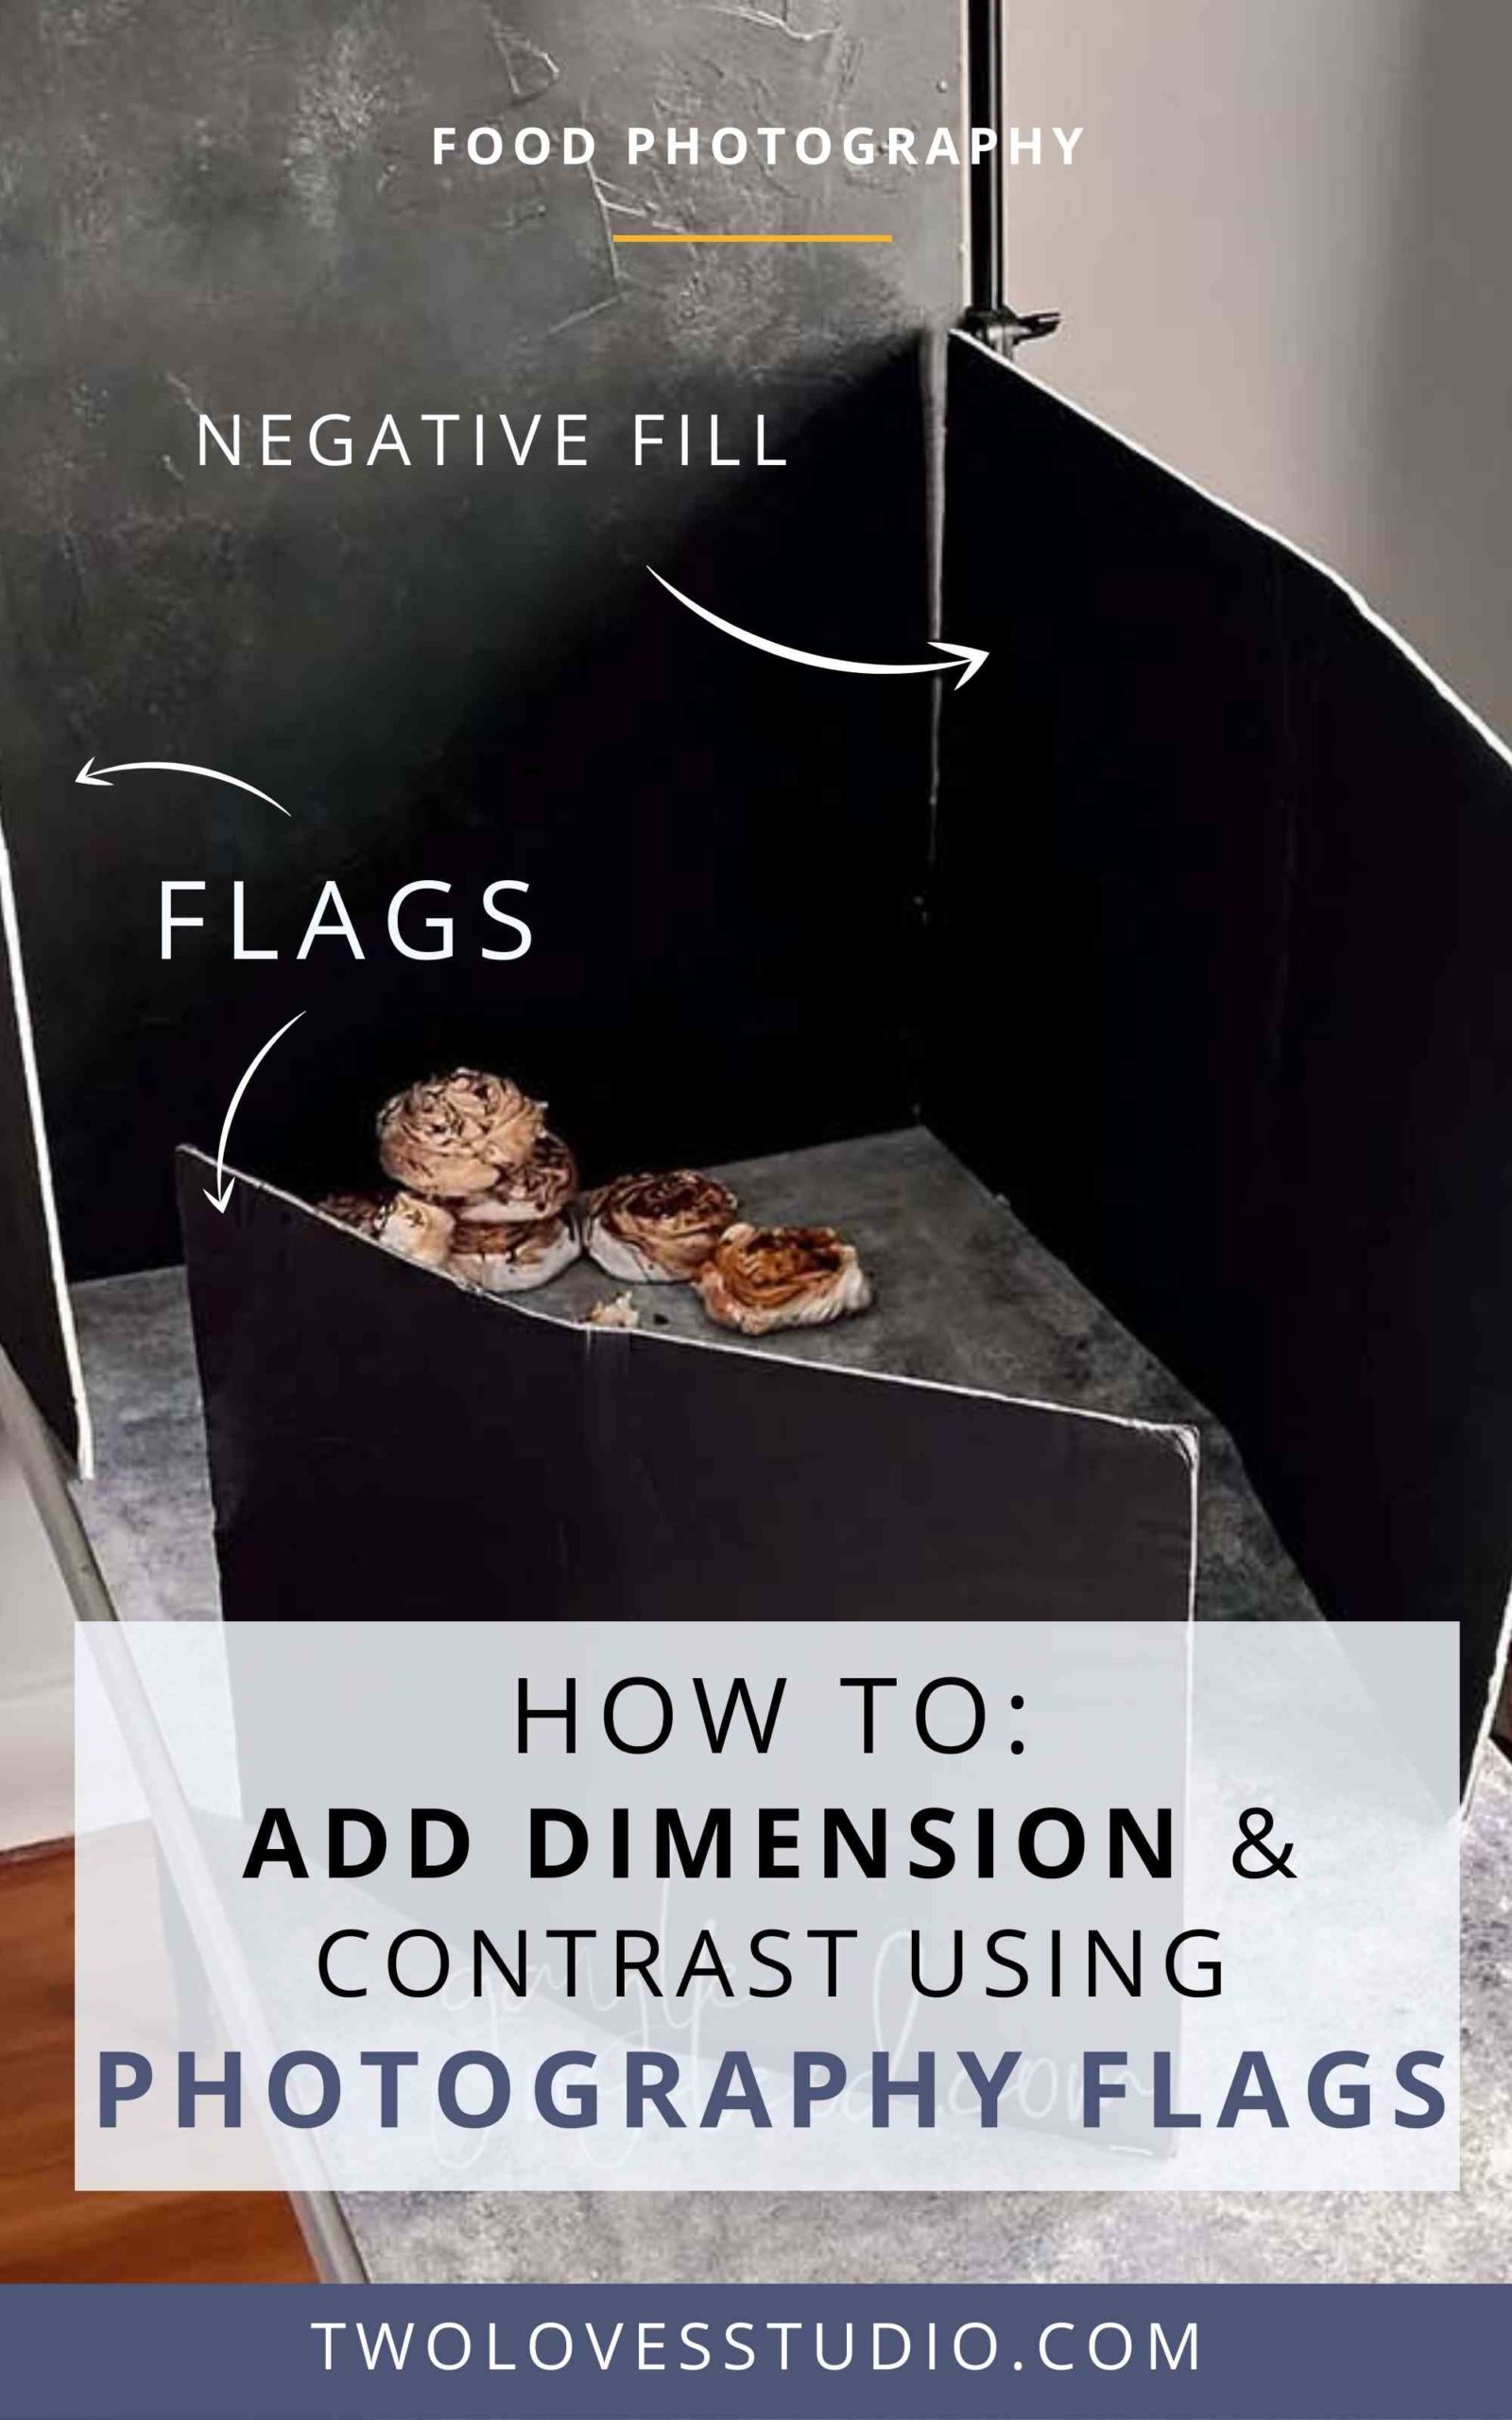
Flags are most often made from inexpensive black foam core and can be positioned around your scene to block the light from falling on areas where you don’t want it.
Foamcore can be easily cut down to any shape. It comes in a range of sizes and thicknesses from an art supply or dollar stores.
Pro Tip:
Depending on the size and placement of your flags, you’ll need clamps or tape to keep them in place. Alternatively, simply fold to create a slight V-shape so it will stand on its own if you’re placing it directly on the surface.
When Should Photography Flags Be Used?
- When your subject is lit well, but other areas of the scene are either too bright and distracting.
- If there is a lack in contrast resulting in a dull appearance. (This is common when the light source is larger than necessary and too much light falls onto the set).
- If there is ambient light affecting the scene. (This scenario can happen with natural or artificial light, by placing flags to control the light, we can draw the focus back to the hero).
Before I Started Using Flags in Photography:
Frequently in my process, I relied more on editing software (Lightroom and Photoshop) to make local adjustments to the scene exposure with linear or radial gradient filters.
The difference I found is the results from that software didn’t look as natural or have the same impact as when I manipulated the light itself.
Add Interest and Depth to an Image Using Flags in Photography
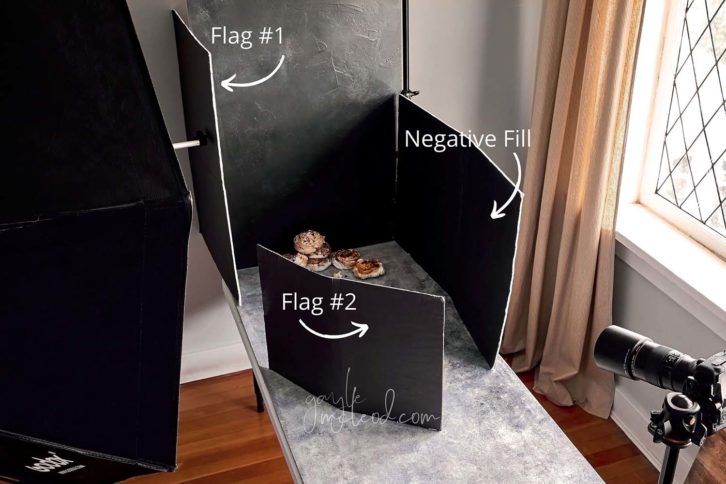
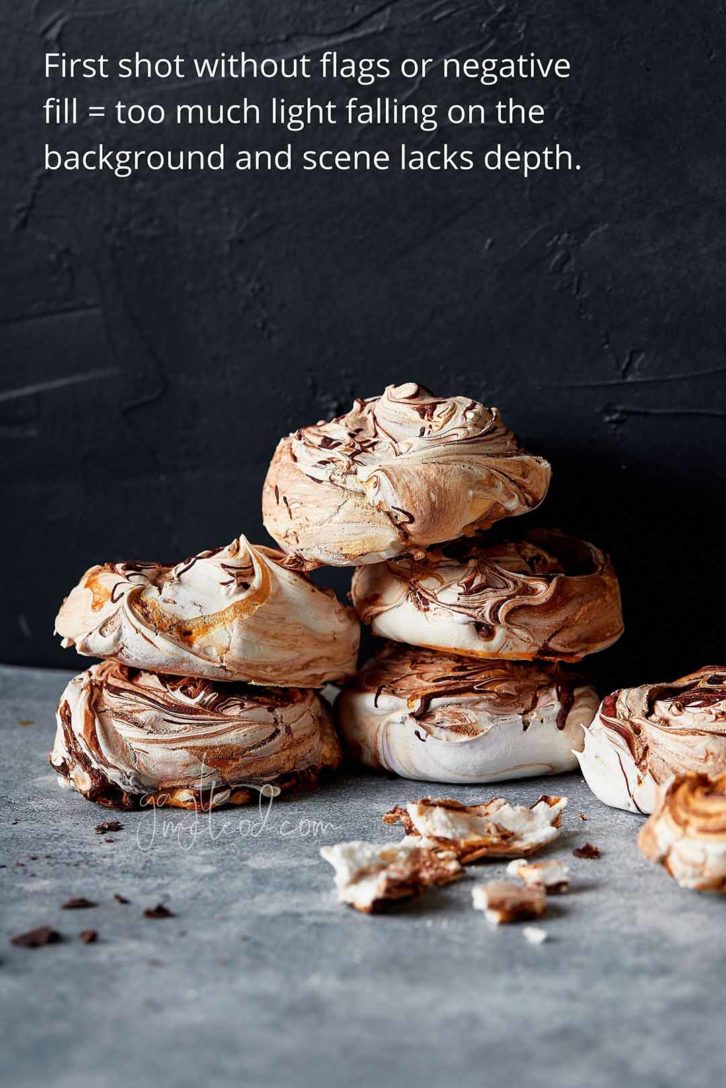
First, we build our scene. Here, I have a medium grey surface with a black background which already adds contrast since the subject is meringues. The meringues are arranged on a slight angle to the back of the set.
The camera is also on an angle to the back of the set, directly facing the meringues. This angle of the subject and camera to the horizon line of the set also creates depth and visual interest. The light is coming from the side, positioned slightly to the front of the set.
List of Gear Used:
- Camera: Canon 6D Mark II
- Lens: Canon EF 100mm f/2.8L Macro IS USM
- Tripod: Manfrotto MT190
- Light Source: Godox SK300
- Modifier: Godox Octabox with Grid – 120cm
- Light Stands: Neewer
- Foam core: Black foam core
- Clamps
The Next Shot: Setting Up The Photography Flags
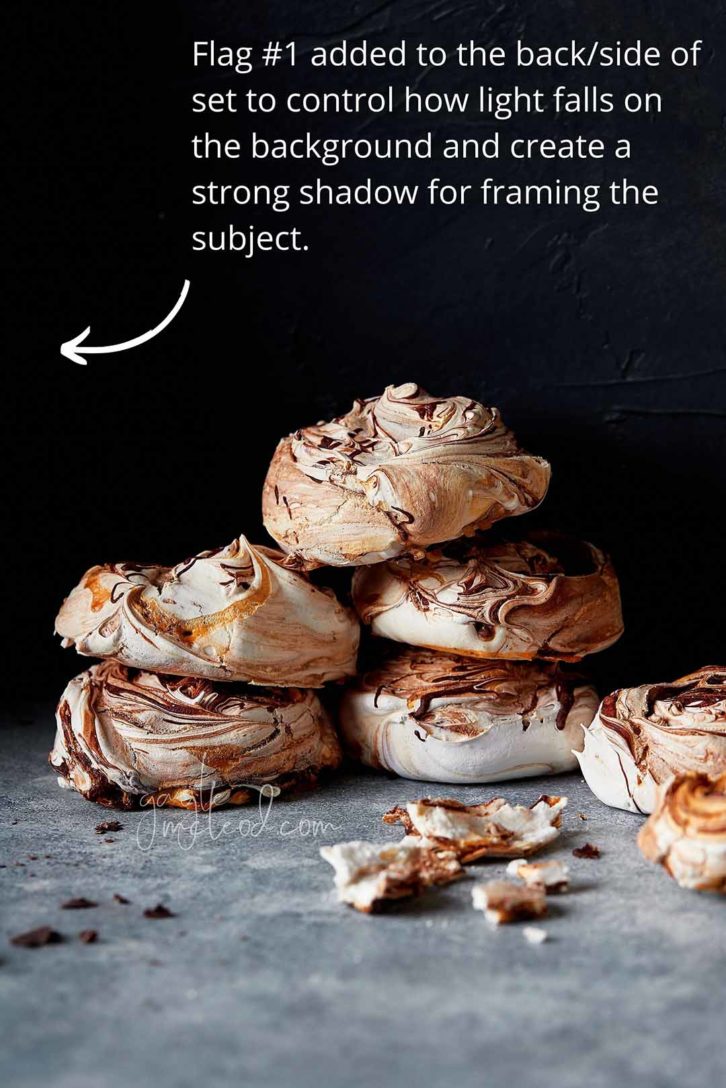
In this next shot, I placed a photography flag at the back of the set to block some of the light falling on the black background. By adding this flag, a strong shadow was created that helped frame the edges of the two stacked meringues.
I styled the table having in mind the vision of a sunny lunch outside.
I then placed another flag at the front left corner of the scene to control some of the light falling on the surface at the bottom of the image. Now, the opening between these two flags narrows the path for the light to fall on the subject, with the shadows essentially framing the meringues.
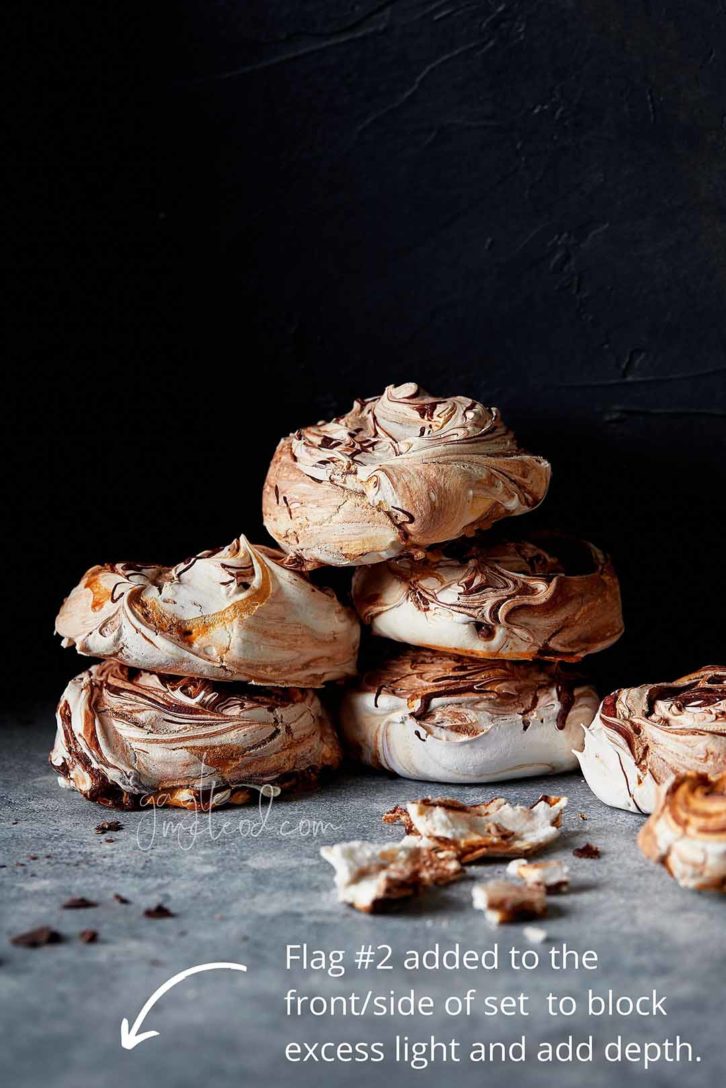
Adding Negative Fill For Enhanced Contrast
While the exposure on the meringues themselves hasn’t changed, they seem more defined and the texture more pronounced. If I had stopped shooting at this point, the shadows created make the scene appear more interesting and have also added visual hierarchy.
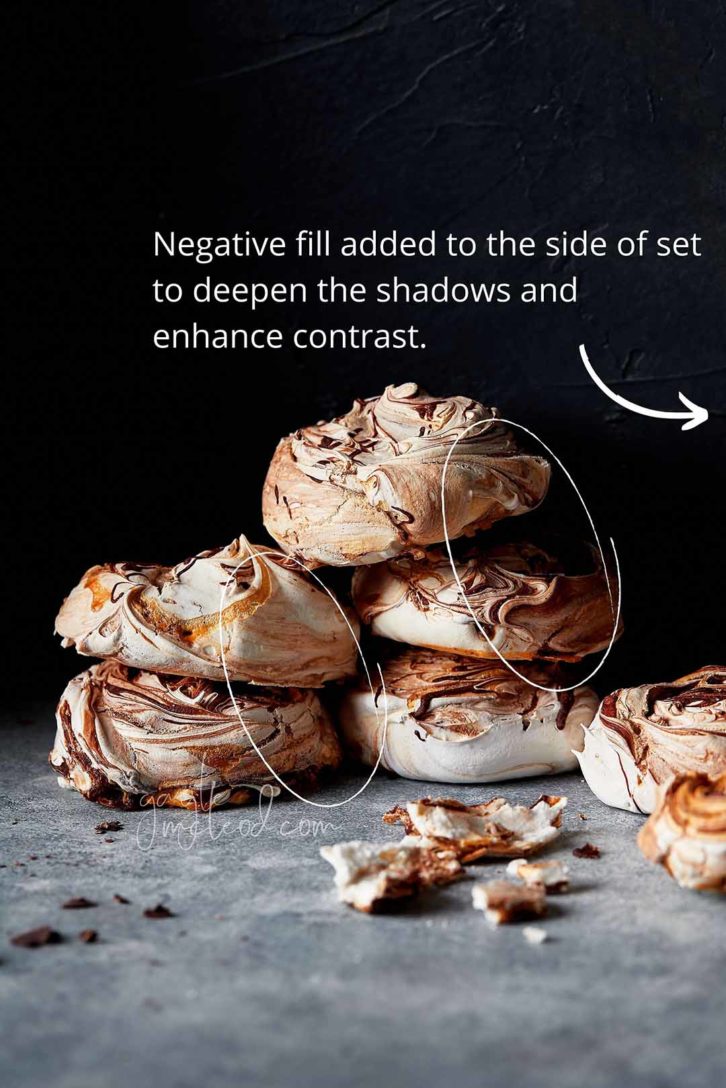
In the final step, I added a third piece of black foam core on the set, positioned opposite the light source to act as a negative fill for the scene instead of using it as a photography flag.
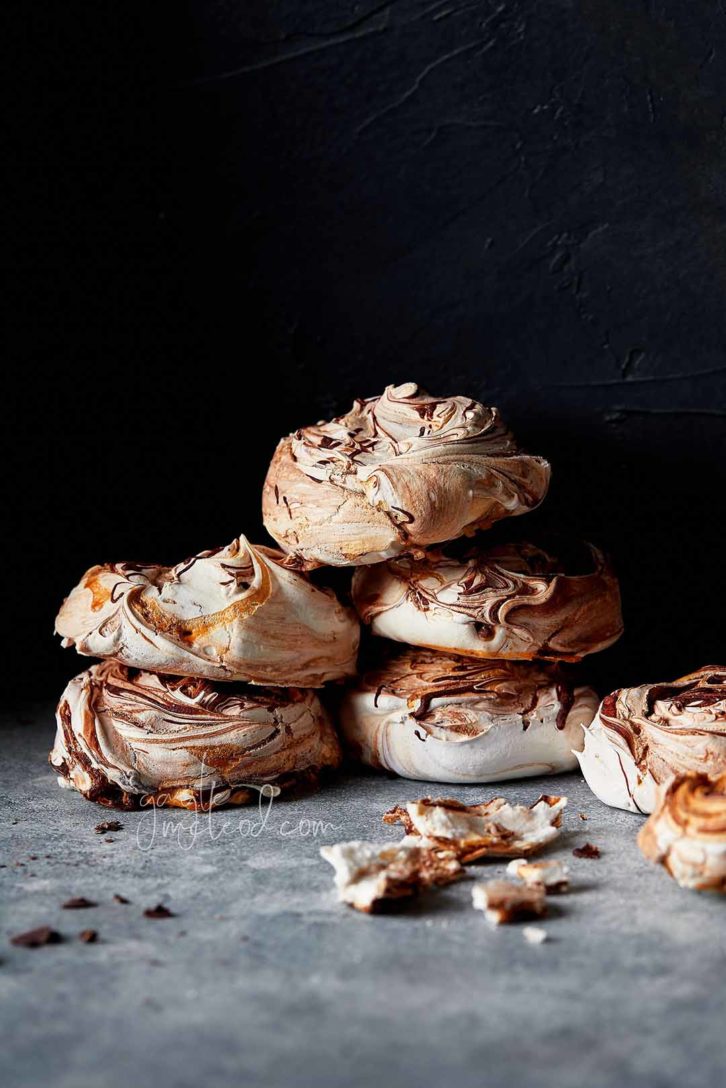
As you can see in the image below, the light now appears as though it’s glancing across the front of the meringues. We are drawn into the texture of the delicate cracks and swirls of chocolate and caramel. We can still sense there is a background and a foreground, yet neither of which are distracting.
Contrast is an important visual element. It helps us perceive dimension and create interest in two-dimensional images (a.k.a. make your images POP!)
By using photography flags to subtract light from your scene you can easily construct compelling images in-camera rather than at post-production. Practice different placements, experiment with shadows, and HAVE FUN!
Further reading: Check out the below for more articles about Lighting tips:
Simple One Light Photography Setup: Moody Black Forest Cupcake
How Learning Low Key Product Photography Improved My Creativity
Create Dappled Light Using a Speedlite: How to Guide.
Softboxes For Product Photography: What You Need to Know.
Natural Lighting Food Photo Tips You Need To Know For Chiaroscuro Effect.
Gayle McLeod wrote this post. Thank you Gayle for sharing your tips on dimension and contrast.

Gayle McLeod
Food Photographer
Hi! I’m Gayle McLeod, a professional food stylist and food photographer based in Vancouver, Canada. I love the art of bringing food to life by visually communicating the textures, flavours, and details in a way that is relatable and compelling to the viewer. Check out my website or stop by on Instagram!
Two Loves Studio was not paid to write this post, however, it may contain affiliate links. If you purchase an item from an affiliate link, we do get a commission on the sale which helps us run this site. Only affiliates for products/services we believe in appear on this site.






Eliza
Thank you for sharing! Great post ?❤️
Rachel Korinek
Thanks, Eliza! I love how Gayle uses flags. Very inspiring.
F
It could be something special.
flappy dunk
i think this is a great post