Here we are, folks! Nearly at the final lesson of this Photography Fundamentals Series.
And we’re talking about types of distortion.
I think this is key in photography and something that as a beginner is often overlooked.
But you can easily make a few changes to reduce lens distortion, which will dramatically improve your images.
What is Distortion in Photography?
Have you ever looked at a photo and thought, something just doesn’t look right?
Distortion could be the culprit. So let’s get into what distortion is and how you can fix or avoid it.
Distortion is something that happens that ‘distorts’ or ‘deforms’ our image.
This is where the ‘something doesn’t feel right’ feeling comes in.
Either the gear we are shooting with has deformed our image. Or we, as the photographer, have done something to deform the image.
There are two main types of distortion that I want to introduce you to.
One that occurs more than the other in food photography.
Types of Distortion: Optical + Perspective
The two main types of distortion that we are going to look at are:
Optical distortion and perspective distortion.
Optical distortion is also known as lens distortion, due to the fact that it’s our gear that is the cause. It’s lens error.
Perspective distortion is our other type of distortion. It has to do with the relative perspective of the subject to the camera or within the frame.
In food photography, I see perspective distortion something that happens more frequently.
Perspective Distortion is About Positioning
This type of distortion has to do with us, as the photographer.
It happens when due to our positioning and the subjects positioning within an image.
The easiest way I like to explain this concept if it’s new is by thinking about those wide angle flatlay images.
Have you ever taken a shot of a flatlay, and the subjects at the edge of the frame feel like they are slipping out of the image? And well, it looks weird.
That’s perspective distortion.
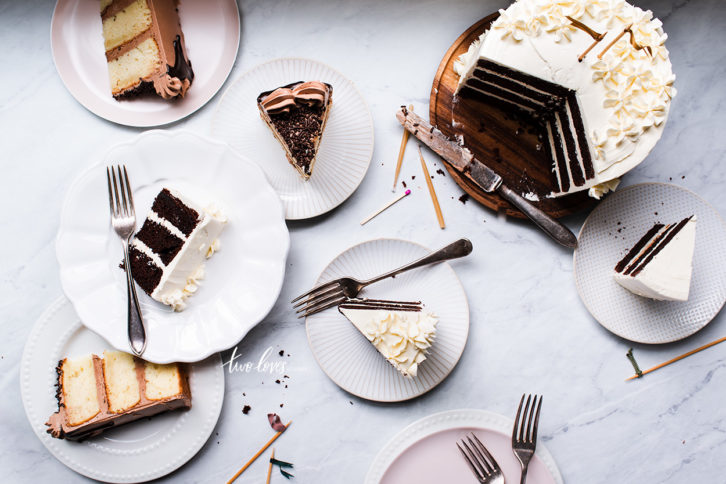
This occurs due to the lens you’re using and how close the subject is to the camera. Or put another way, how close the subject appears with respect to the background.
It looks disproportionally close.
I see this mostly happening in food photography when photographers are limited to what lens they have.
They only have a wide angle lens, and they want to get a close-up shot.
The ‘why’ behind this has to do with the relationship between the focal length of your lens and your positioning. Meaning the distance between you/camera and the subject.
Now, I just want to recap quickly here before we move on.
Perspective distortion with your wide angle lens will occur when you try to get up close to the subject.
The size of your subject will look disproportionally large compared to the background. This is what causes distortion.
Let’s look at some examples here.
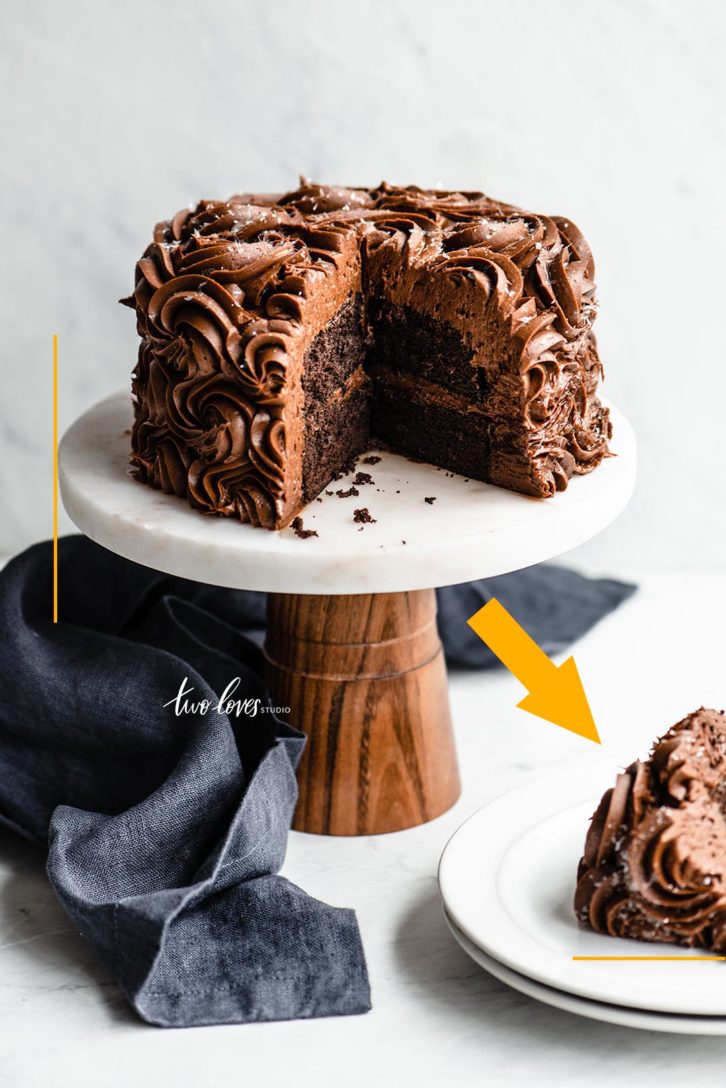
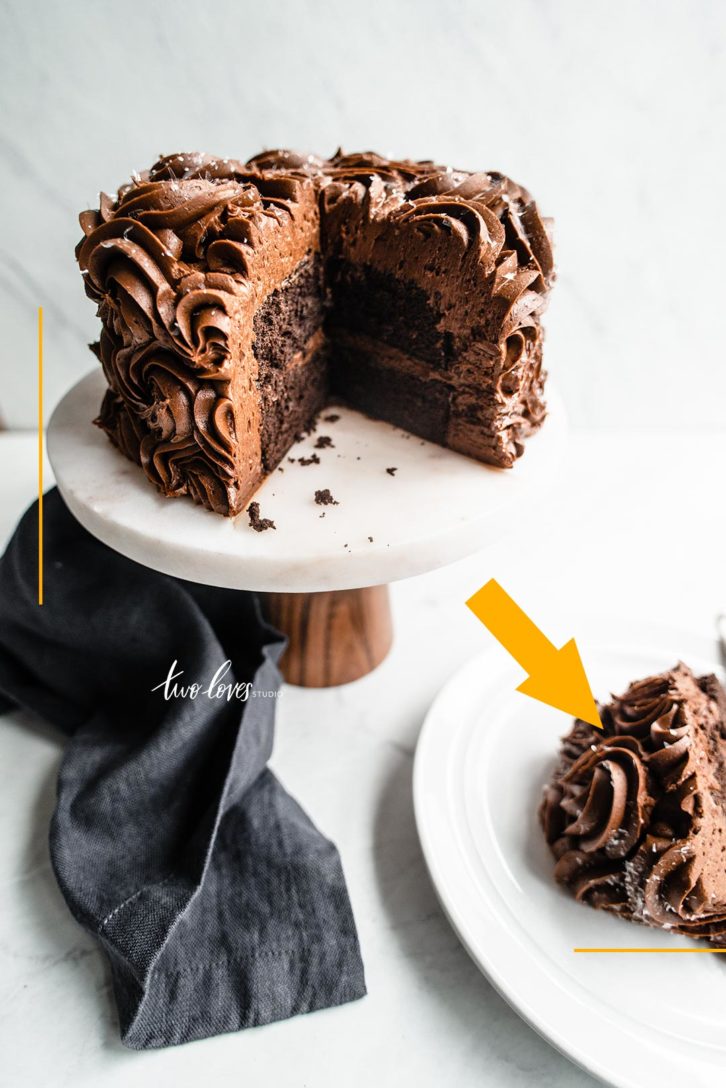
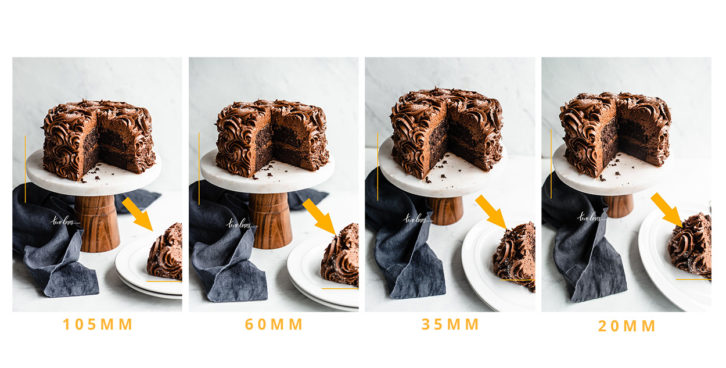
You can see in the image on the right that shooting with a wide angle lens makes the cake ‘look weird’. The cake slice looks like it’s sliding out of the frame and is proportionately large.
These images looks like I changed angle, but that’s how this works. I shoot the two images above, the only thing I changed was distance. The camera was at the same angle.
The goal is to line up the side of the cake stand and the piece of cake in the foreground in the same place to see how we get perspective distortion.
Related: 4 Ultimate Lenses For Beautiful Food Photos
Optical Distortion
The other type of distortion is known as optical distortion or lens error.
It’s a little more complex as to why this type of distortion occurs, as it yields different results.
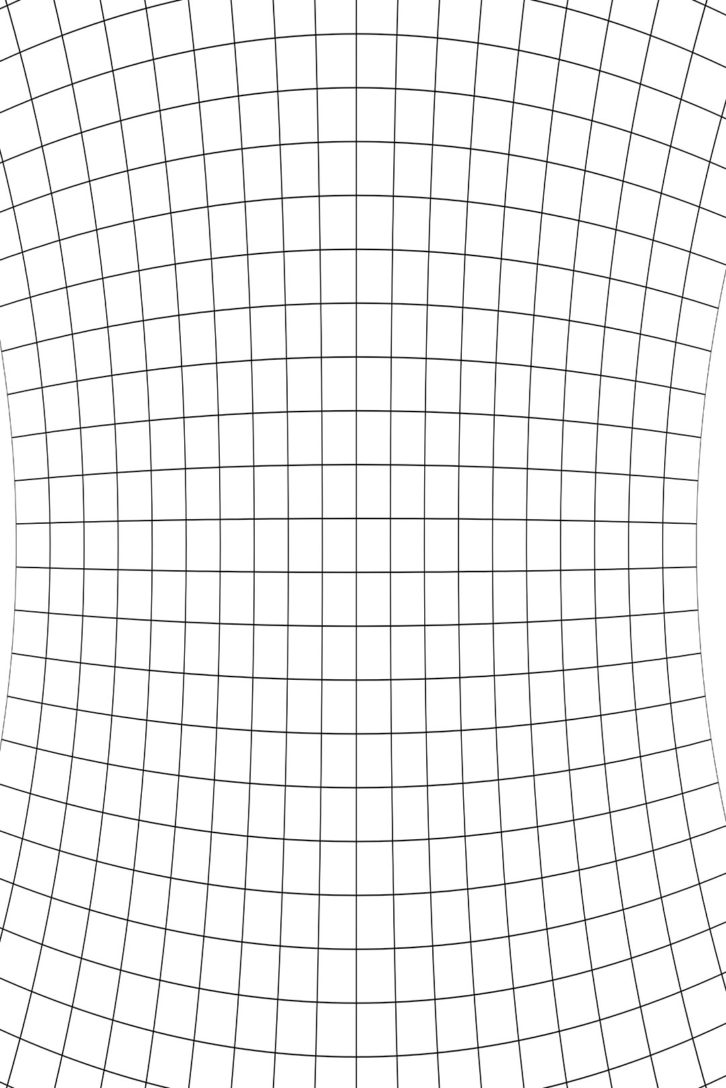
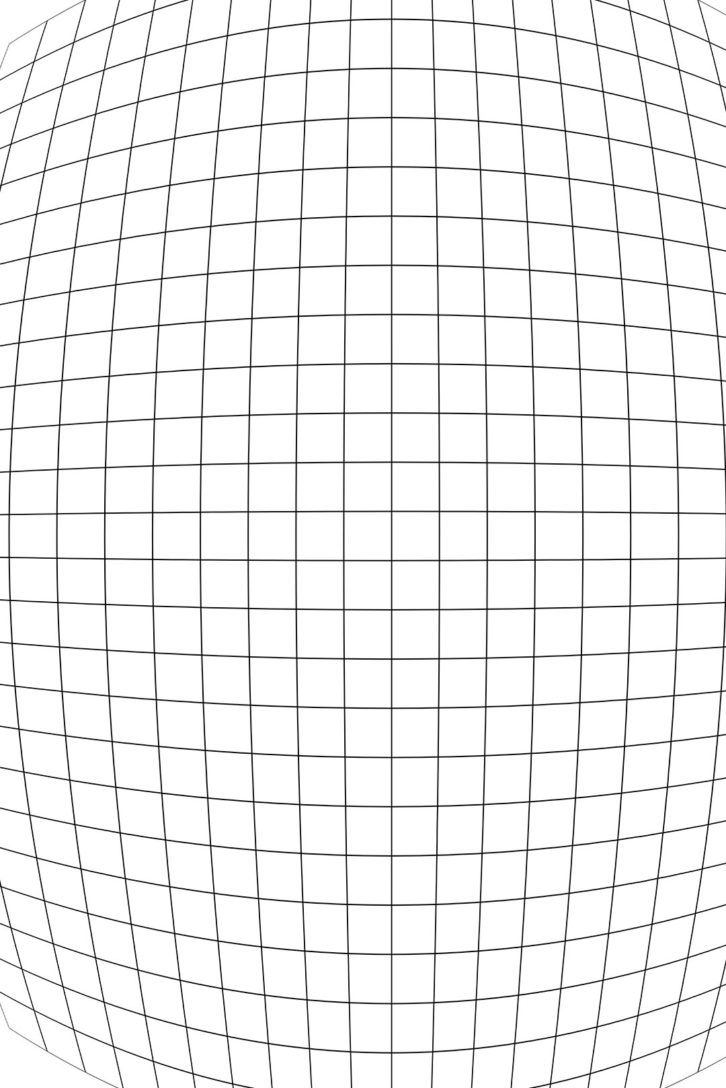
It’s basically optical aberration that deforms or bends straight lines. It results in them appearing curved or bent.
There are a couple of types of optical distortion. They are Barrel distortion, pincushion distortion or mustache distortion.
I’m not going to get too deep into each type in this post.
All you need to know is that optical illusion bends or curves straight lines.
Depending on which way they appear bent, it’ll give us a different name.
Lines can appear to curve inwards, outward or a combination.
If anything, just keep that point in mind.
Now that we know a little bit more about what causes these odd looking images, let’s look at how to reduce it.
How to Reduce Distortion
How we reduce distortion depends on which type we have.
So identifying whether it’s optical or perspective is the first step.
Firstly, let’s look at how to reduce perspective distortion.
Reducing Perspective Distortion.
We know that perspective distortion has to do with the combination of focal length (lens) and distance to our subject.
So to reduce perspective distortion with our food photography, we have to change either one of those elements.
If you want your subject larger in the frame, then you would switch from a wide angle lens to a narrow lens like the example below.
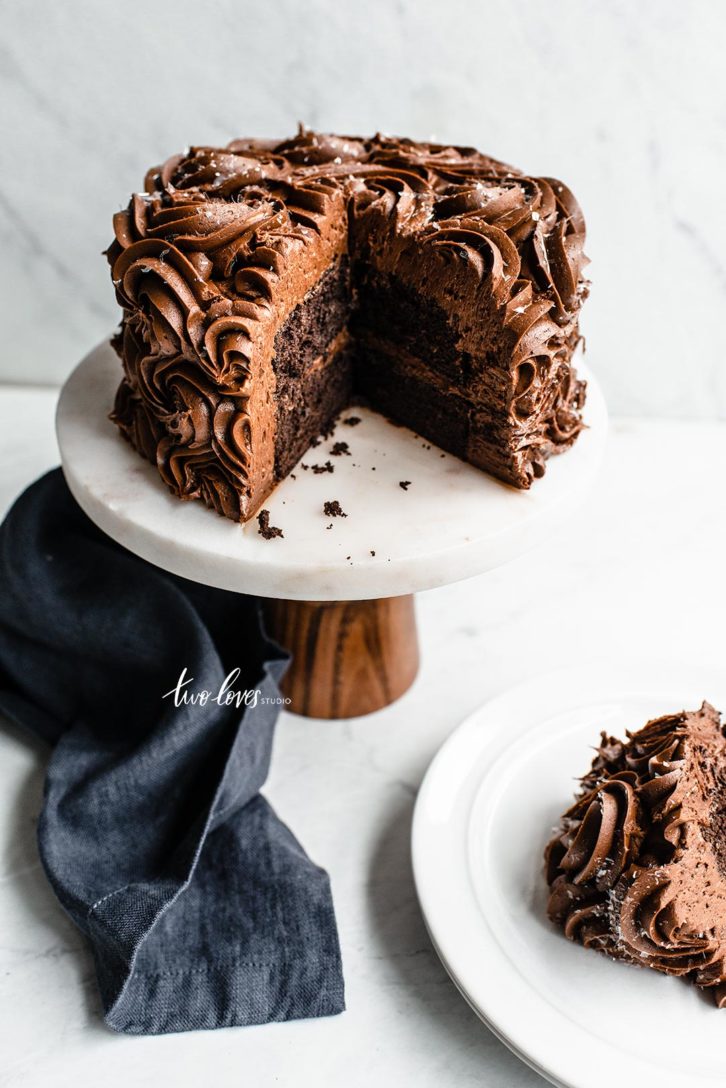
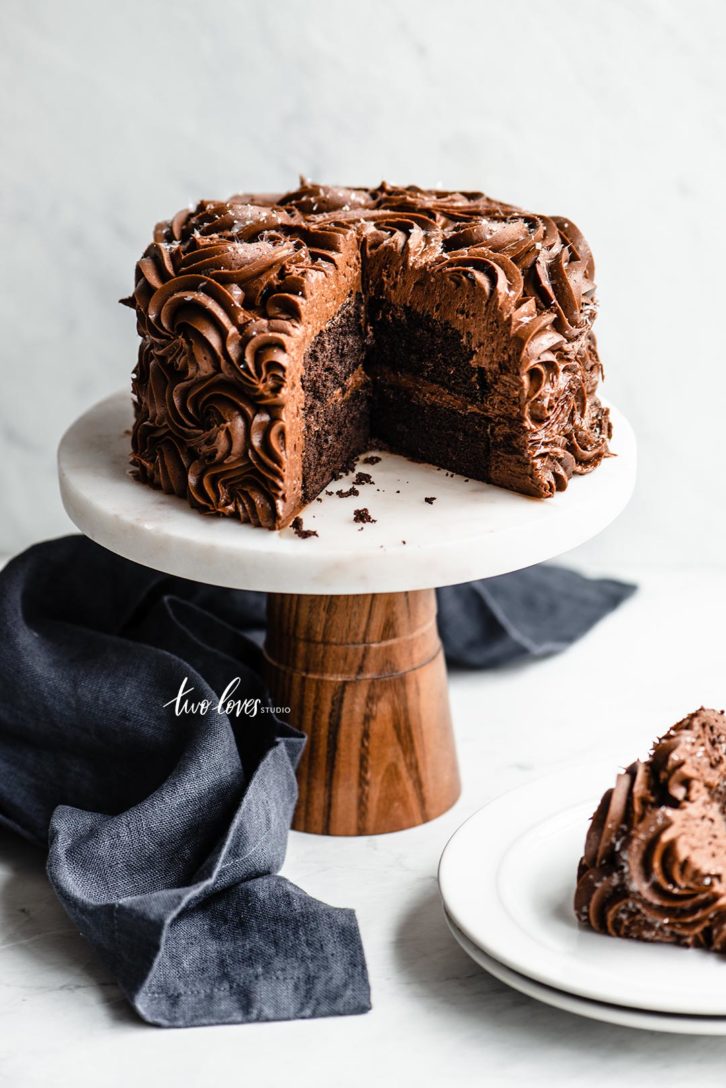
Even moving from a wide lens to a ‘normal’ focal length like a 50mm or 60mm will give less distortion than a 35mm.

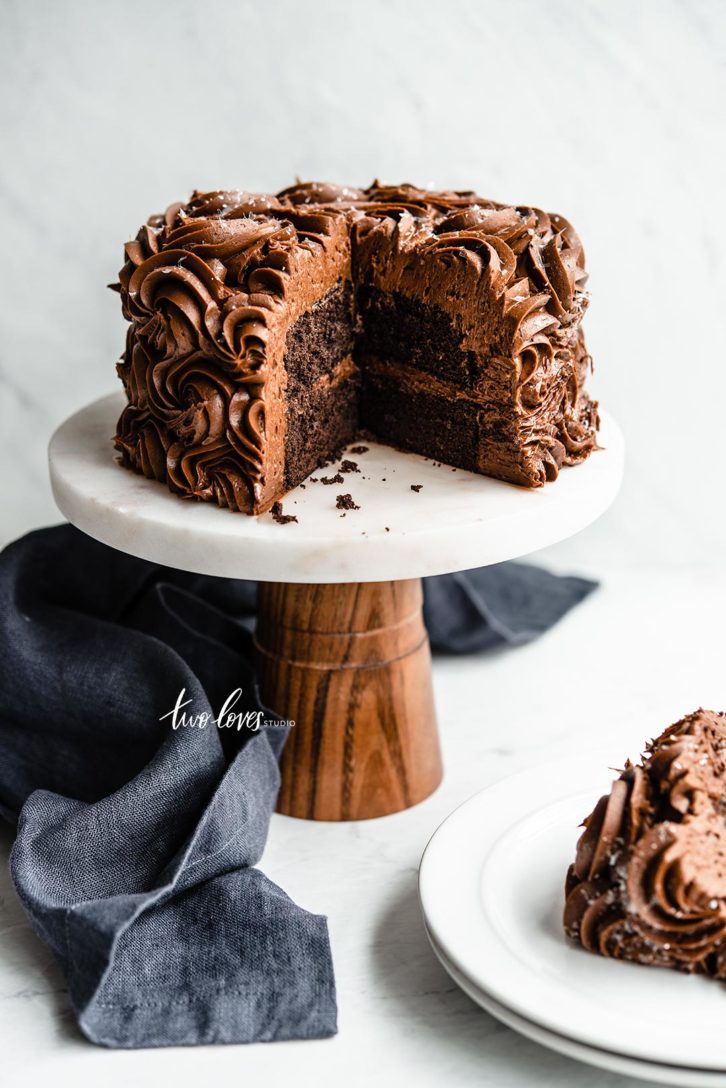
If you don’t have a narrow lens, you would get further from your subject and crop in (if possible).
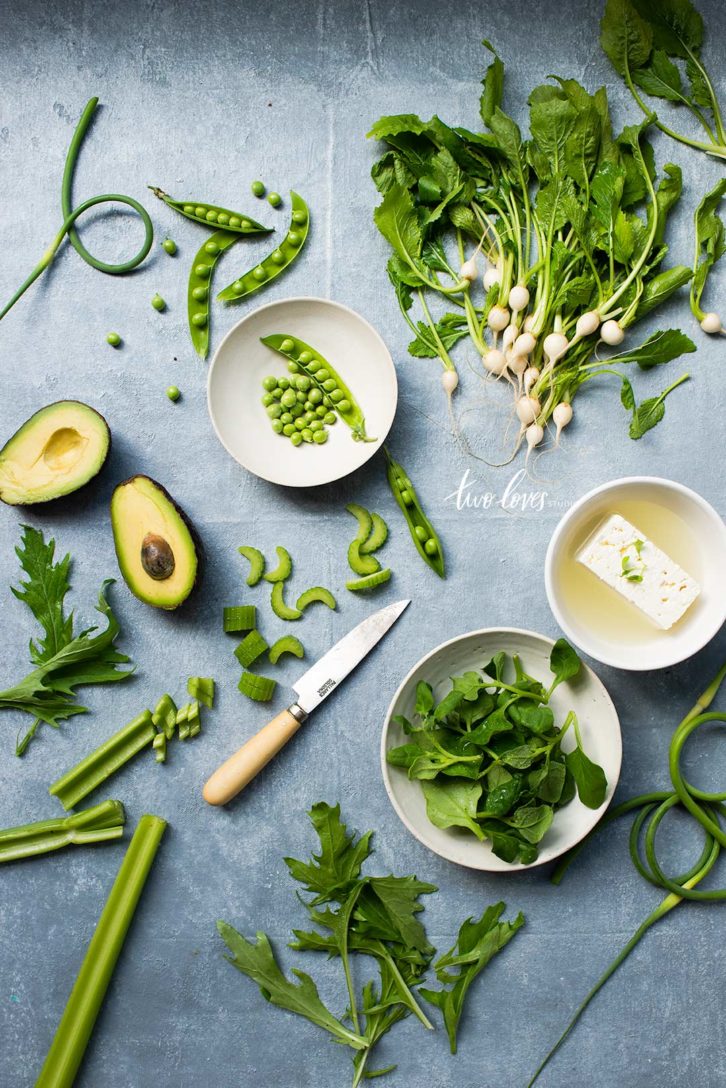
Perspective distortion from above happens less with short subjects.
The image above is shot with a 35mm, but the subjects are relatively flat at this height. This will give less distortion.
Reducing Optical Distortion.
Since this has to do with lens error, it’s not a matter of simply changing your positioning like with our other type of distortion.
With this type of distortion, you will need to rely on post-production to correct.
Depending on what program you use, it’s sometimes as easy as a preset or one click adjustment.
It can also depend on the type of lens error you’re seeing.
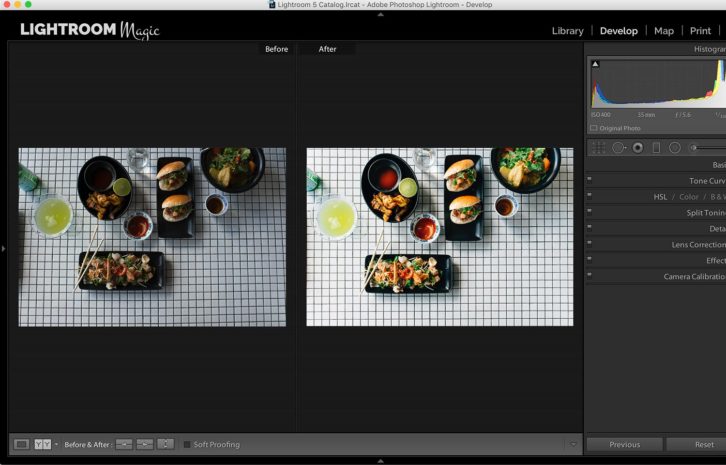
There are manual adjustments that you can do in say Lightroom that can give you more control over correcting straight lines.
For in-depth training, I teach how to do this in my Lightroom masterclasses for food photography.
Recap
I know this can be a tricky subject to get your head around, and hopefully, the visual examples helped.
In a nutshell, here are the takeaways from this post:
- Distortion happens when we distort our subject or straight lines in an image.
- There are two types of distortion. Perspective and optical.
- Perspective distortion happens when our relationship between focal length and distance distorts our subject.
- Optical distortion happens when we get lens error, resulting in curved lines, (outward, inward or both).
- We can correct perspective distortion but changing lenses and our distance to our subject.
- We can correct optical distortion in post-production.
Lesson
Next time you’re having coffee with friends, do a little experiment.
- Take out your smartphone and use the ‘normal’ camera.
- Get really up close to the coffee so it’s large in the frame. Take a snap.
- Then using ‘portrait mode’ (if you have it), take another snap of your coffee, but this time don’t get so close.
- Try to make the coffee the same size. Take a snap.
- Then compare the two. Which looks better?
- If you don’t have portrait mode, just use the regular camera, but move further away. Take a snap and this time, crop in closer with an editing app to compare.
If you’re taking Photography Fundamentals 101, click here for your next lesson.





Simal
Hello Rachel!
Thanks a lot for this informative post! I have one question, for cropped sensor cameras will I have perspective distortion same as full frame (with same lens)? Or for a 35mm lens it will act like a 35*crop size?
Thanks!
Rachel
Hey Simal, great question! On a cropped sensor you will have distortion at the equivalent of 35mm, (so on a 24mm lens would give you 35mm approx on a cropped sensor and you will see distortion then). If you shoot with a 35mm on a cropped sensor, it’s an equivalent of 50mm so there will be less distortion at the same distance. Does that makes sense 🙂