This post is sponsored in partnership with V-Flat World. All opinions are my own.
Food photography set up can range from simple to complex and professional. But you don’t need a huge amount of gear to make beautiful photos.
Having a working setup will help you to focus on being creative, styling your food and capturing that story.
Let’s dive into a step-by-step process for creating a food photography set up.
Step-by-Step Food Photography Set Up
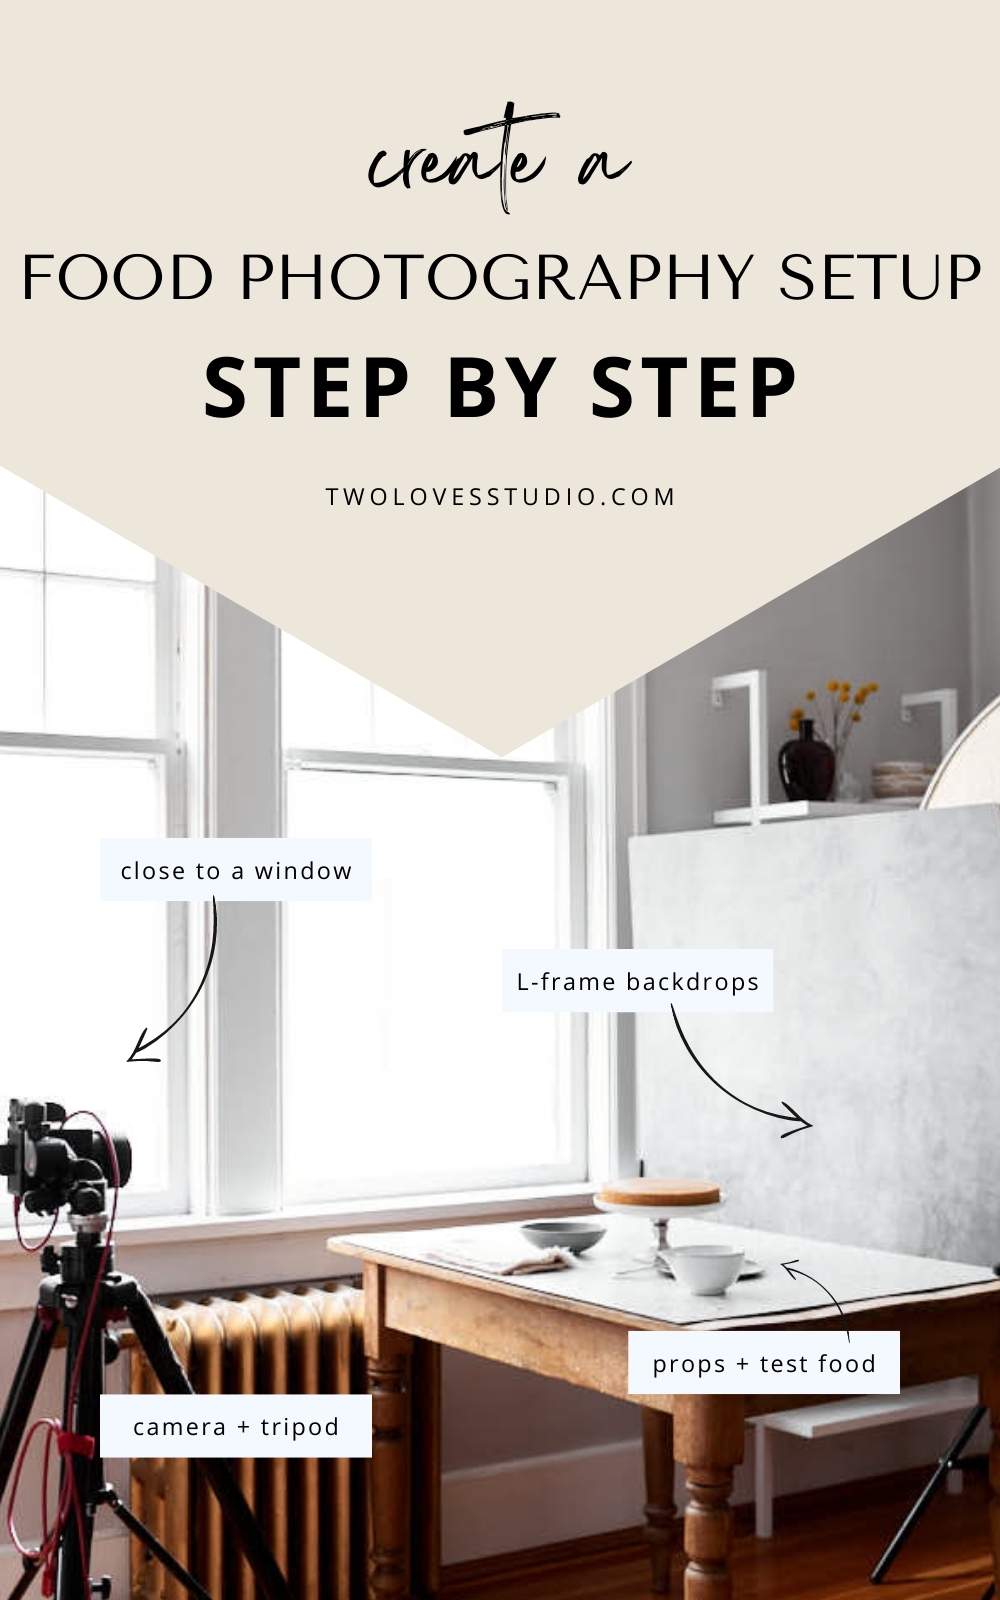
For a quick overview, here are the 7 steps to create your food photography set up.
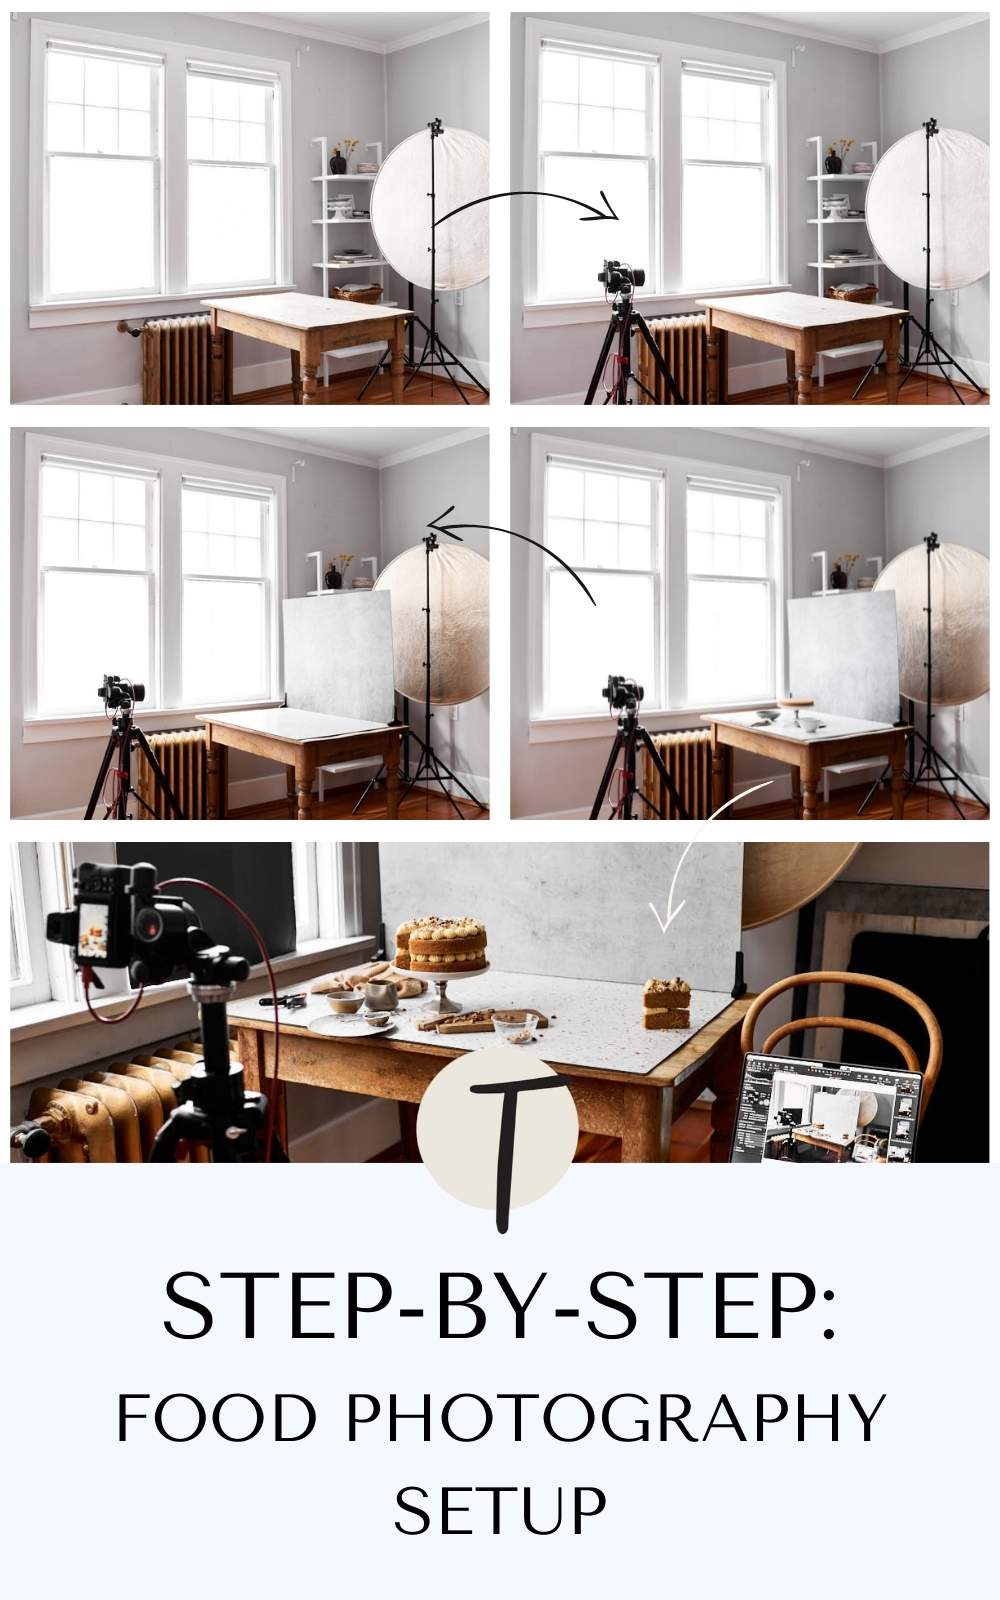
- Use a table to create your photography scene
- Position your table near a light source
- Set up a tripod and camera at your desired angle
- Position food photography backdrops to make an ‘L’ frame
- Style your scene with props + test food
- Use lighting modifiers to shape light
- BONUS: Tether by connecting your camera to your computer
To learn more about each one and see our step-by-step setup with images, keep reading!
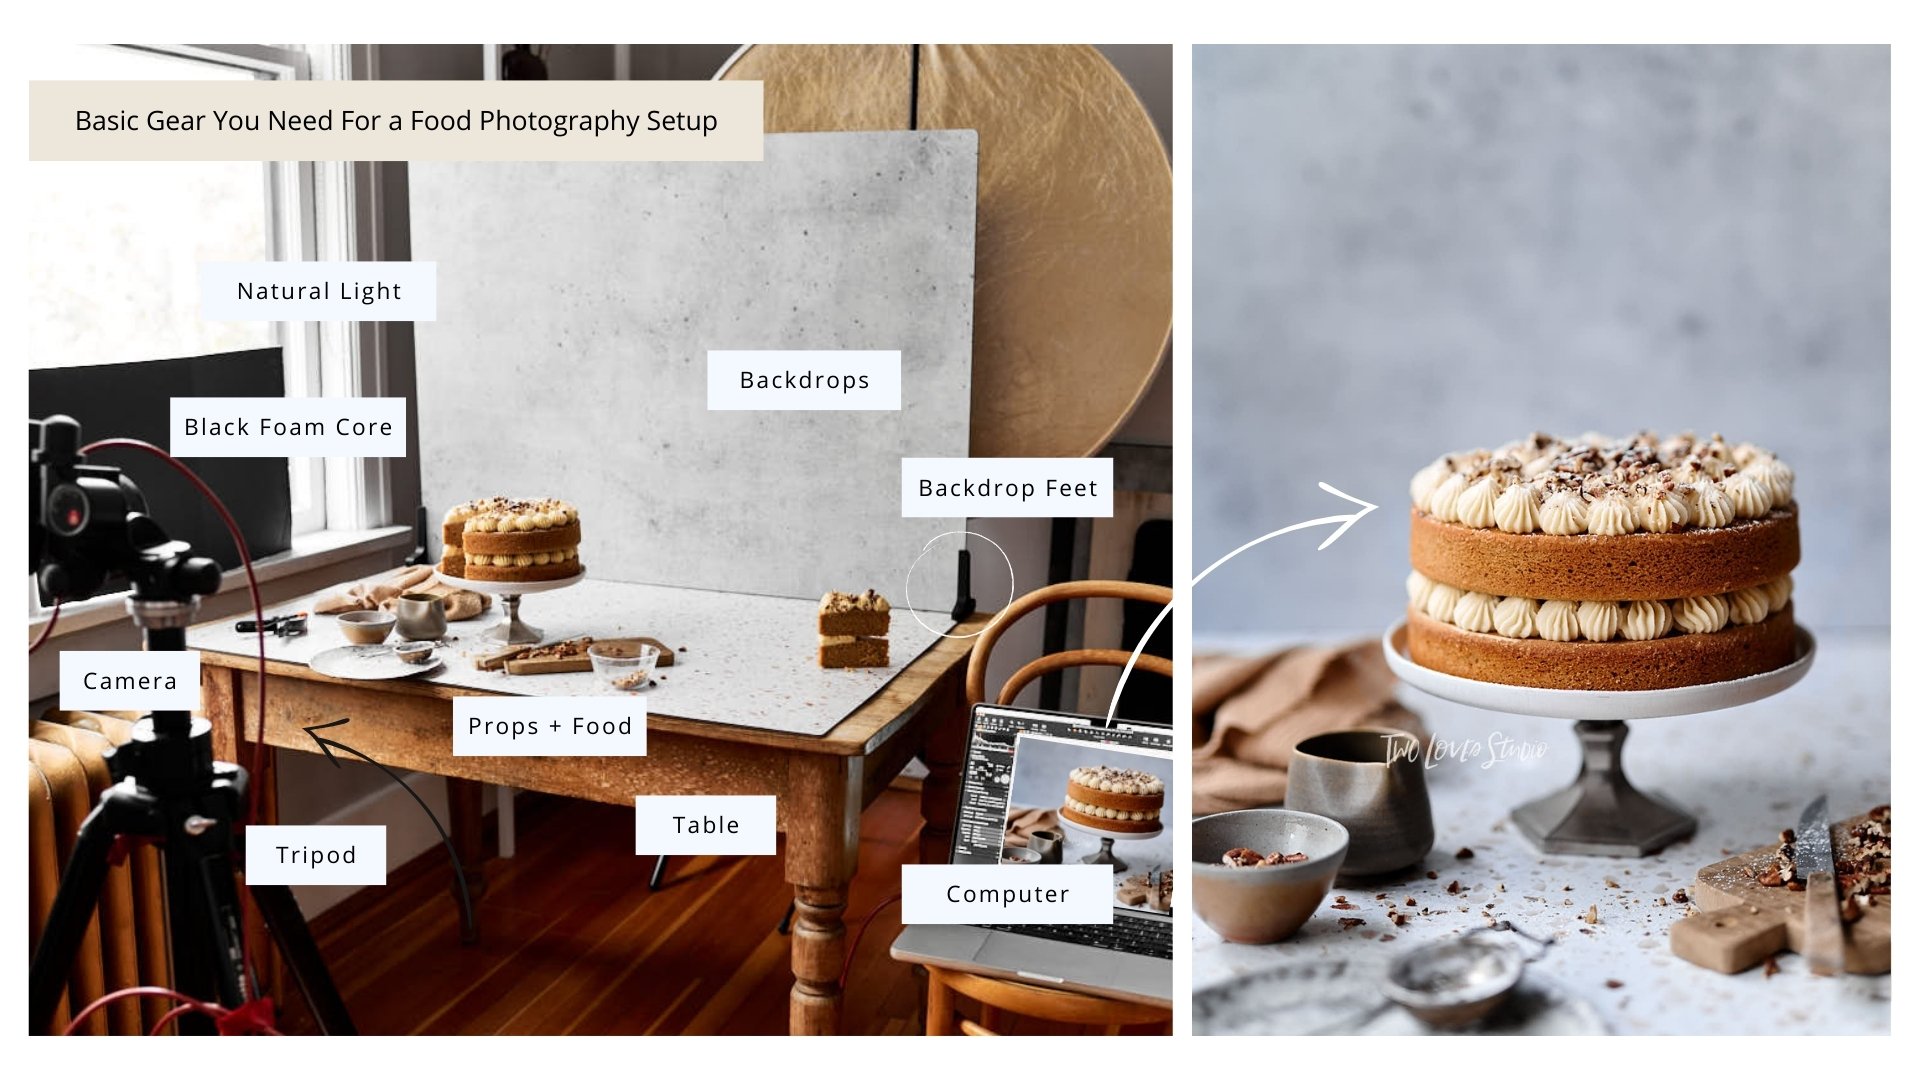
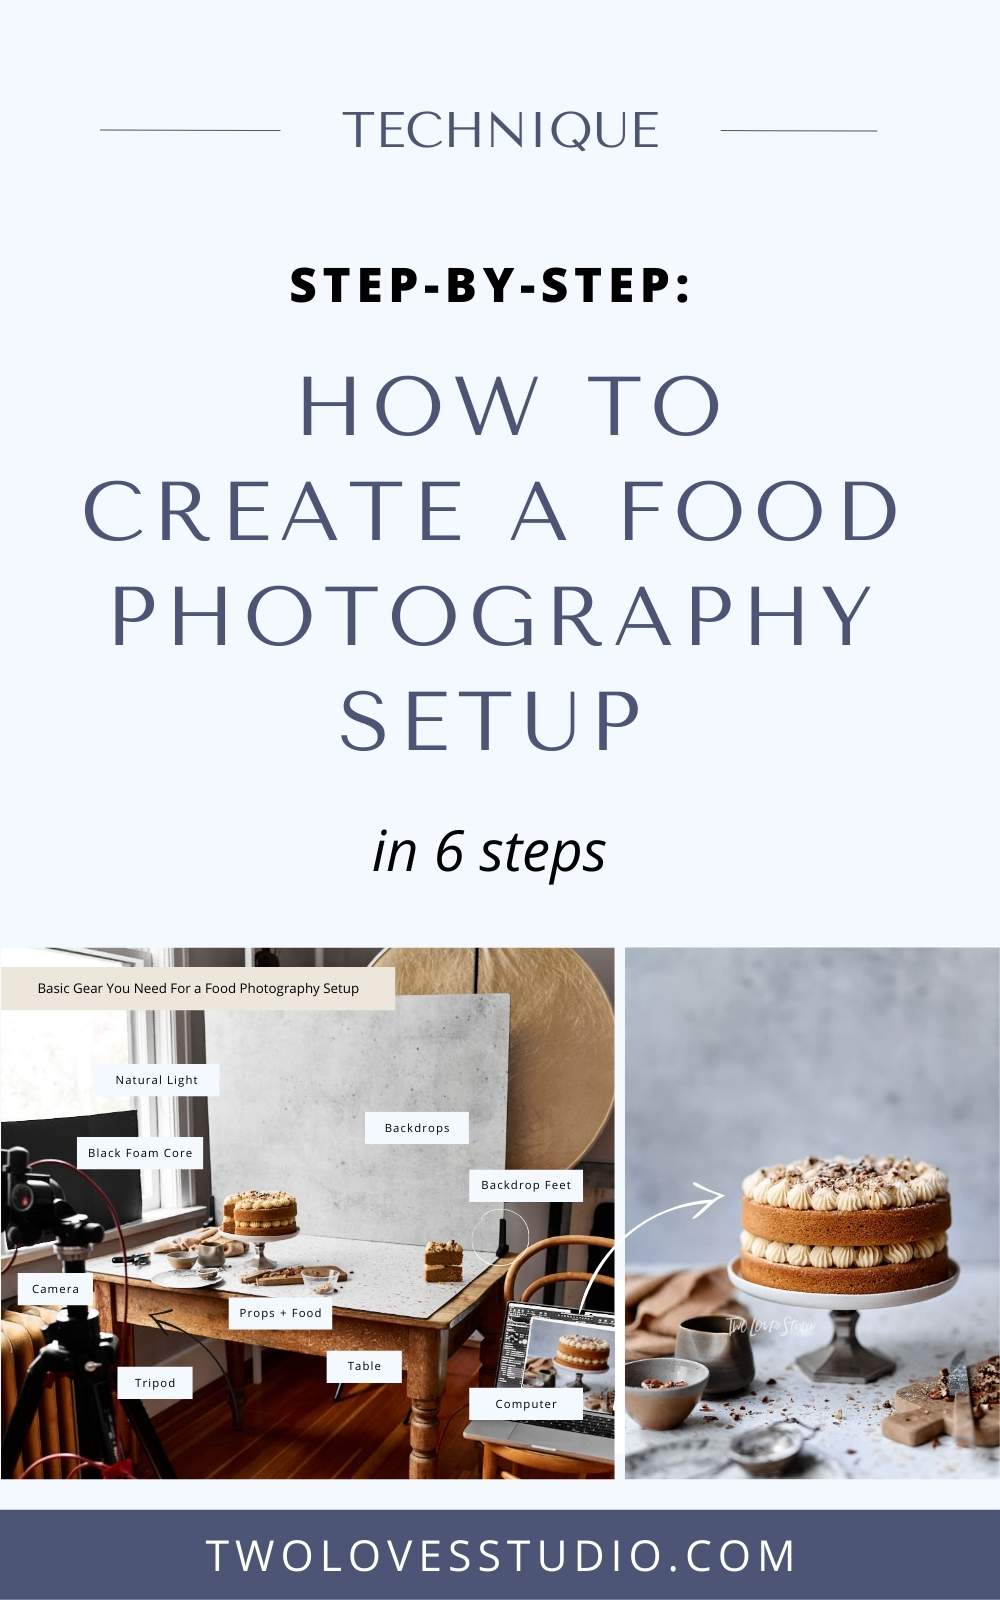
Basic Gear You Need For a Food Photography Setup
- Table, apple boxes, crates etc where you can set up a scene
- Camera, lens and tripod
- Backdrops and props
- Lighting diffuser and bounce foam boards
- Computer and tether cable (if tethering)
Step 1: Use a table to create your photography scene
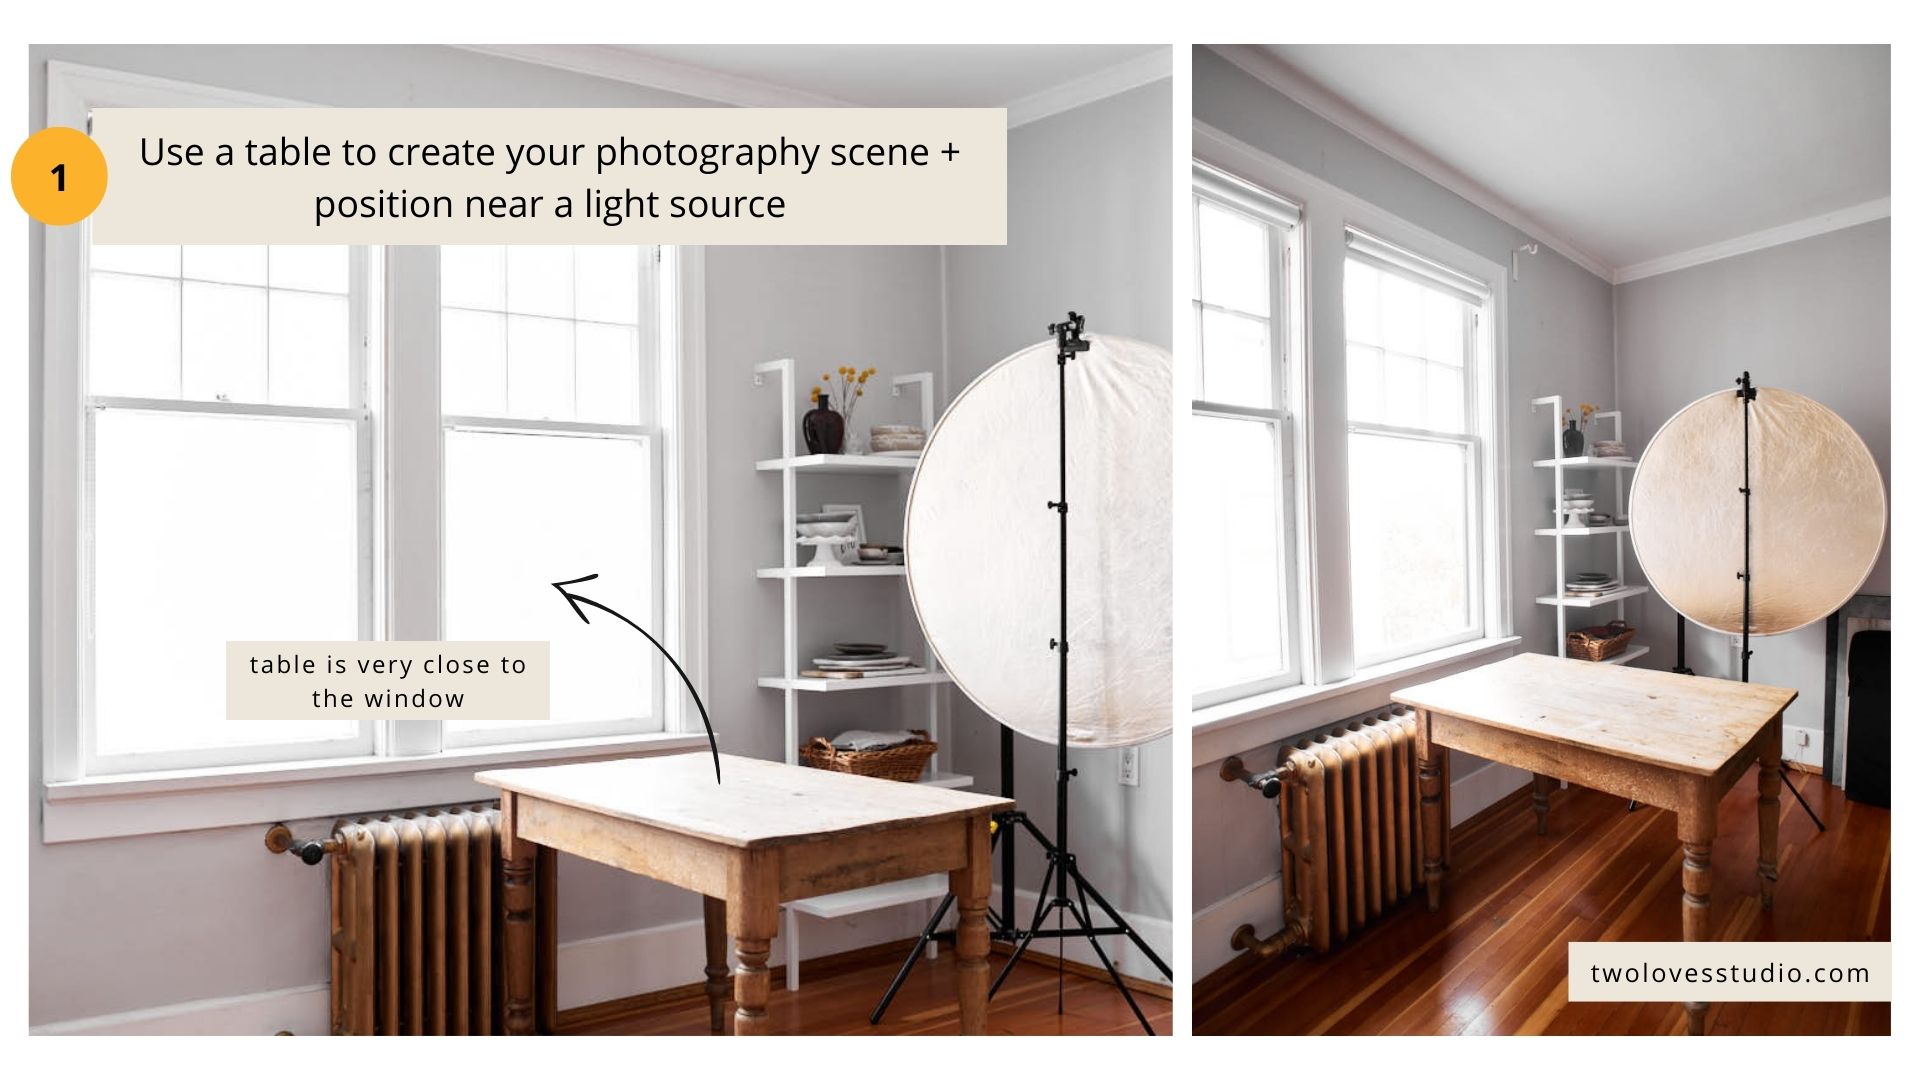
If you have access to a table, desk or similar it’s the best platform to position your food photography set up. Other things you can use are apple boxes or crates as long as they are stable.
Don’t tell anyone, but I did once use a small Ikea stool! Not recommended as it’s not stable and but sometimes we have to use what works.
Using a table to set up your scene is better than using the floor (in most cases) because:
- You need to be at a certain height for good lighting (in most cases)
- It allows you to shoot a range of angles
- Doesn’t strain your back
Step 2: Position your table near a light source
There is a sweet spot next to the window that you will want to use. The light is more powerful the closer you are to your light source (or window) due to the Inverse Square Law.
You’ll want to position your table anywhere between touching the window frame to 1-2m ( 3-6ft ) away.
Ideally, the light will be coming in sideways and not from above – as you’d find with basement windows.
Step 3: Set up a tripod and camera at your desired angle
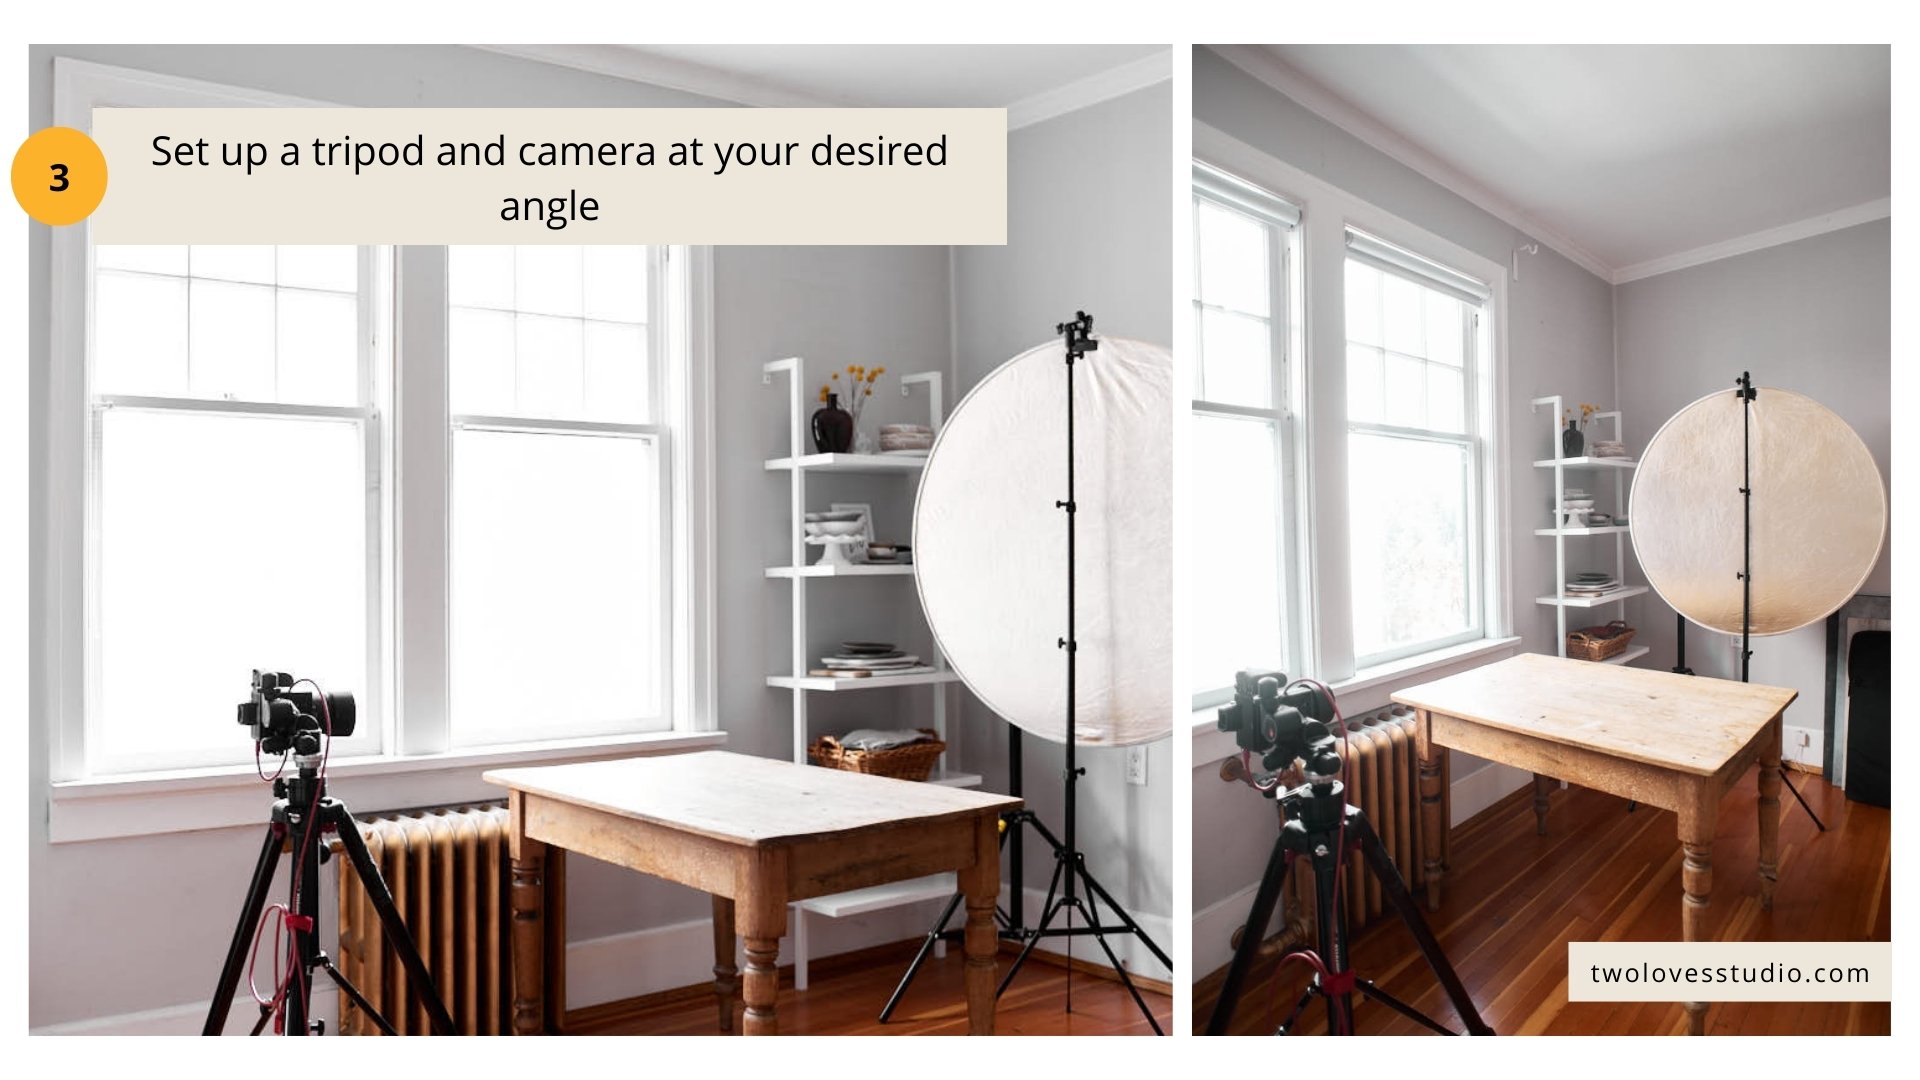
Because we are photographing food, which is a still-life subject, it’s very handy to use a tripod so your hands are free to style and make composition changes.
Choose your desired angle for the shot and set up your tripod.
If shooting overhead, you need a tripod that has an overhead arm extension to help you capture flay lays.
Step 4: Position food photography backdrops to make an ‘L’ frame
Food photography backdrops are an important part of getting the look. They are also a key part of the food photography set up process.
A backdrop can be the base of a photo when shooting overhead, or you will need both a base and a board in the background to create an ‘L frame’.
The first step is to lay a background flat on your table and then use a board standing up to create the backdrop.
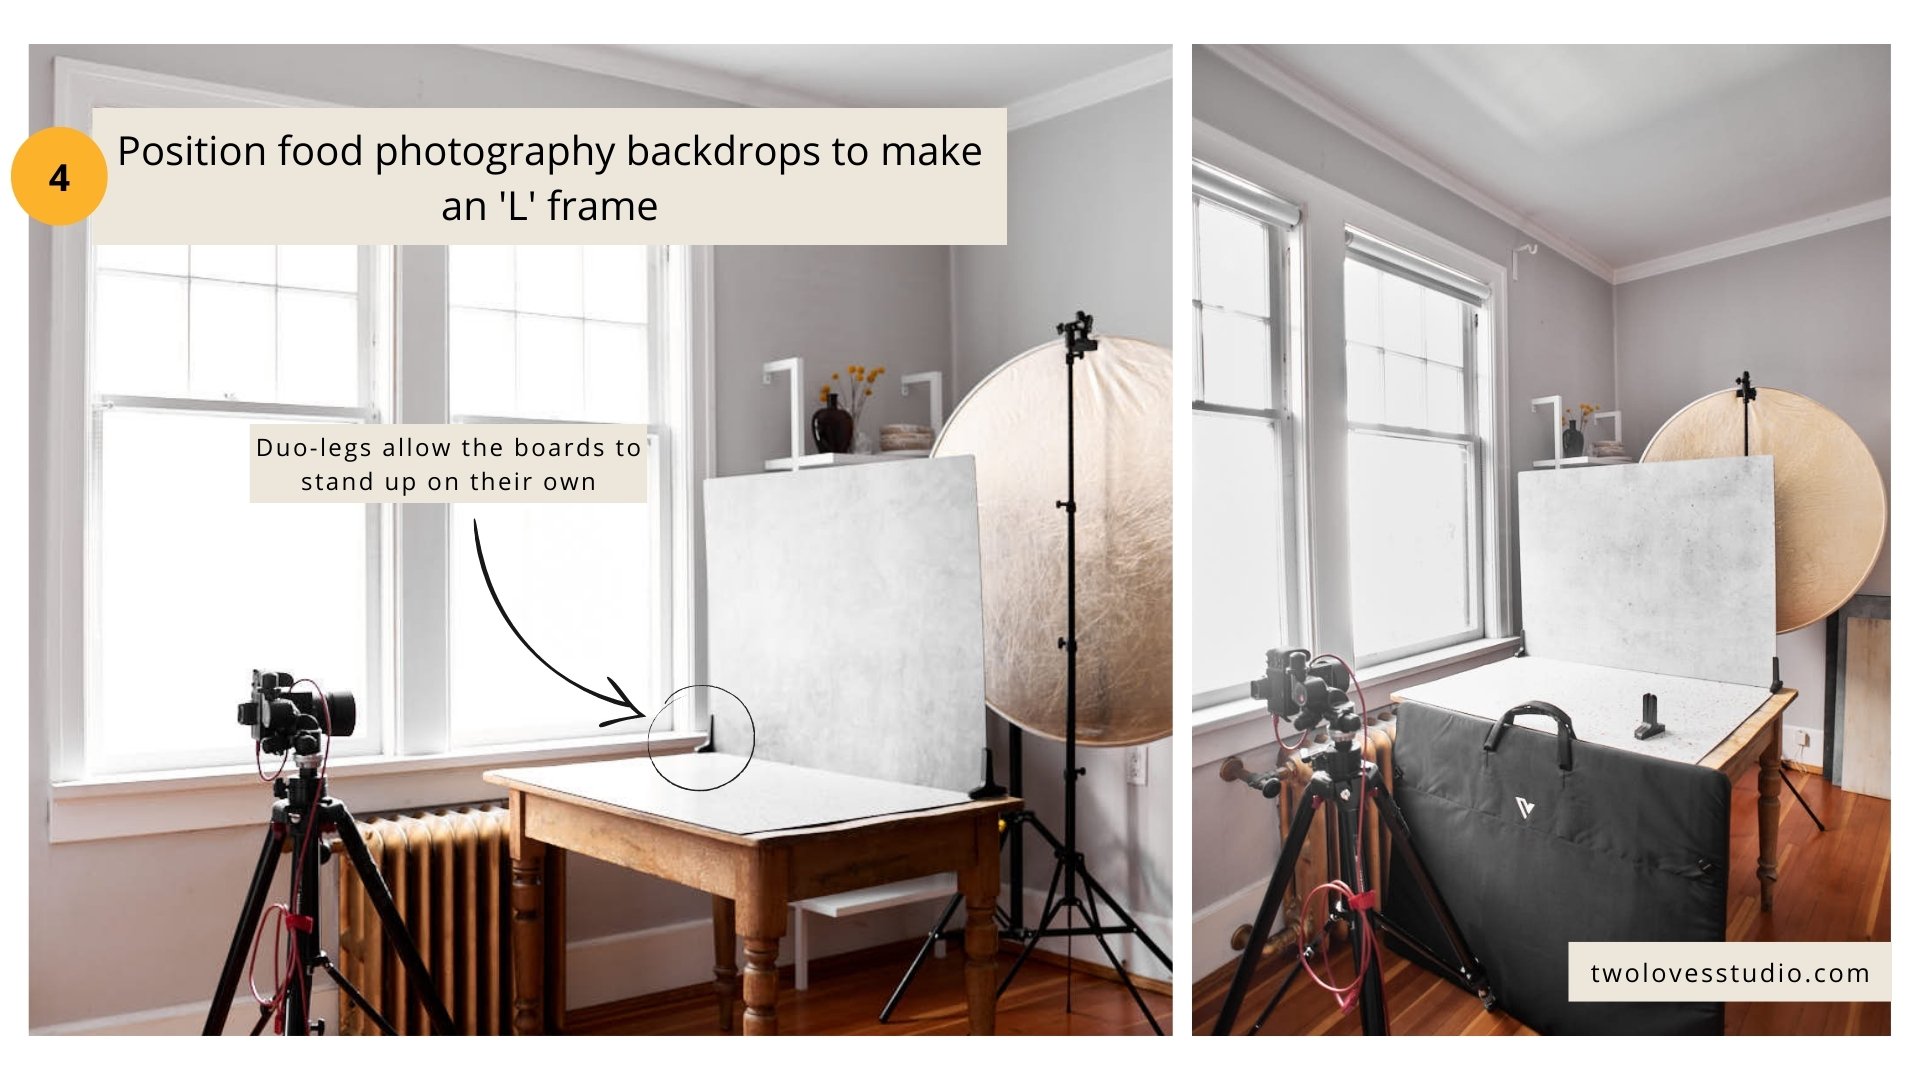
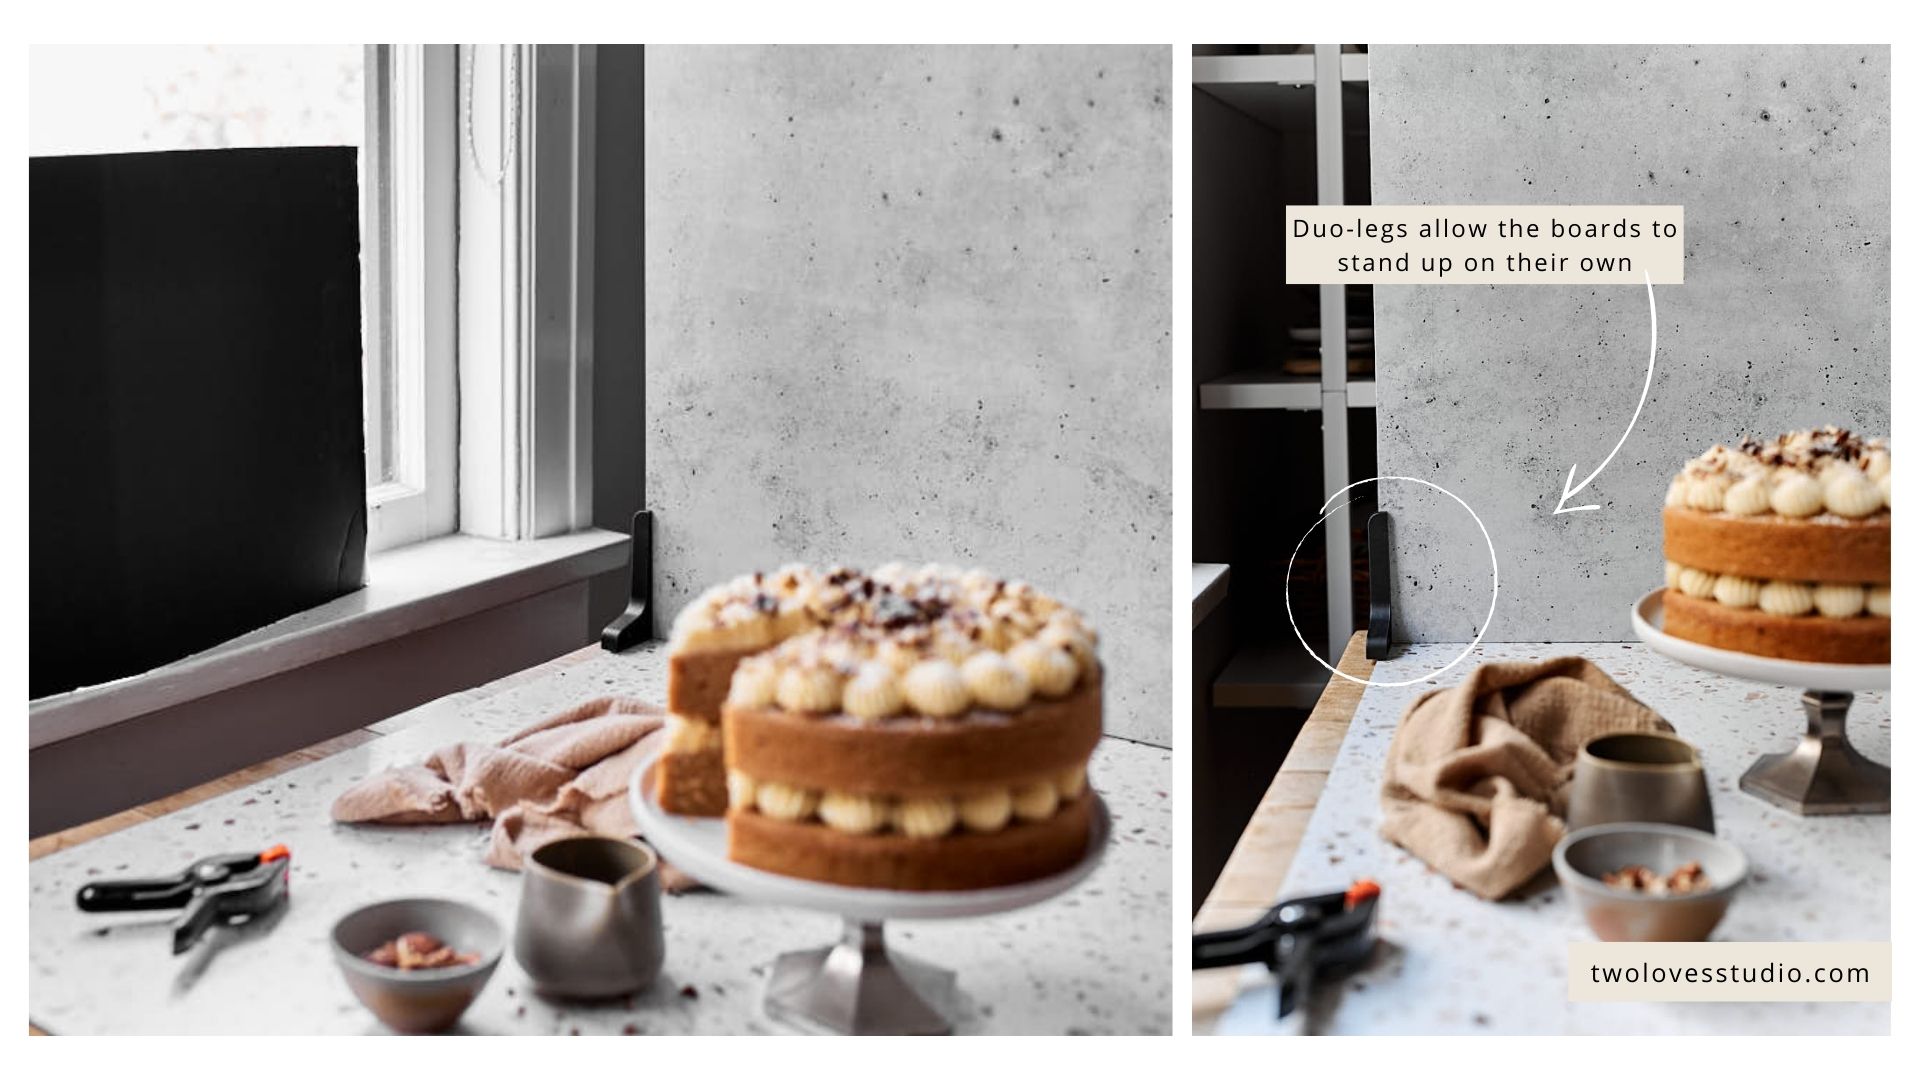
When you’re starting out and don’t have a lot of gear, use backgrounds that come with ‘feet’ or stands so they can easily stand on the table without falling off.
Dou Boards from V-Flat World are a great option. High-quality, double-sided vinyl backgrounds that come with easy-to-fit stands.
To learn more about Duo Boards check out this post.
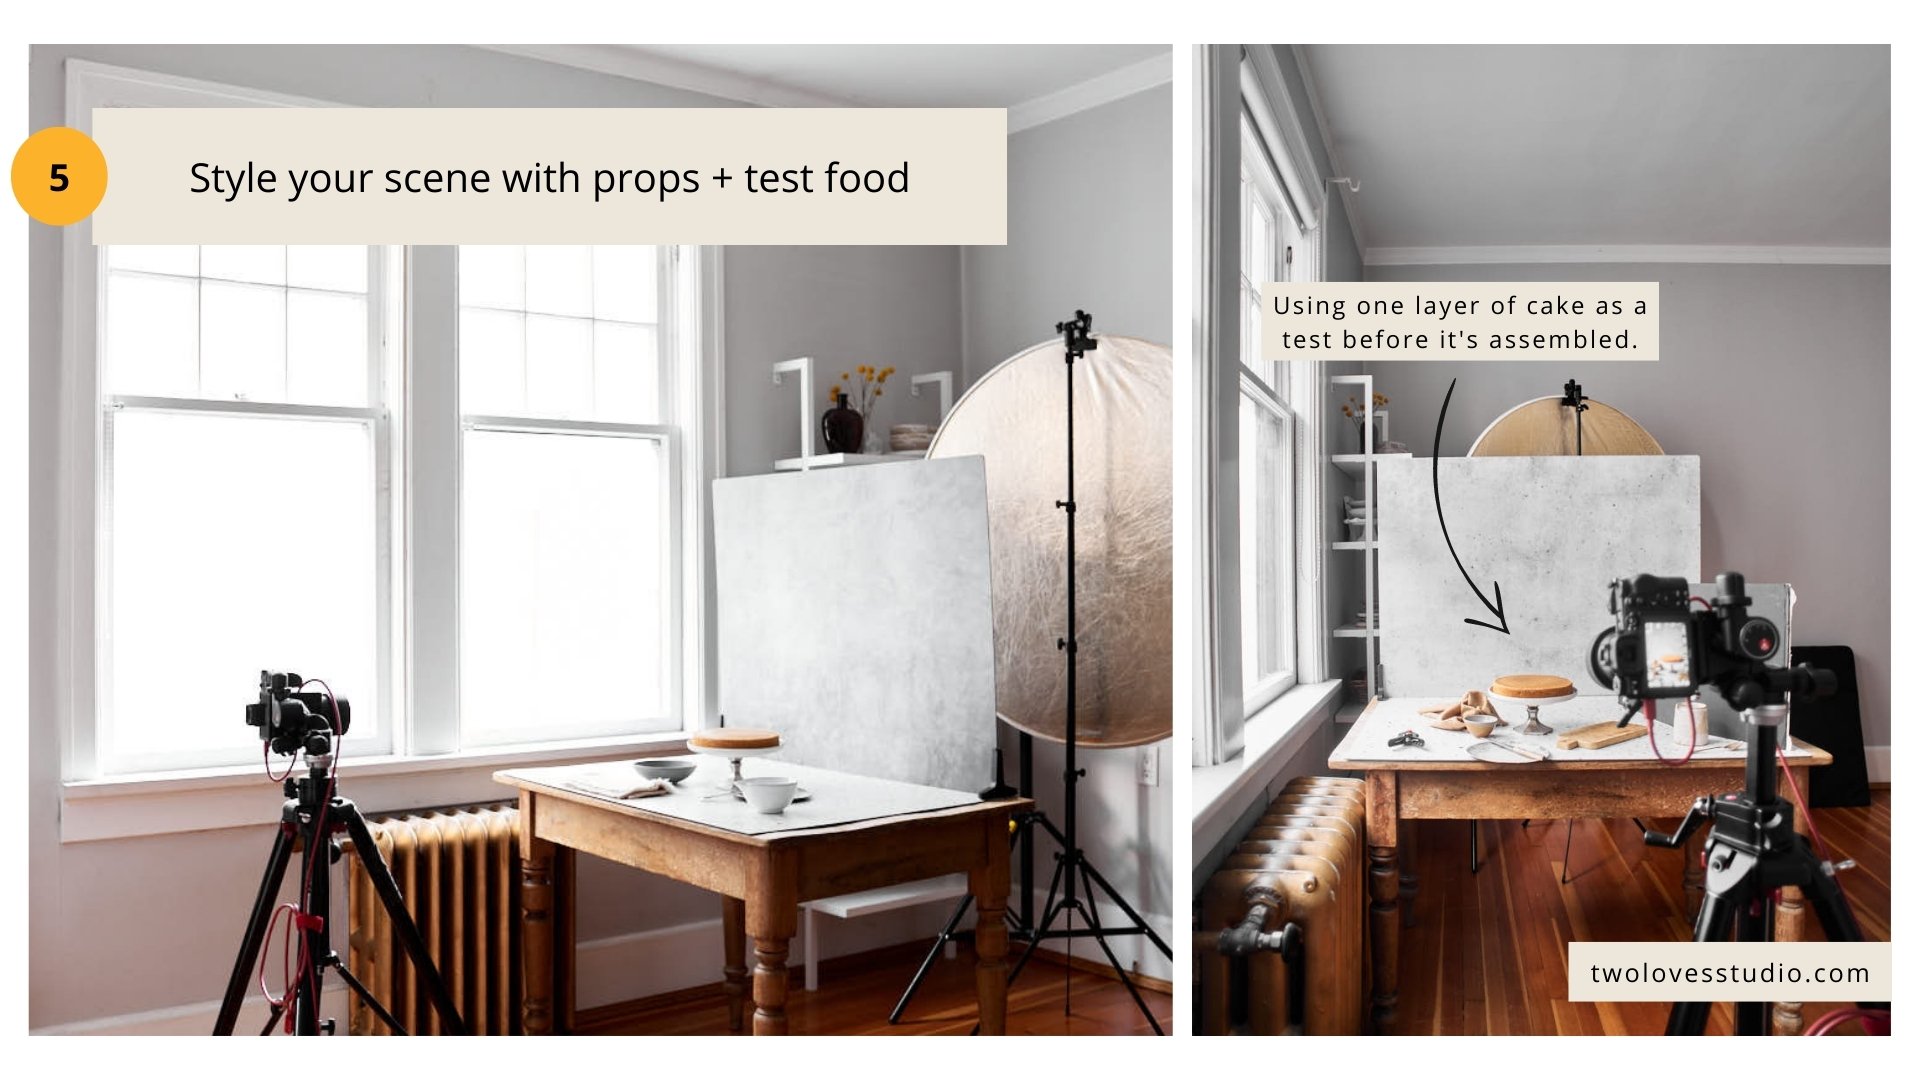
Step 5: Style your scene with props + test food
Once you’ve got your backgrounds set up, it’s time to style your scene.
Add any props and test food to your scene and start to visualise what this looks like in a photograph by looking through your camera and taking some test shots.
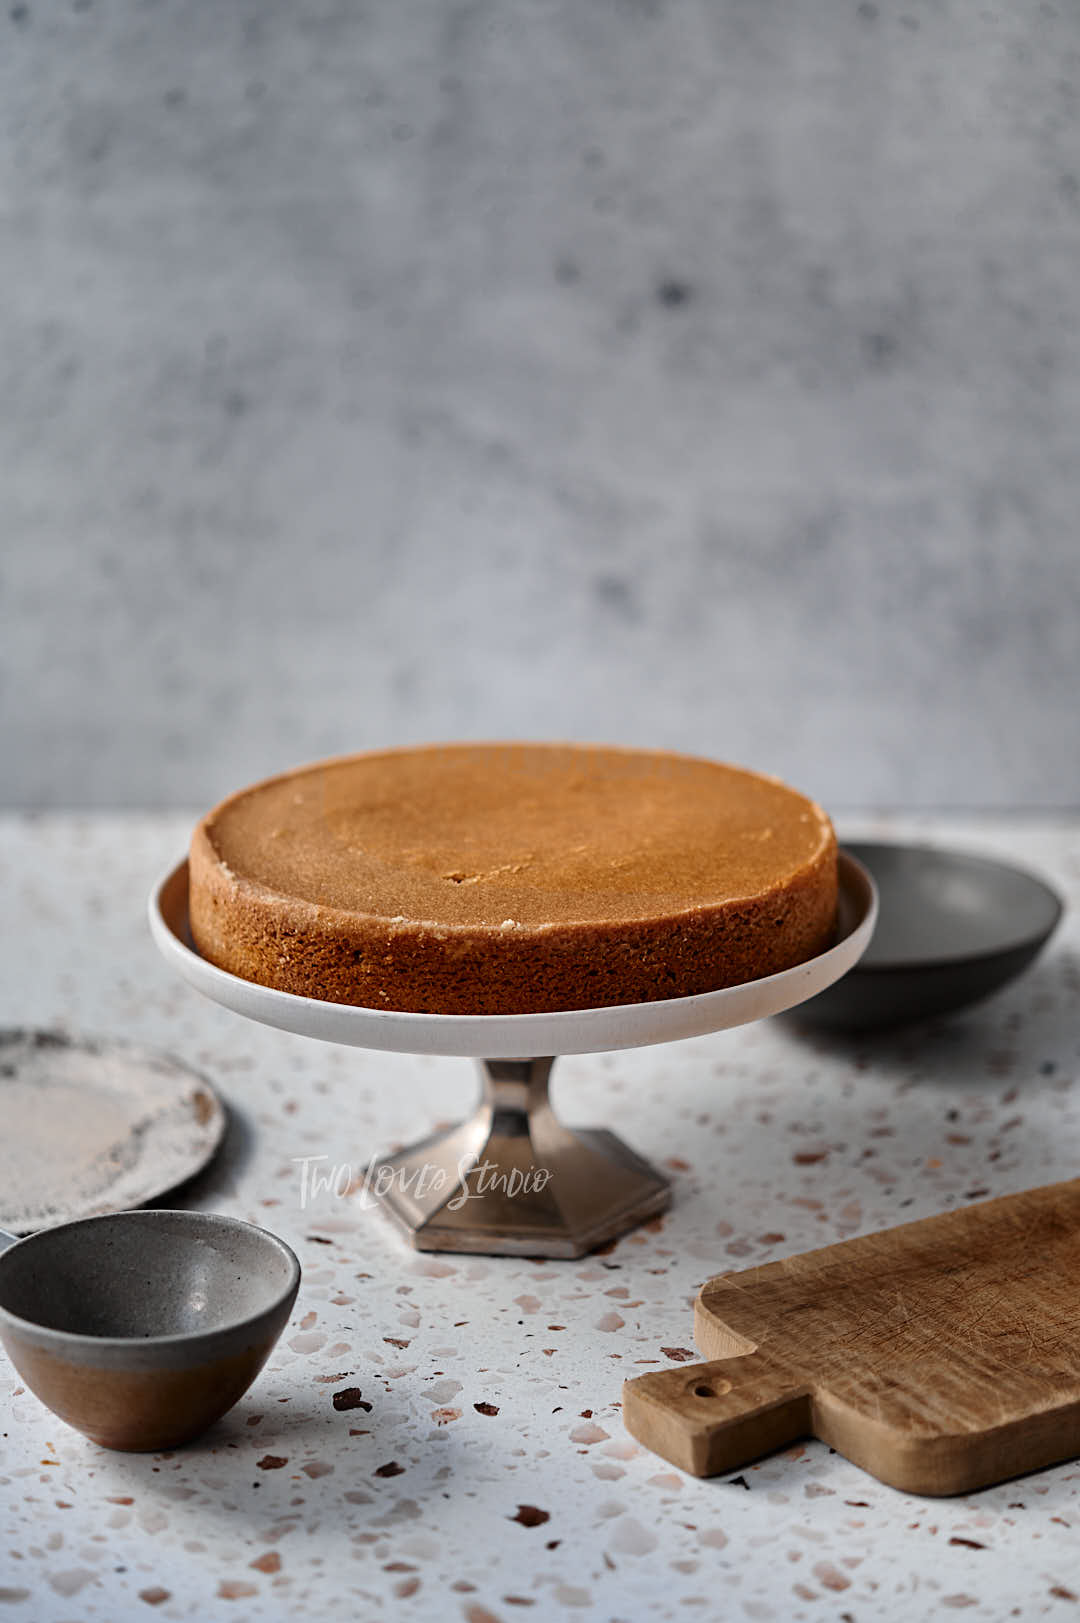
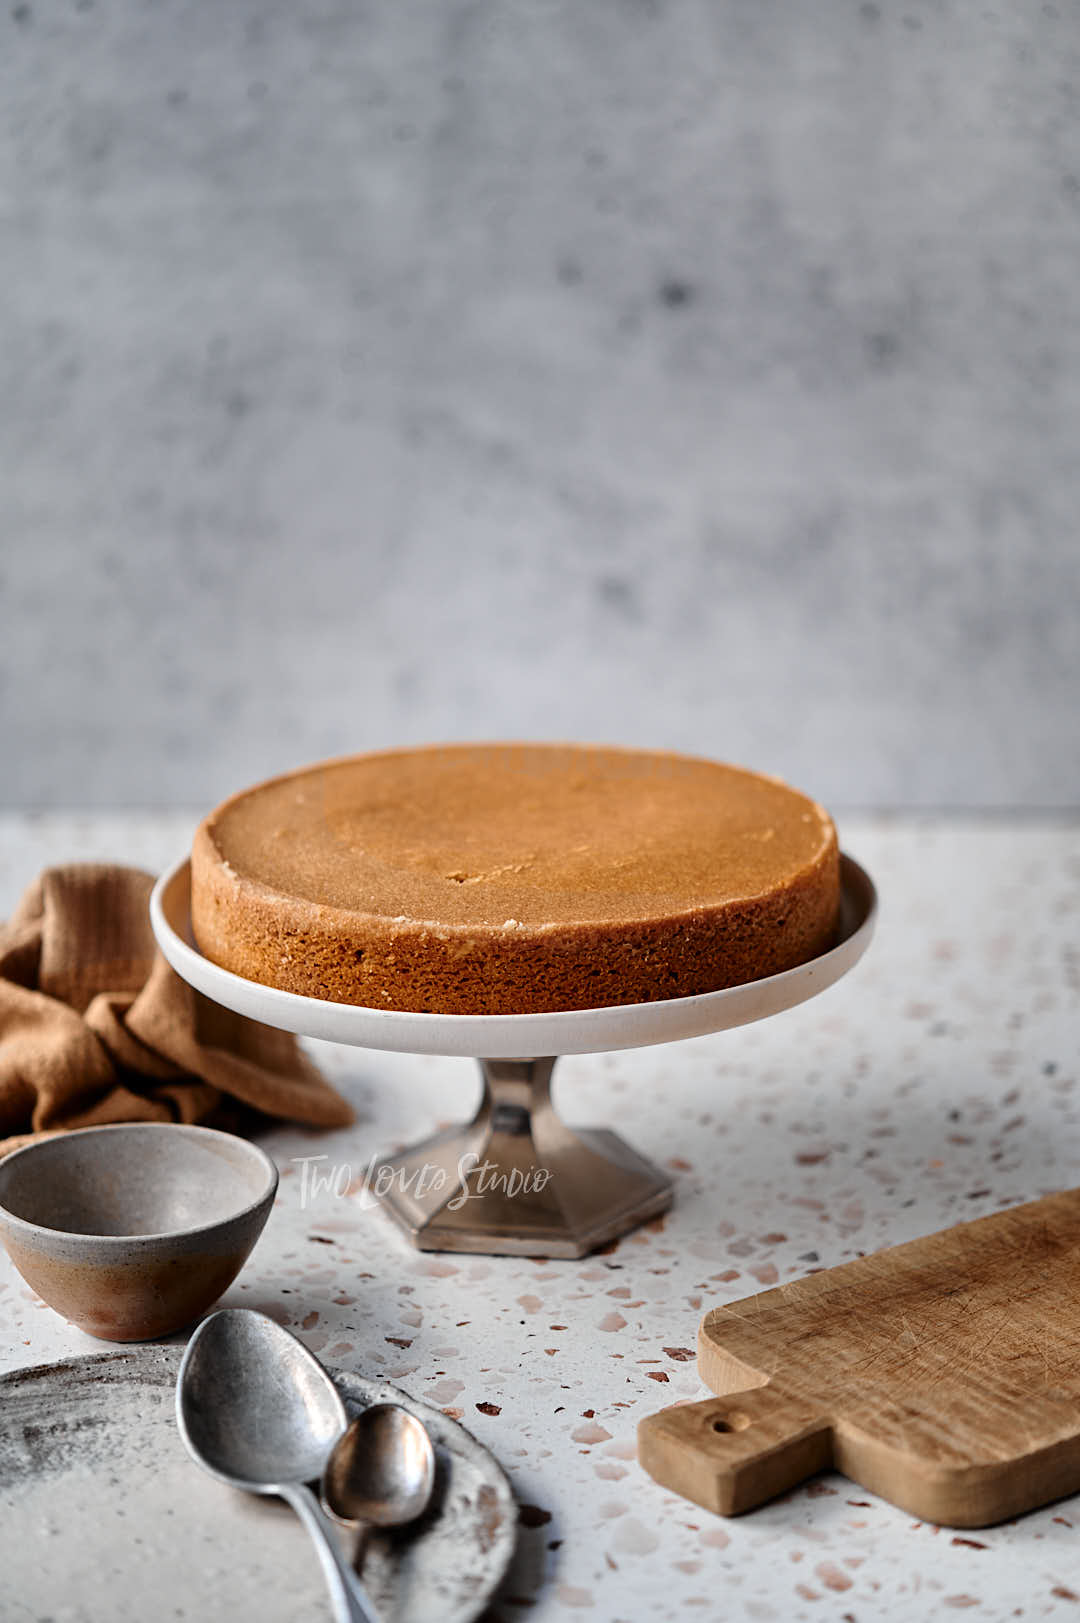
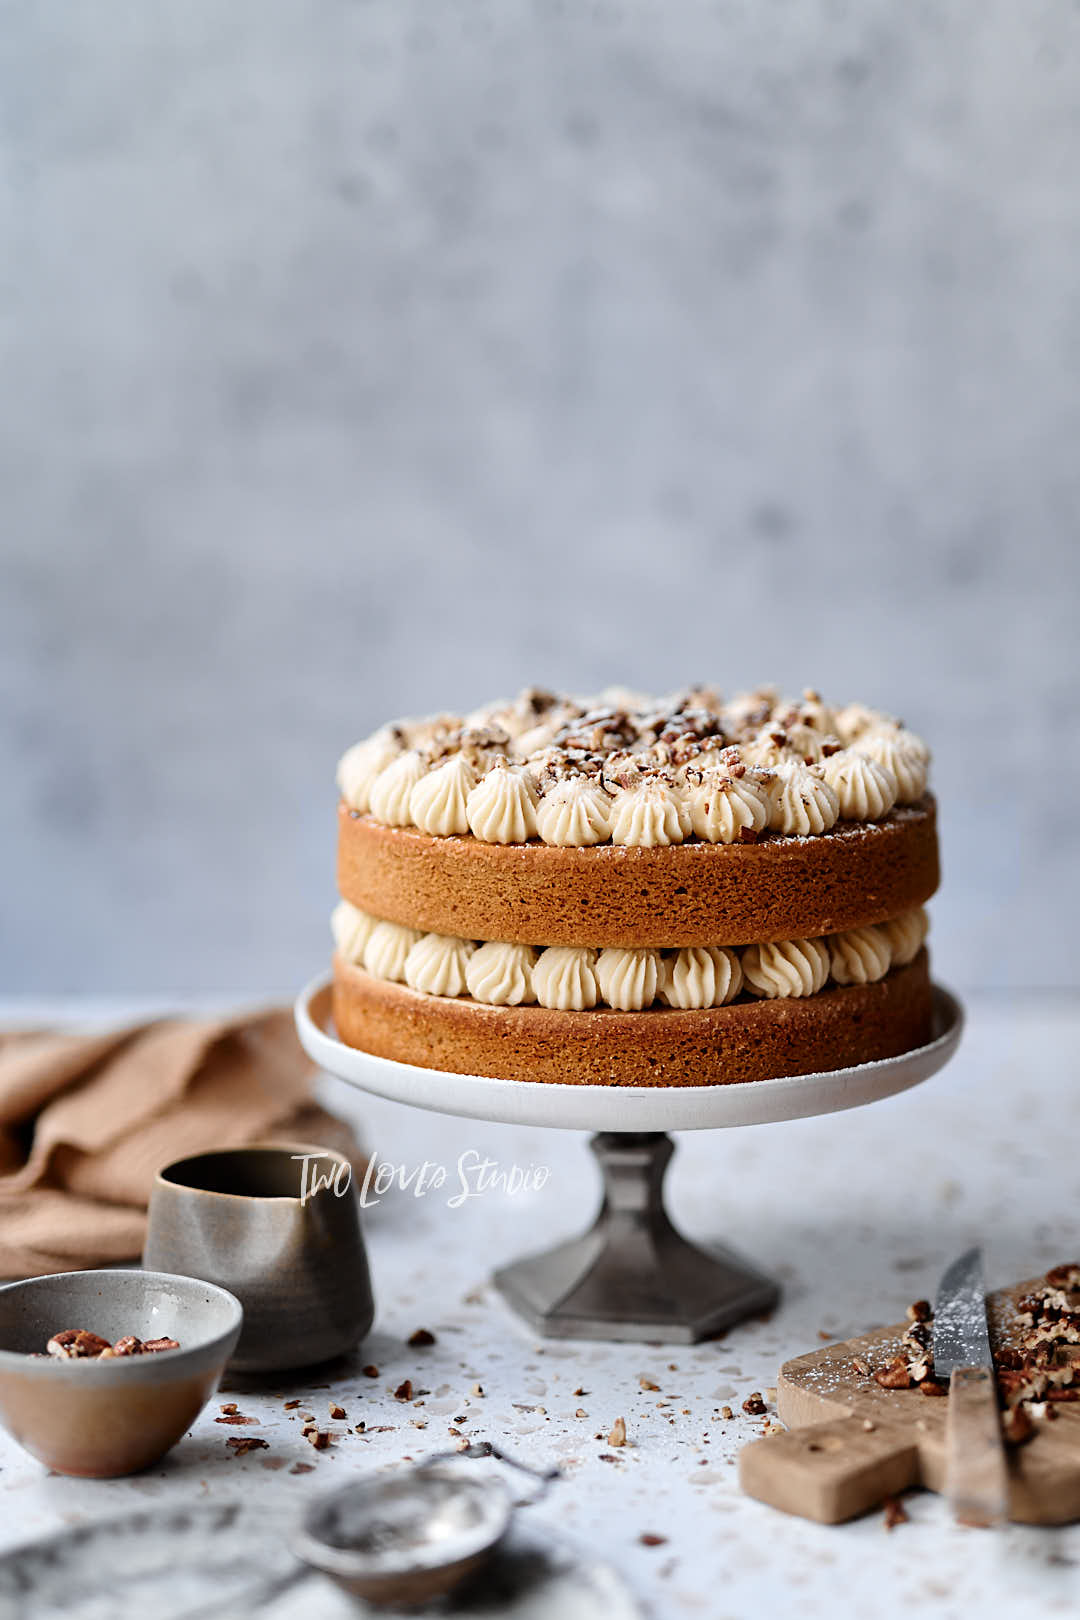
This is why you need a tripod and sturdy backgrounds because you want to have your hands free to style and make changes.
It’s a good idea to use test food because your hero food needs to look fresh and making changes can take some time.
Step 6: Use lighting modifiers to shape light
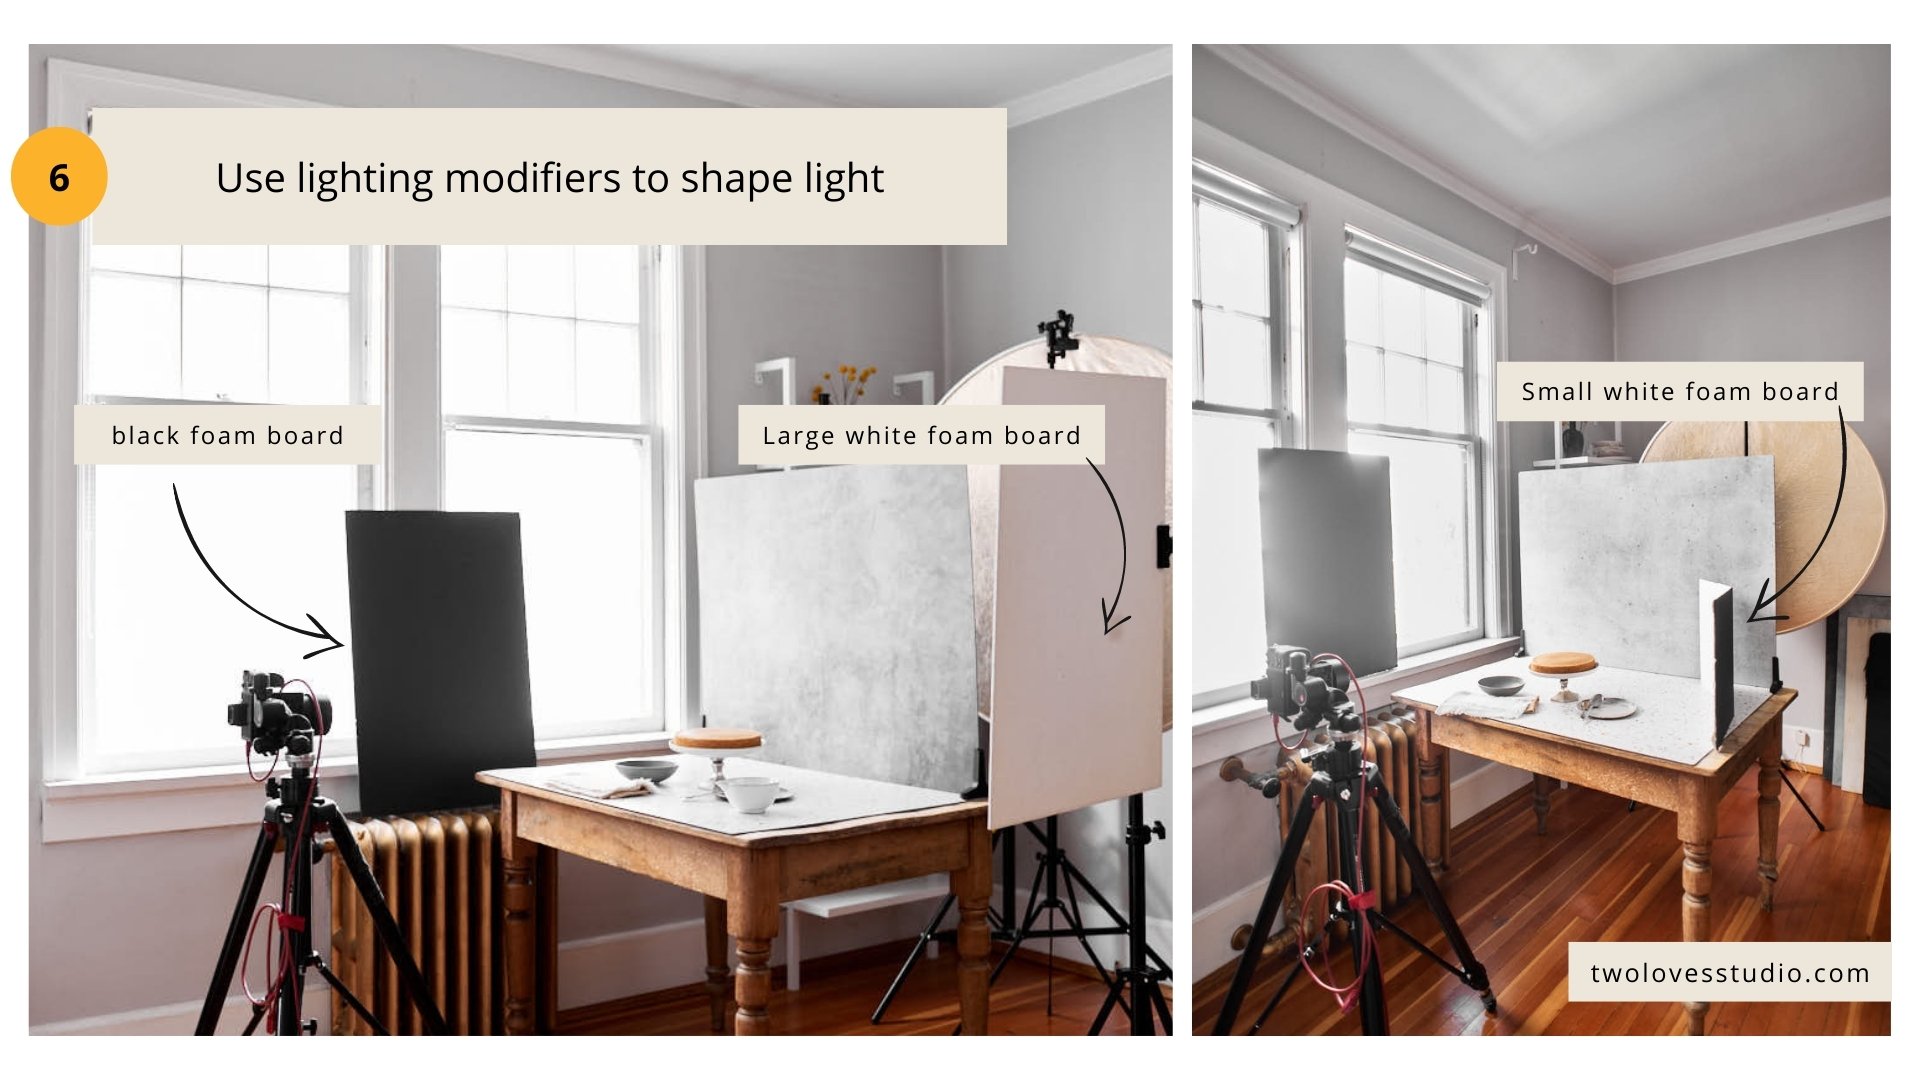
Once you start to build a composition that you are happy with, it’s time to make sure you’re happy with your lighting before you add the hero food.
Now is the time when you can make modifications to your light using lighting tools like foam boards, diffusers etc. Or position your artificial light differently.
At any time during your food photography set up, you can look at adjusting the lighting.
If you’re using natural light, you will find it might change often and you need to make continual settings adjustments or changes to your modifiers.
BONUS: Tether by connecting your camera to your computer
Tethering is when we connect our camera to our computer so that we can see the photos we are taking in real time!
This is beneficial as we can make changes in real-time which allows us to improve our photos (in less time) and make sure we aren’t making silly mistakes.
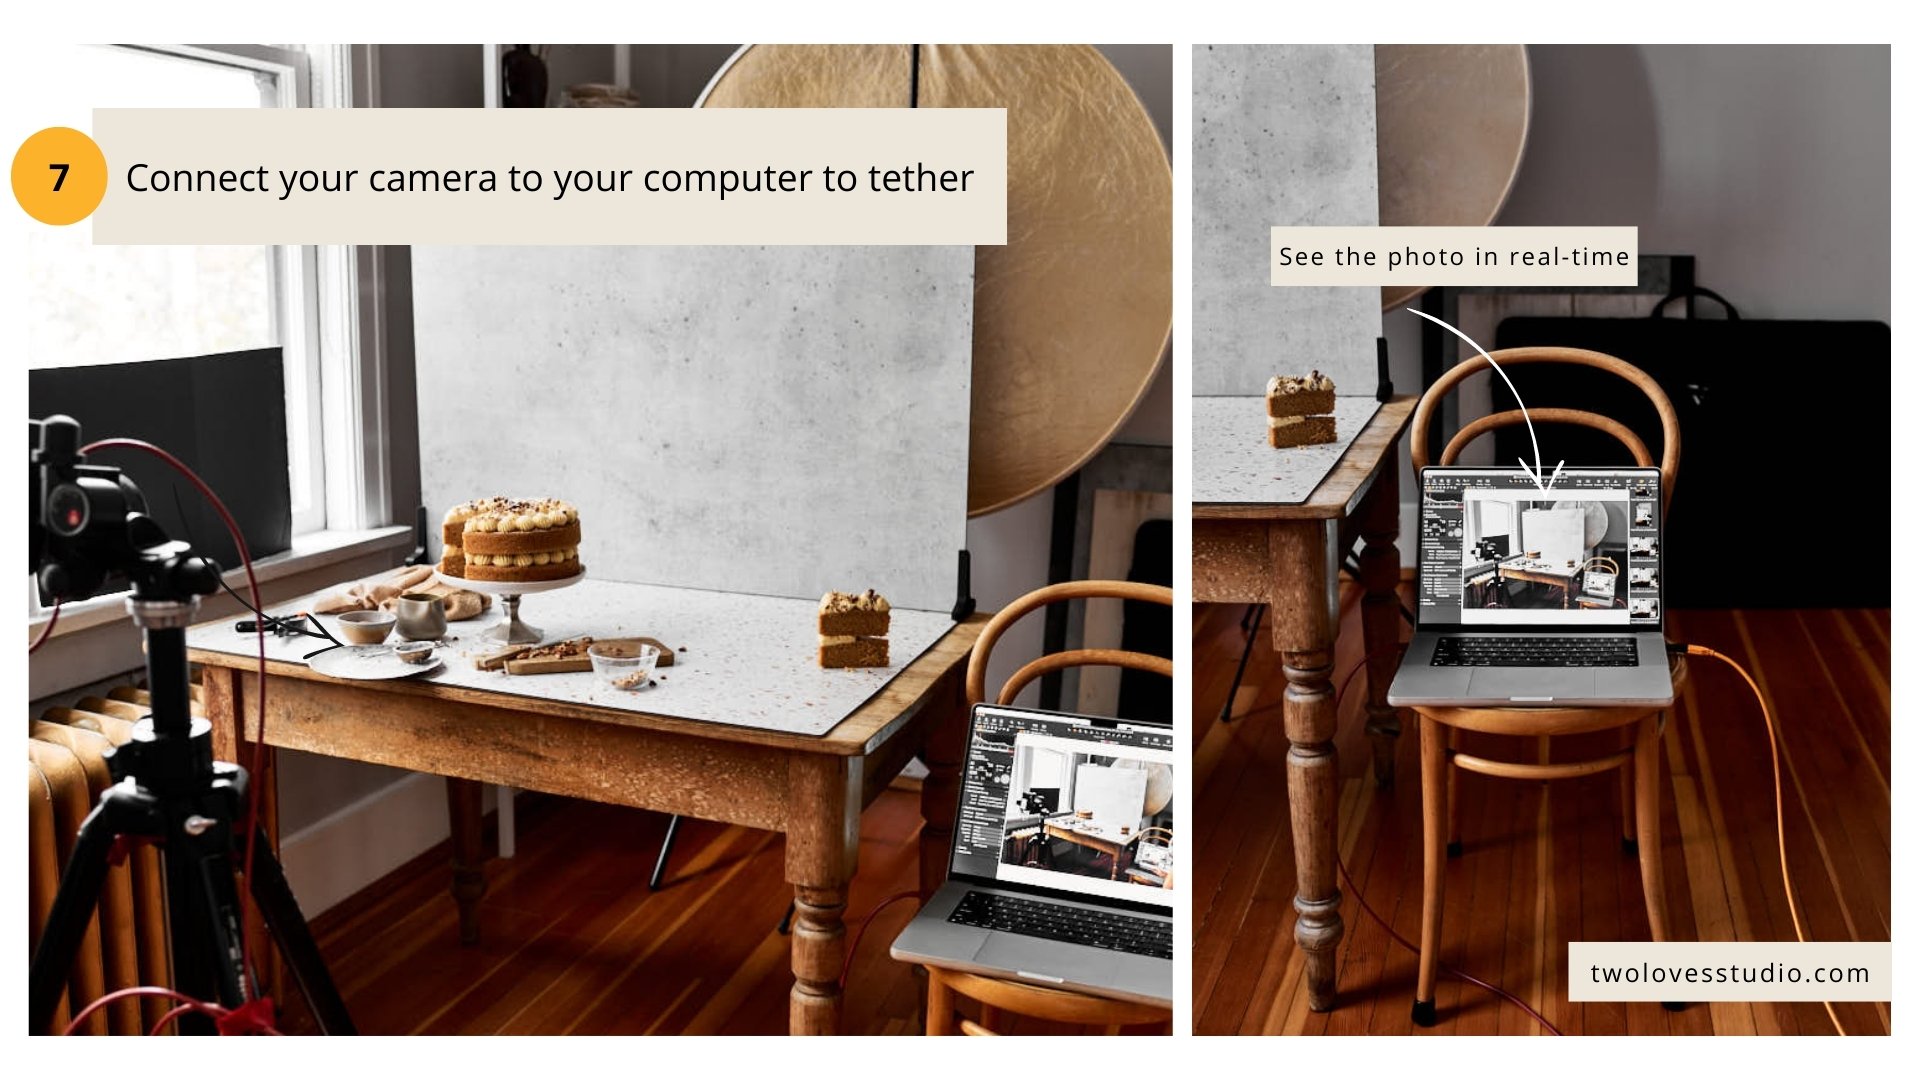
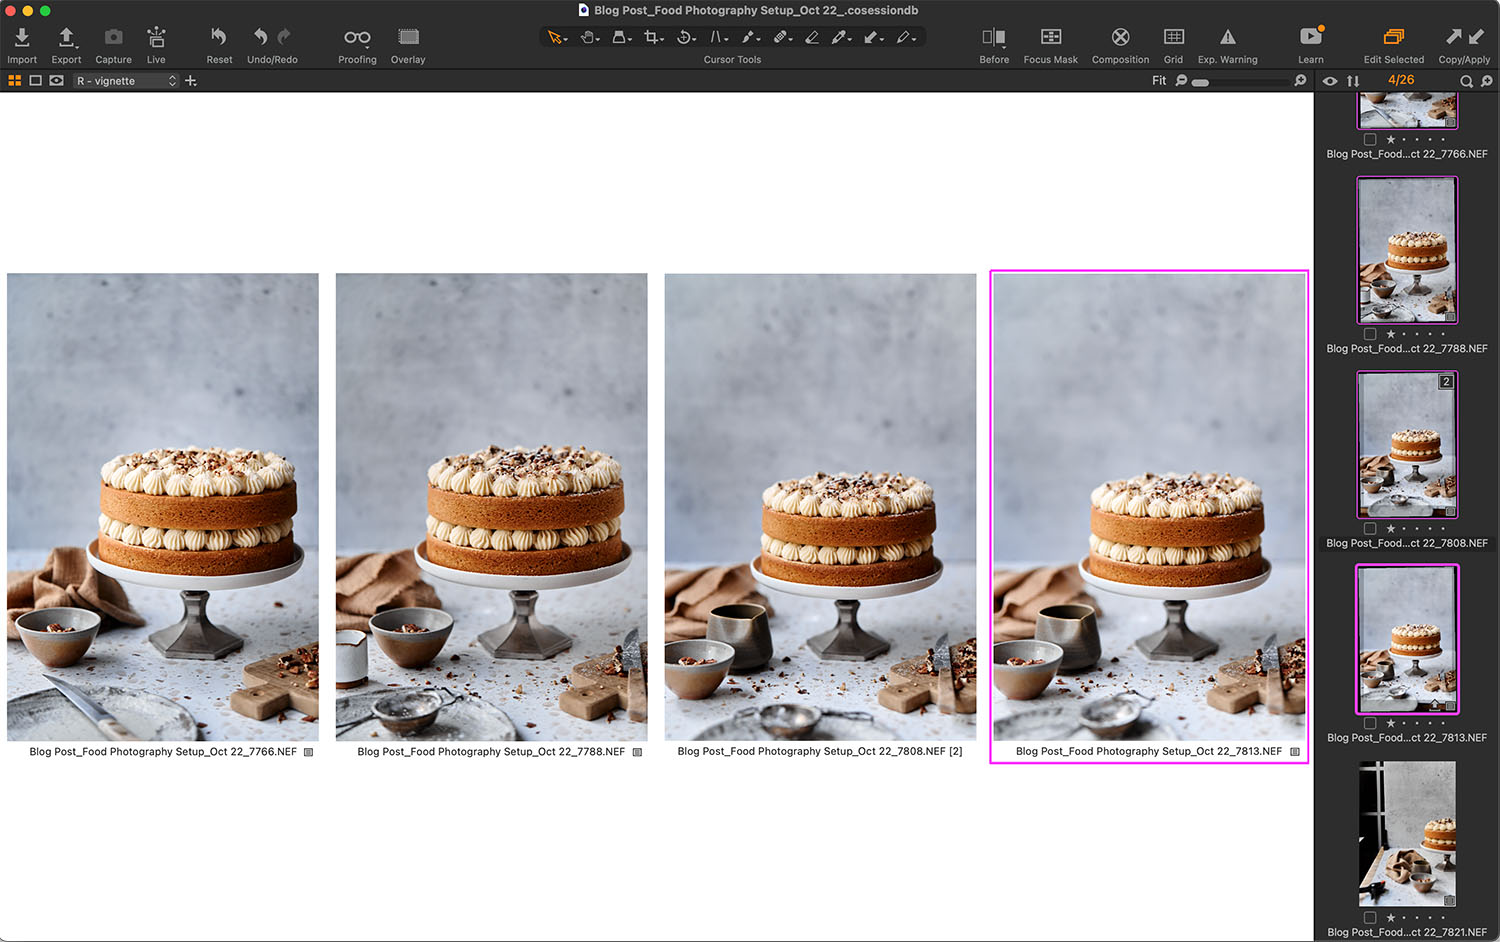
This is more of an intermediate to advanced skill. If you’re interested in learning more about tethering – check out 7 Reasons Why Tethering Helps You Take Better Photos.
This post may contain affiliate links from products and services we love and trust.



Taher Safari
Thanks, this was awesome…
Rachel Korinek
So glad to hear it! Thanks for reading.
GOBALAN SANASAMY
useful techniques shared. awesome.thanks
Rachel Korinek
Glad you enjoyed it! Thanks for stopping by 🙂
Bernie
I love your work Rachel. I learned alot from the 7 days free course. That’s so helpful to be at ease for my food shooting. Thanks alot.
Best regards
Bernie
Rachel Korinek
That’s fantastic Bernie! I am glad the course helped you. Thanks for being a part of the community.
ssspinterest official
This post is incredibly helpful! I never realized how important the setup was for food photography. The step-by-step approach makes it so easy to follow. Excited to try these tips for my next food shoot! Thank you for sharing!
MP3PAW.nu
I love how straightforward the steps are! The tips on lighting and background really helped me elevate my food photography game. Can’t wait to try out the suggestions with my next recipe shoot! Thanks for sharing!