This post may contain affiliate links from products and services we love and trust.
It’s extremely frustrating (and a total shame) to spend hours styling a scene with expensive equipment, only to find out that your shots are ‘soft’ or out of focus.
Our job as a photographer is to make sure that our photos are in focus — tack-sharp focus!
Yet, focus is not always a simple solution. There are many things that come into play to get a sharp food photo and many things that can get wrong when we take a blurry photo.
I’d love to empower you with some tricks up your sleeve to get those mouth-watering tack-sharp photos. Here are the tips we’ll cover in this article to:
- Reduce camera shake
- Try auto-focus and manual-focus
- Use single-point focus
- Focus in live view when tethering
- Zoom in on your camera to focus
- Use tools like capture one’s focus mask
- Take into account the plane of focus
- Artificial light makes photos appear sharper
But first, let’s cover what makes a photo ‘blurry’.
What Makes a Photo Blurry or Out of Focus
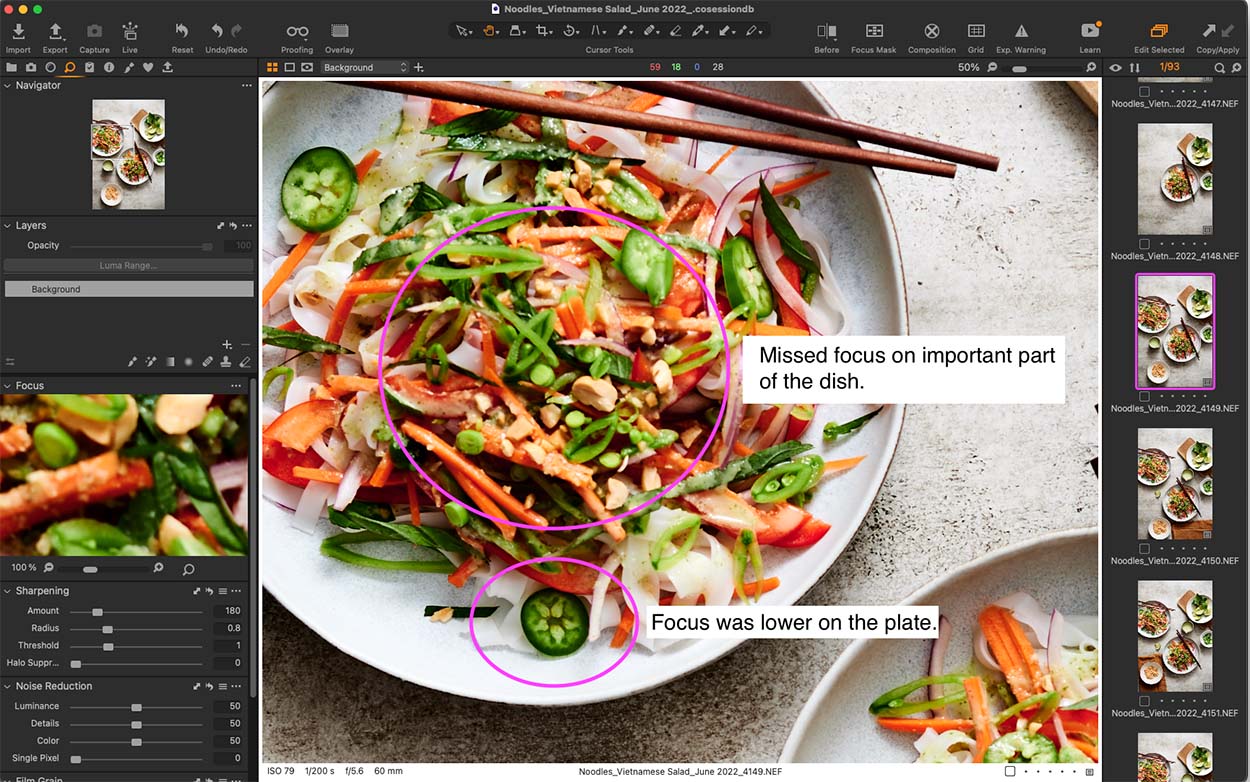
When we take a photo and it’s out of focus, we often refer to this in the photography world as being ‘soft’. This can make the focus seem a little ‘off’ or the focus in an unintended place.
We can also have a photo that is ‘blurry’, where there is a camera shake that makes the focus area blurry. Here’s a little rundown of what can make a photo out of focus:
- Focusing on an unintended area in your photo.
- Macro lenses miss the area you wanted to focus on due to the plane of focus.
- There is camera shake due to an external force.
- Your camera settings allow for camera shake or movement when hand-holding.
- The LCD screen on the back of the camera isn’t sufficient to show if the area is in focus.
These are the most common things that can happen — seems simple right? While these are simple, there are so many things that can cause them it often takes a little bit of detective work at first to figure out what the cause might be.
Reduce Camera Shake for Sharp Photos
Camera shake is probably the most common reason our photos are blurry and out of focus.
When we talk about camera shake, it refers to any movement the camera experiences as the photo is being taken. If we have a slow shutter speed, the shutter is open for longer and subject to the effects of camera shake than a fast shutter speed.
You can experience camera shake at faster shutter speeds, but it’s more frequent with slower shutter speeds (which we mostly shoot in still life photography and food photography, especially if you’re using natural light).

Ways to reduce camera shake include:
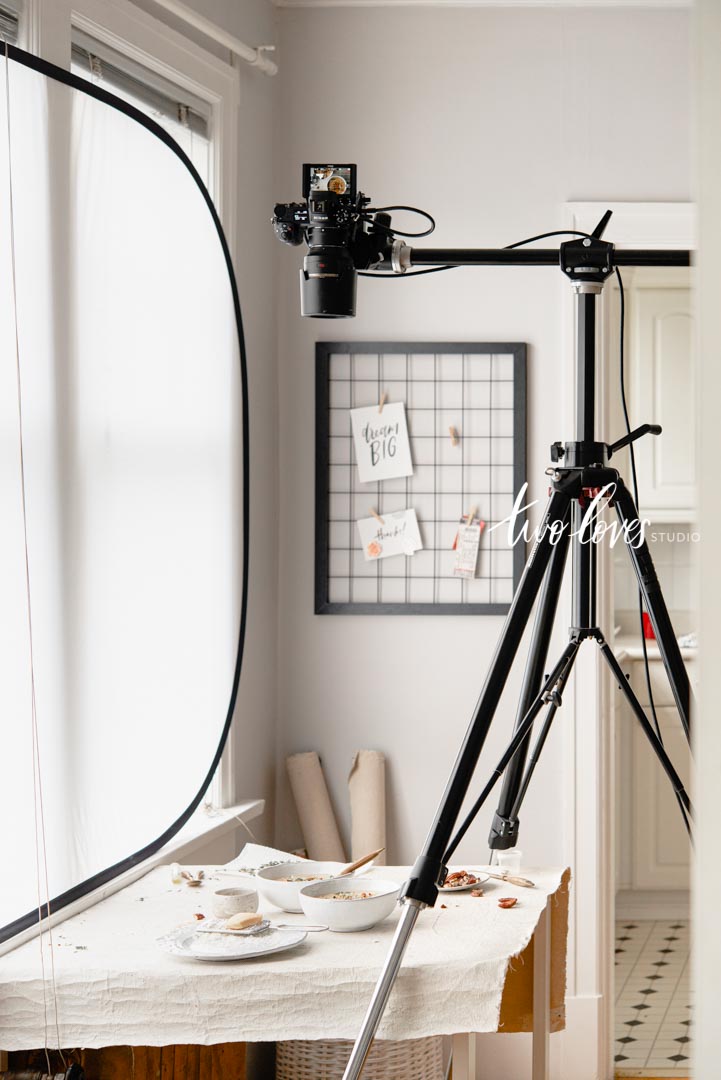
- Use a sturdy tripod and sandbags (or similar) to secure it
- Take the photo via a remote control or using your computer if you tether
- Avoid walking around while taking the shot if you have bouncy floors
- Increase your shutter speed (and other settings) if hand-holding
- Artificial light will help you reduce camera shake due to the speed of the flash
Auto Focus vs Manual Focus
It’s useful to be able to use both Auto-Focus and Manual-Focus on occasions where the photo isn’t blurry, but the lens is ‘missing focus’.
Most of the time I use Auto-Focus in combination with Live View to ensure I am focusing on the area I want. With macro lenses and small areas, sometimes we will need to switch to manual focus.
If your lens isn’t selecting the correct area, switch to manual focus and turn that focus ring old school!
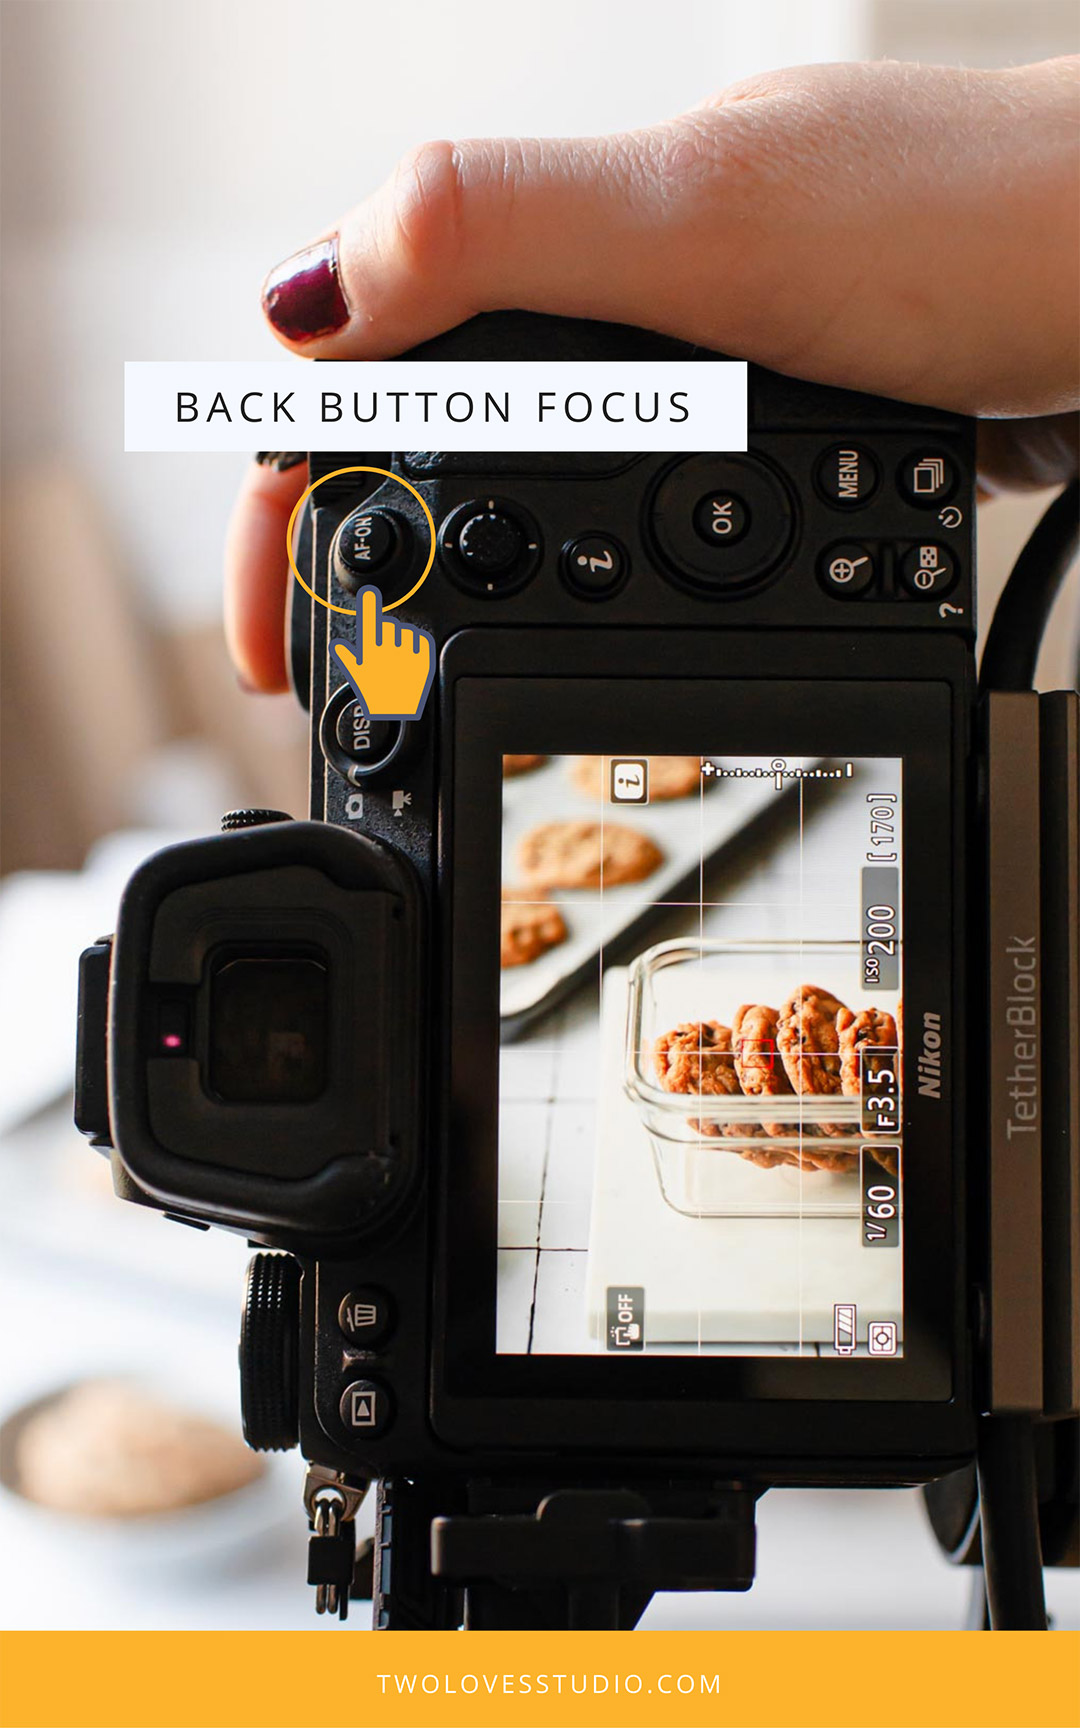
If you’re interested in learning how to set up Back Button Focus, check out the post.
Try Single Point Focus
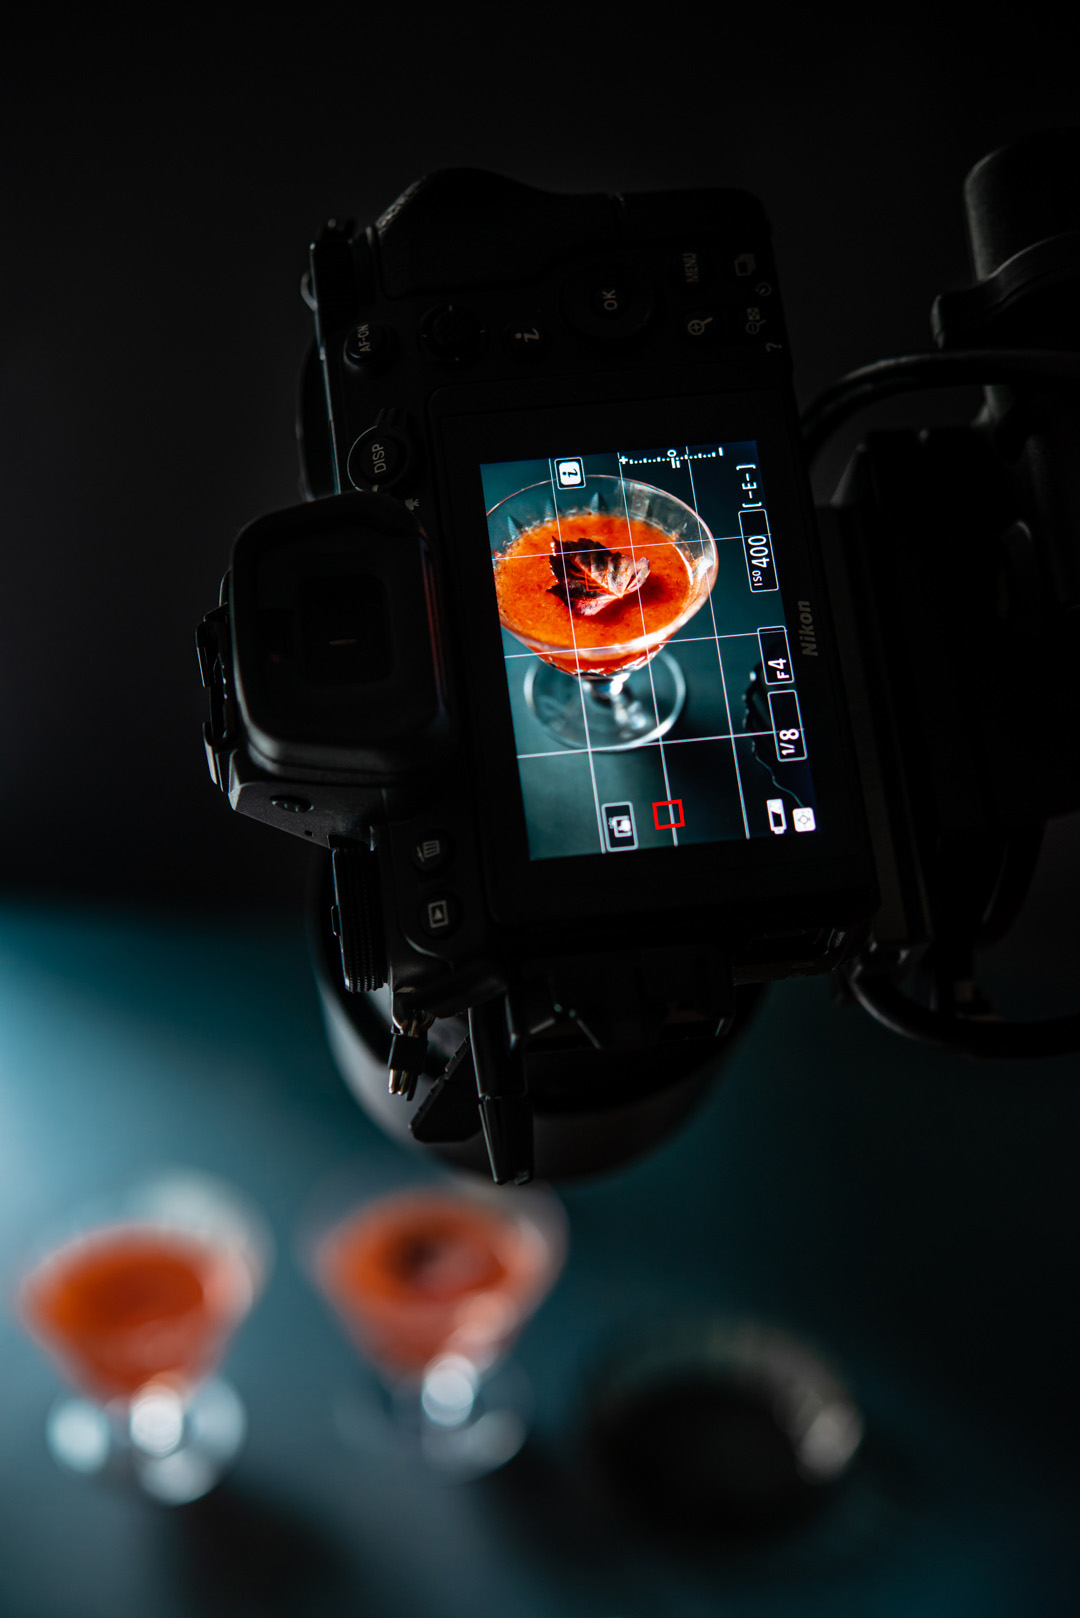
There are many types of focus options in cameras these days and many are designed to suit specific niches. For still life and food photography, my favourite focus mode is Single Point Focus.
This gives me a little square that I can move around on my camera, (or tethering software like Capture One), to ensure that I am controlling where the focus is. Other modes might not give you the specific areas or control that we need as food photographers.
Focus in Live View
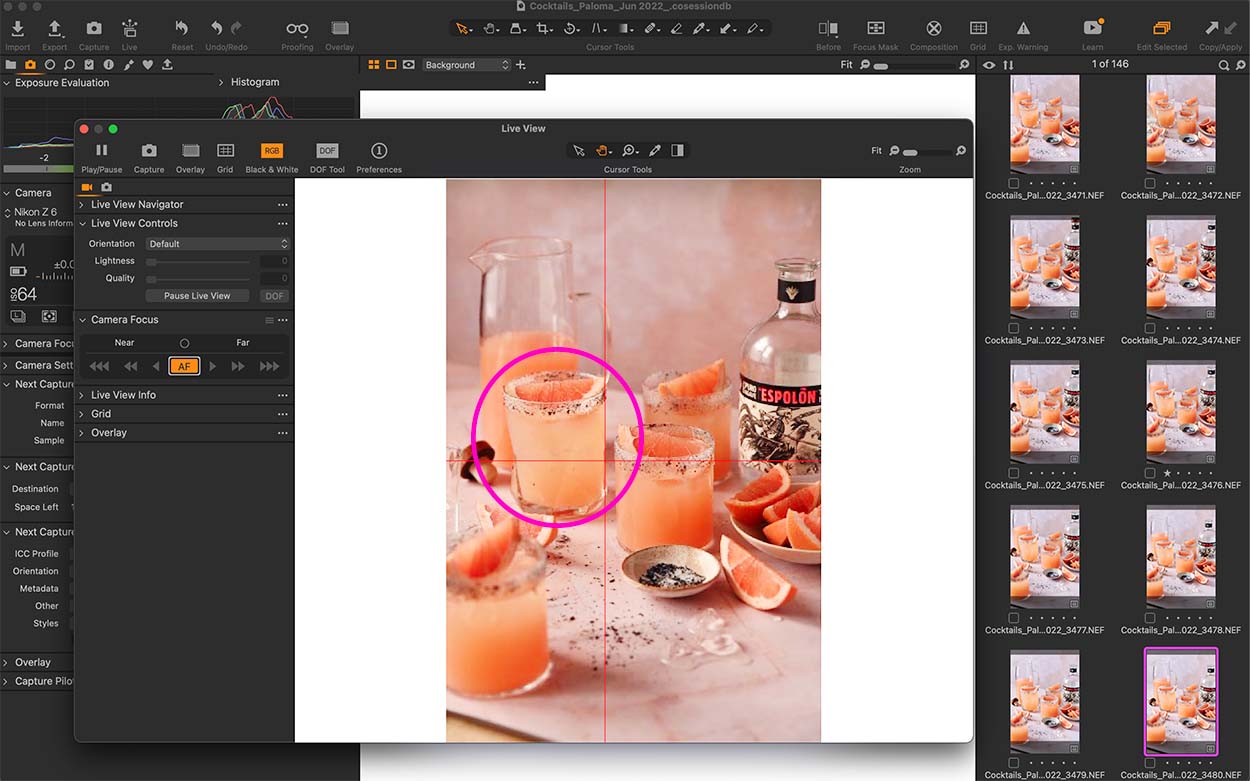
It really helps when you want to focus on the edge of a garnish to be able to see that area of the photo in a larger format. If you use Lightroom or Capture One to tether, then I recommend opening Live View to see the area on your computer and then focus.
When the area is small or delicate, like the edge of a glass, I always use Live View to zoom in and focus before I take the photo.
It’s a complete gamechanger to tether and you can make sure you get those shots in focus right then and there. Check out this post on why I recommend tethering.
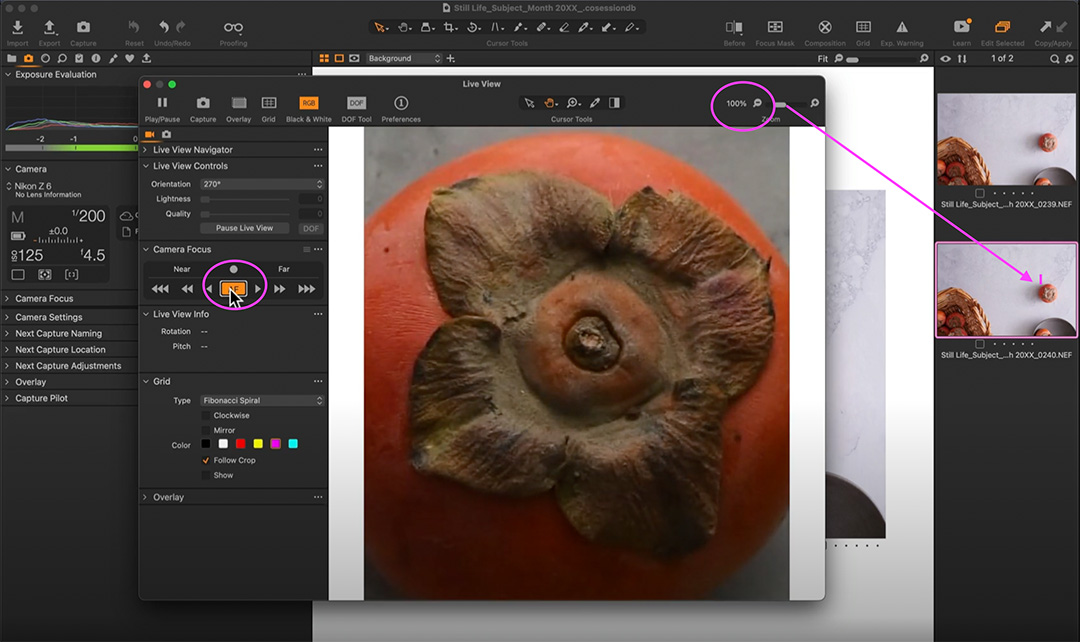
Sharp Focus Top Tip: Zoom in on Your Camera to Focus
If you’re in a situation where you can’t tether and you aren’t selecting the exact area you want to focus on, it helps to zoom in on your camera and then focus.
By doing this, you are putting the entire area you want to focus on into the view of the camera, and it’ll select that area to focus on much better than if it was competing with other areas.
Use Tools Like Capture One’s Focus Mask
If you tether, (and I hope you’re excited to dive more into tethering), you have some more options to help you focus at your fingertips.
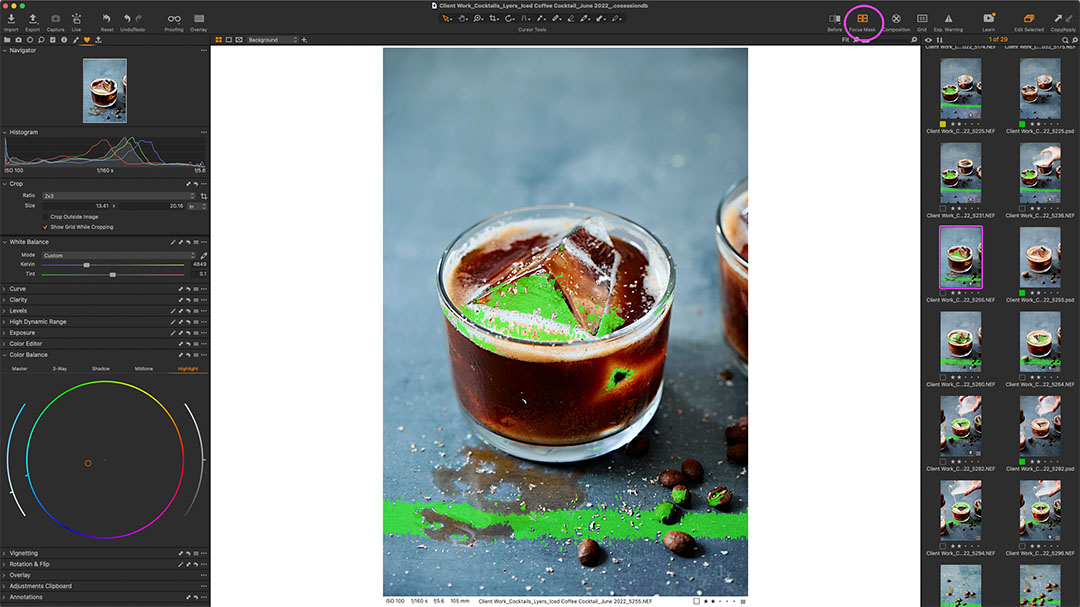
When I tether in Capture One, I have access to what’s called a Focus Mask. The Focus Mask gives us a quick visualisation and confirmation of the focus accuracy and sharpness in a photo.
The Focus Mask will display areas that are sharply in focus.
This is great for using when tethering if you are far from the computer. It helps you to get a reference of how and what you are focusing on.
Troubleshooting Tips for Focus Issues
If you’re experiencing a blurry or soft photo, I have an article 14 Tips to Troubleshoot Focus I highly recommend going through.
Some unexpected things that can cause focus issues I haven’t covered in this article are:
- You need sufficient contrast on the area you’re focusing on in order for autofocus to work correctly.
- Aperture greatly affects what’s in focus. You can get focus issues with too high or too low apertures.
- The lens might be front/back focusing causing issues even with manual focus.
- Your kit lens won’t be as sharp as a pro lens. The appearance of focus can be affected.
- The lens might need cleaning or the diopter on the camera adjusting.
The focus troubleshooting post is an accumulation of years of experience with focus issues and has helped a lot of photographers take tack-sharp photos. Make sure to check it out.
Plane of Focus Matters for What Will be in Focus
If you’re new to photography or new to using a macro lens, you might be wondering why it’s so darn hard to get a photo that feels in focus!
When it comes to macro photography, we have to be mindful that the Plane of Focus will affect the areas that appear in focus in our photo.
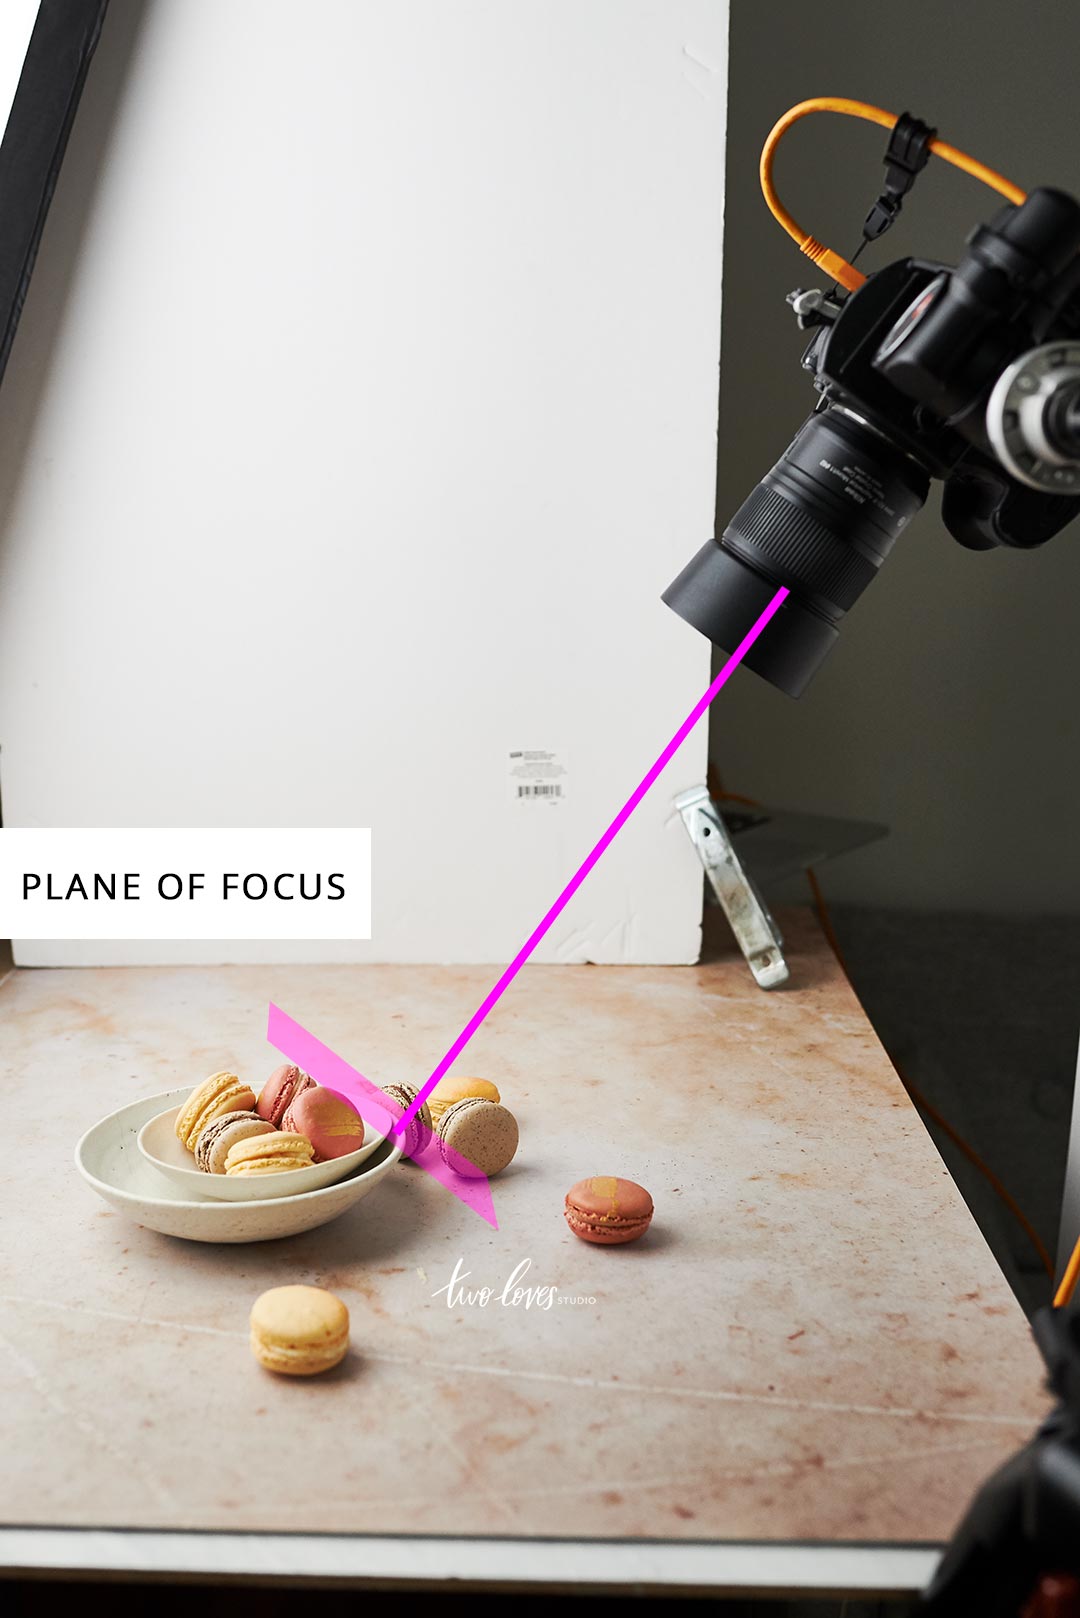
The Plane of Focus is essentially an area of focus that is parallel to our camera’s sensor, whose effects are exacerbated in macro photography. As you play with angles with a macro lens, the Plane of Focus will affect what’s in focus and what’s not.
To learn more about this important aspect of focus, check out the article Secret of Macro Photography: Plane of Focus.
Using Artificial Light Will Make Your Photos ‘Sharper’
One of the things I love about using artificial light is that the speed of the light is so fast, that combined with a fast shutter speed on your camera, our photos ‘feel’ sharper.
Fast settings make for sharp photos — let’s think of it that way.
This might not be the reason to switch from natural light to artificial light, but it’s important to know. If you use both artificial and natural light, then you need to be mindful that when using natural light you have to be vigilant about your camera settings and reducing camera shake.
However, you can still ‘miss focus’ with artificial light. You’ll just likely eliminate the ‘blurriness’ of photos with artificial light.
The Best Place to Focus is on Key Details of Your Hero Subject
Now that we have covered a bunch of tips and things to think about when it comes to focusing, you might be wondering what the best place is to focus on?
I recommend focusing on your hero subject. The subject that’s most important to your food story. Within the foreground to mid-ground of the photo, and selecting the most important detail within that subject.
However, I do recommend exploring! Your photo might look wonderful with something in the background in focus and the foreground blurry. My best advice is to take a range of photos with different focal points so you can have a selection after the shoot.
I hope you found this article helpful. I’m curious to know which tip you’ll be focusing on (pun intended) on your next shoot?
Let me know in the comments below. If you’re experiencing focusing issues, let’s chat. Maybe I can help.


